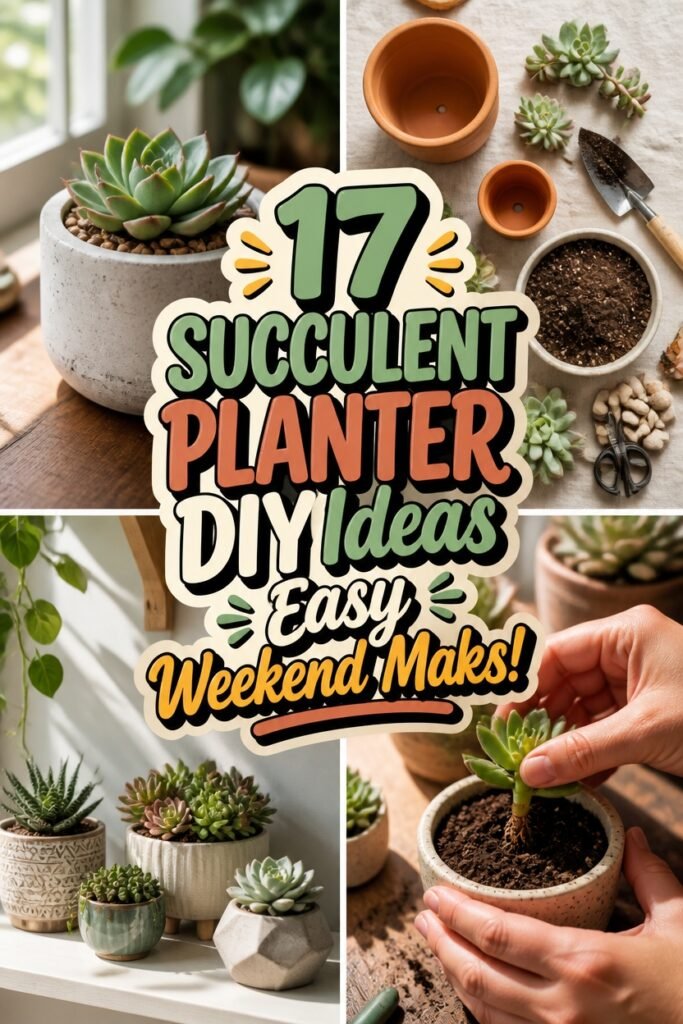
Crafting your own succulent planters is easier than you might expect. A few simple materials and an afternoon are really all you need to get started.
Concrete casting brings a modern, sculptural quality to your space. Painted terracotta offers a classic look you can customize to match any room.
Even repurposed containers from around the house can find new life as tiny gardens. Mason jars, vintage tins, and reclaimed wood each bring their own character to the project.
Hand-sculpted air-dry clay lets you shape something truly one of a kind. And if you are watching your budget, dollar store finds work beautifully with a little creativity.
Just remember that drainage matters more than anything else. Each method handles water differently, so choose the approach that gives your succulents the best shot at thriving.
Concrete Succulent Planters: Casting Custom Designs
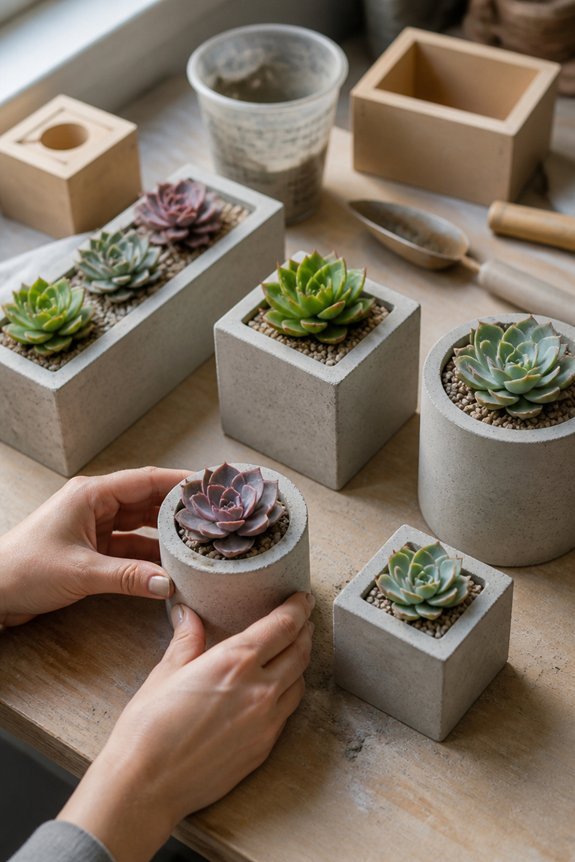
Concrete opens up endless possibilities for succulent planters. You control the shape, size, and finish. The material laughs at harsh weather and won’t crumble when temperatures swing.
Start simple. Grab a plastic container or cardboard box for your first mold. Silicone molds work beautifully if you want crisp details. Nest two containers together to create hollow space for soil. Don’t forget drainage holes while the mix is still wet. Drilling later is miserable.
Succulents like echeveria, jade, and aloe thrive in these sturdy homes. Leave your planter raw gray for an industrial look. Paint it with concrete-safe coatings. Or seal it to lock out moisture and extend its life.
Patience matters here. Let your creation cure for seven full days before adding plants. The wait rewards you with pieces no store stocks. Your garden gets exactly what you envisioned.
Also read: 16 SUCCULENT GARDEN DESIGN Ideas That Feel Modern!
Painted Terracotta Pots for Succulents
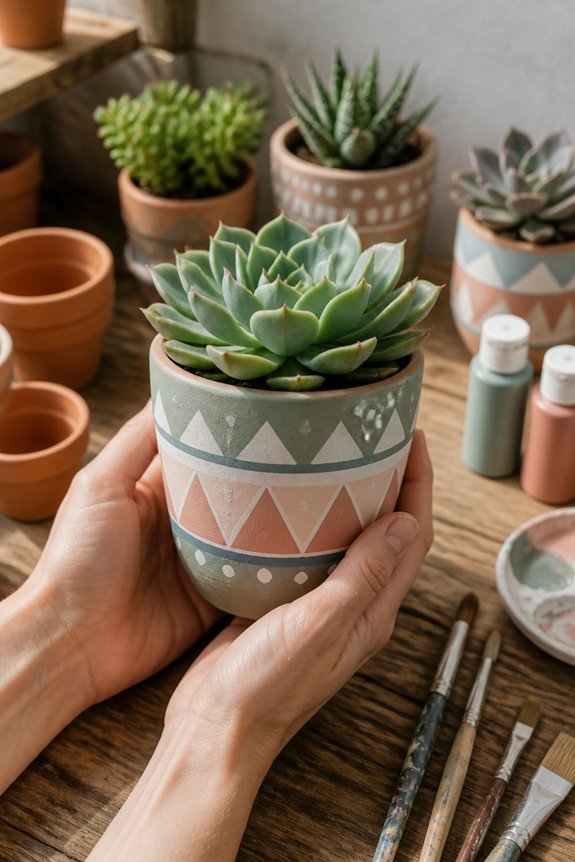
Terracotta pots are a great starting point for succulent gardening. They are affordable and versatile. The clay material offers natural drainage and breathability. Your succulents will thank you for this. Painting these pots lets you add your personal touch. It also protects the clay from weathering over time.
Acrylic paint sticks well to the porous surface. No fancy supplies needed here. Try geometric patterns if you like clean lines. Solid colors work beautifully too. Botanical motifs pair nicely with actual plants. Navy, charcoal, and deep green are standout choices. They make your succulents pop visually.
Start by cleaning your pot thoroughly. A primer helps if you want extra staying power. Let each layer dry completely before adding more. This patience pays off. Seal outdoor pots to keep colors vibrant longer. Thin coats build better coverage than one thick splash. Stack two or three light layers instead. Your finished pots work indoors or out. They blend function with your unique style.
Hanging Succulent Planters From Reclaimed Wood
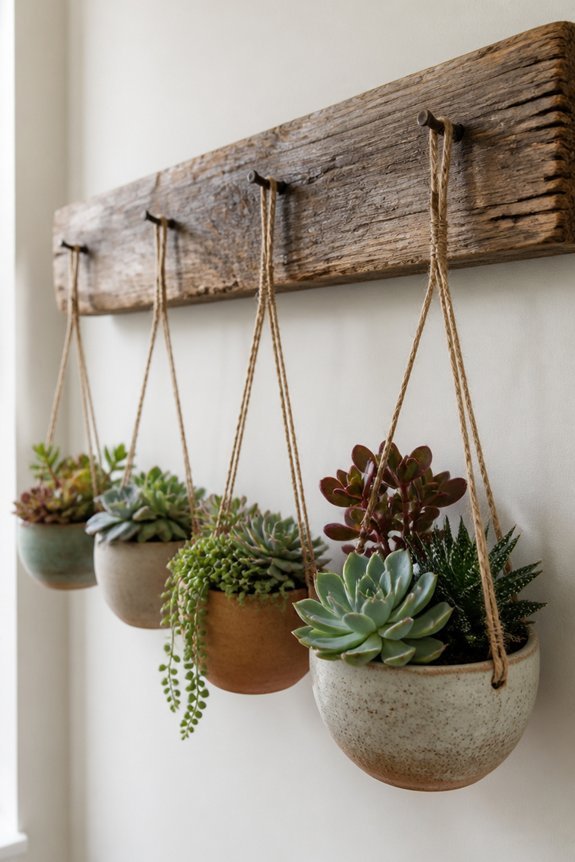
Several types of reclaimed wood work well for hanging succulent planters. Barn wood gives you that weathered, rustic look. Pallet wood is easy to find and comes in uniform sizes. Driftwood creates interesting shapes, though it works best for smaller plants.
You’ll need just a few basics to get started. Grab your wood pieces, a drill for drainage holes, potting soil, and your succulents. Use weather-resistant screws or brackets to hold everything together. Don’t skip the drainage holes. Succulents hate wet feet, and root rot sets in fast without an escape route for water.
Think about how you want your planter to age. Untreated wood breaks down quicker outside but keeps that natural, raw look. A coat of sealant or stain buys you extra years. Hang your creation somewhere with partial shade. Your plants stay happier, and the wood lasts longer too.
Echeveria, sempervivum, and jade plants all thrive in these setups. Mix different textures and colors for visual interest. A trailing sedum spilling over the edge adds nice movement.
Mason Jar Succulent Gardens for Windowsills
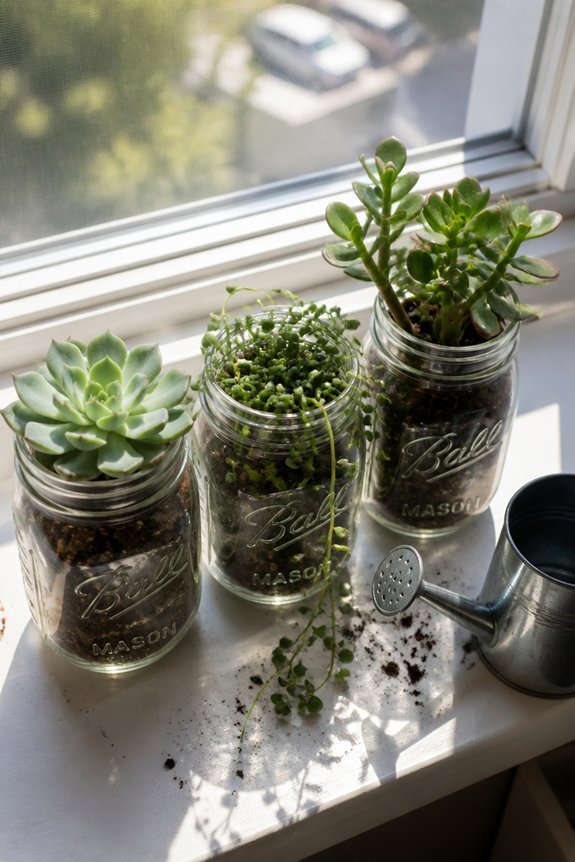
Mason jars bring something special to windowsill gardening. You can see everything happening inside. Roots grow. Soil dries. It’s all visible through the glass.
These jars fit almost anywhere. Tight kitchen ledge? Small bathroom window? No problem. Stack some pebbles at the bottom. Add cactus mix on top. Nestle in an echeveria or two. Done.
*Tip: Try a jade plant cutting. They root easily in mason jars and live for years.*
Water kills more succulents than anything else. Drill a hole in the jar bottom if you can. No drill? Drop in a small unglazed terracotta pot. It soaks up extra moisture like a sponge.
Your windowsill needs six to eight hours of light daily. South-facing works best. East works too. Just watch for leaves stretching toward the window. That means more light needed.
*Tip: Rotate jars a quarter turn weekly. Plants grow straighter this way.*
One jar can hold a whole scene. Let a trailing sedum spill over the edge. Tuck a plump rosette in the center. Add a tiny stone or shell. Suddenly you have a landscape. Play with heights and textures. Mix soft leaves with spiky ones. Each combination looks different.
Repurposed Tins and Vintage Containers for Succulents
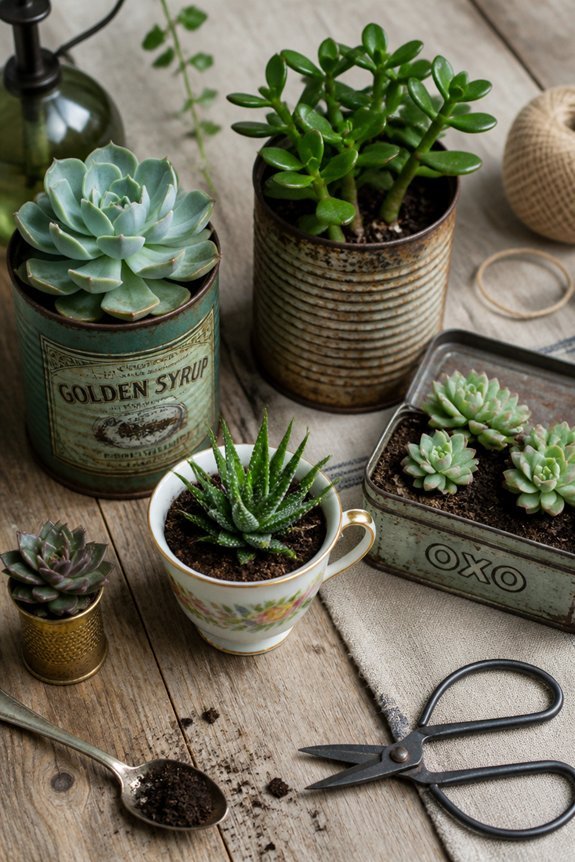
Look around your home before buying new pots. You probably have perfect containers sitting unused in a drawer or cupboard. Tin cans, teacups, wooden boxes, and metal tins all make charming succulent homes.
Just remember one crucial step. Drill or punch holes in the bottom. Succulents hate wet feet. Root rot sets in fast without drainage.
Vintage pieces bring instant personality to your plant display. That rusty tin from your grandmother’s kitchen? Perfect. The chipped ceramic bowl you almost tossed? Give it new life. Shallow-rooted succulents don’t need deep soil, so nearly anything works.
Weathered crates create rustic appeal. Small metal buckets add industrial flair. Mix sizes and textures for a collected look.
Getting started is simple. Clean your container thoroughly first. Add those drainage holes. Fill with gritty cactus soil, not regular potting mix. Nestle your plant in place.
Match size to your plant. Single rosettes thrive in small tins. Larger boxes hold mini arrangements. Try placing taller plants in back, trailing ones near the edges. This costs almost nothing. You keep items from landfills. And each planter tells a little story.
Driftwood Succulent Boxes for Coastal Style
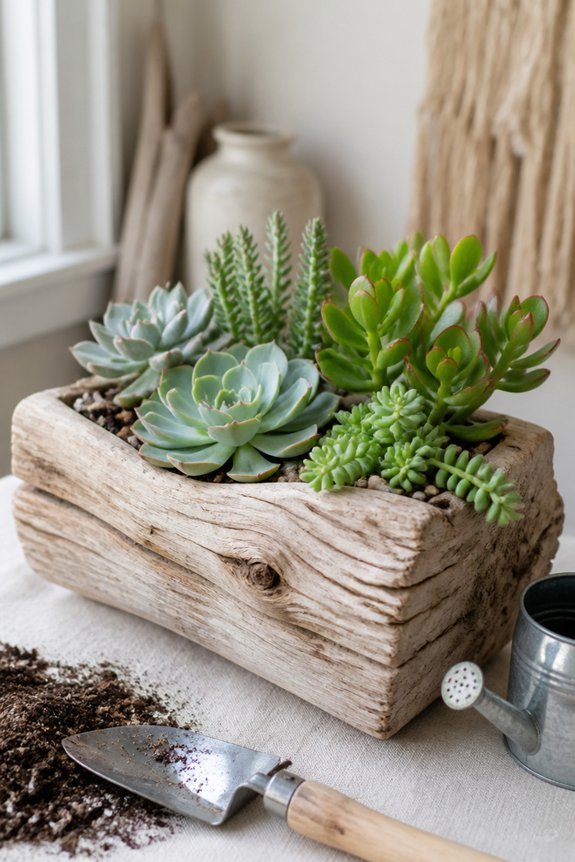
Want a container that feels like beachcombing? Skip the store-bought pots. Driftwood brings the coast indoors without trying too hard.
These weathered pieces work beautifully for shallow-rooted plants. Think echeveria with their rosette shapes. Or jade plants. Sedum varieties too. The wood grain and green foliage play off each other naturally.
Prep your piece first. Seal the inside with food-safe wood sealant. Moisture will warp untreated wood. Drill drainage holes slowly. Rushing causes splits. Line with landscape fabric afterward. It keeps soil in, lets water out.
Place these boxes where you’ll actually see them. A sunny windowsill. Your desk at work. A bathroom shelf. The irregular shapes catch light differently throughout the day.
Water lightly. These are succulents, after all. Rotate the box seasonally. That back corner might get better winter sun than your summer spot.
Hypertufa Succulent Planters: Lightweight Stone Look
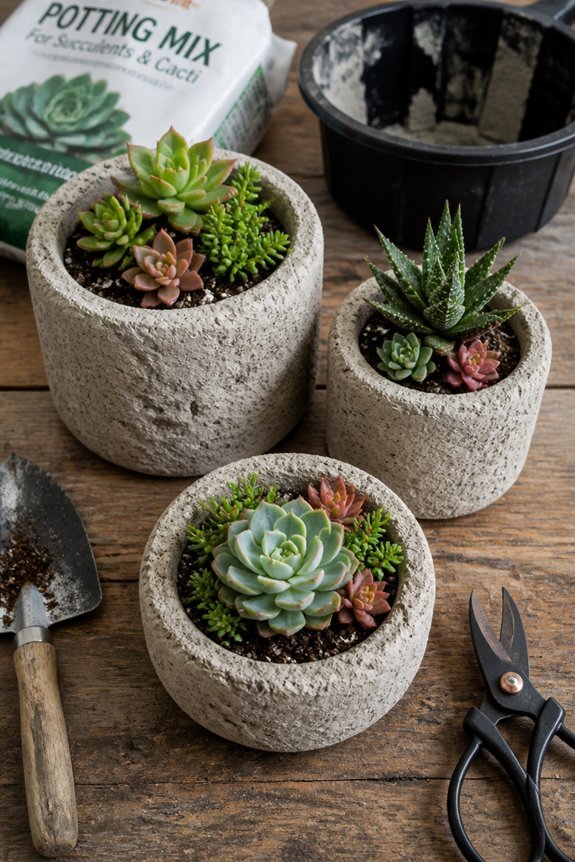
Hypertufa mixes cement, peat moss, and perlite into something special. The result looks like aged stone but weighs far less.
Your succulents will love the porous texture. Water drains slowly instead of pooling around roots. Root rot becomes much less likely.
Try molding your mixture into troughs or shallow bowls. Geometric shapes work beautifully too. Add fiberglass fibers if you want extra strength. These hold up better during freeze-thaw cycles.
Echeveria and sempervivum thrive in these containers. Jade plants do equally well. The weathered gray finish blends naturally into rock gardens. It looks surprisingly modern against clean landscaping too.
A full cure takes patience. Wait several weeks before exposing your planter to harsh weather. Once hardened, hypertufa handles freezing temperatures without cracking.
Your wallet benefits too. Making several planters costs less than buying one stone equivalent. A weekend project can outfit your whole patio.
Ceramic Tile Mosaic Succulent Planters
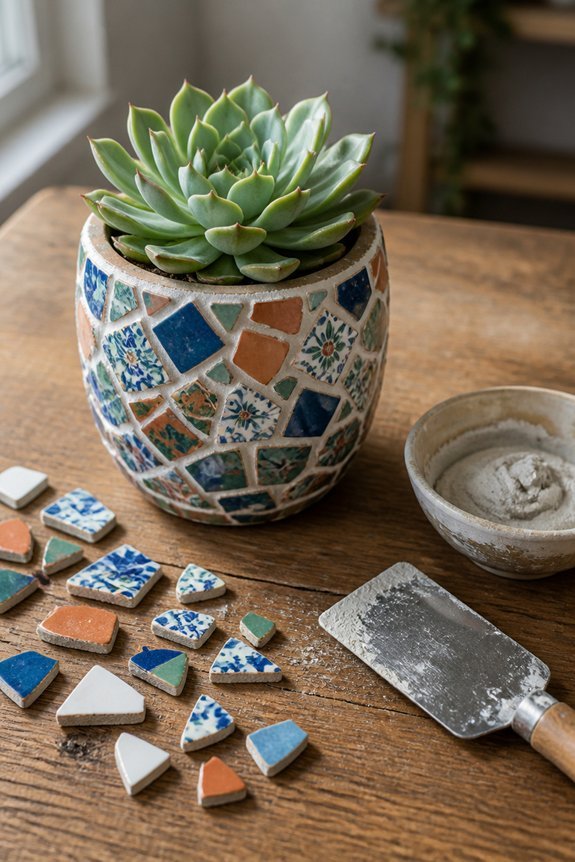
Start with a clean terracotta pot. Rough surfaces grip tiles better. Lightly sand if needed.
Choose your materials wisely. Waterproof adhesive works for small projects. Thin-set mortar handles heavier pieces. Both withstand outdoor conditions.
Break tiles with care. Wear safety glasses. Place tiles in a folded towel, then tap. Aim for varied shapes.
Vitreous glass catches sunlight beautifully. Porcelain offers subtle earth tones. Reclaimed vintage ceramics add character no store can match.
Plan your layout before committing. Dry-fit everything first. Geometric patterns please the orderly mind. Random scatterings feel playful and free.
Press tiles firmly into adhesive. Leave small gaps for grout. Work in sections so nothing dries prematurely.
Mix grout to a peanut butter consistency. Spread with a rubber float. Wipe excess with a damp sponge before it hardens.
Seal the finished planter after a week. This prevents staining. Your succulents will thrive in their custom home.
Small echeveria look precious in petite pots. Larger agave specimens need substantial containers. Match scale to plant.
Protective tile layers shield fragile clay from impact. Clean with mild soap when dusty. Your weekend project lasts years.
Leather and Wood Hanging Planters for Succulents
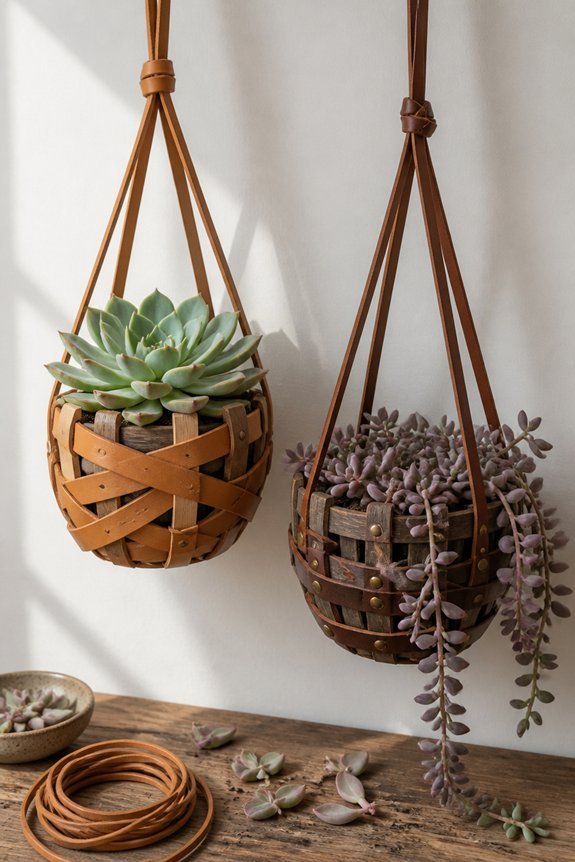
Leather and wood planters bring warmth to any space. They work indoors just as well as on your patio.
Choose cedar or reclaimed barn wood for natural weather resistance. Genuine leather lasts longer, but faux options work fine too. Just make sure your straps hold firm.
Succulents need drainage holes. Without them, root rot sets in fast. Echeveria and jade plants thrive in these setups. Hang them where they’ll get plenty of light.
Installation is simple. Use sturdy hooks or eye bolts. Check your ceiling or branch weight limit first. A carabiner makes rearranging easy.
Keep leather conditioned yearly. Seal the wood when it starts looking dry. These small steps keep your planters looking fresh for seasons to come.
Vintage Teacup Succulent Gardens
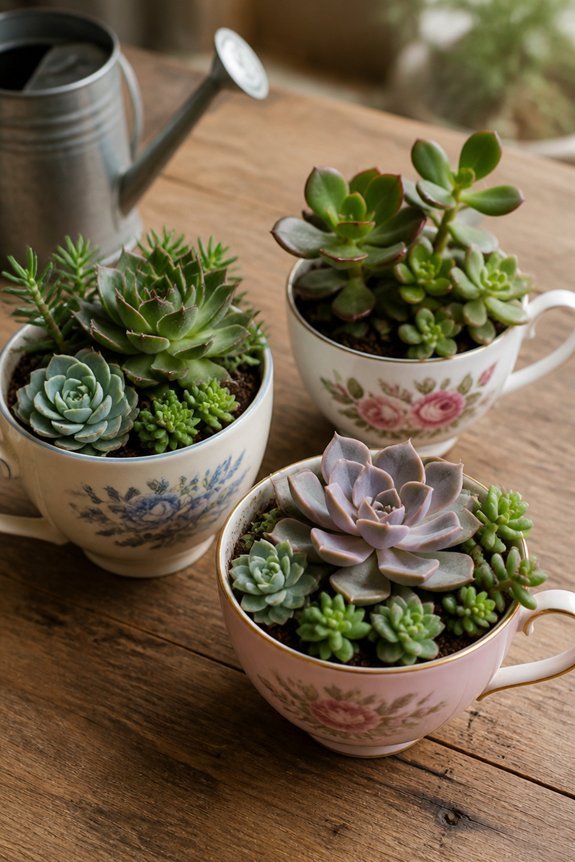
Vintage teacups are perfect for tiny gardens. Their small size keeps succulents contained and manageable.
You will need compact, slow-growing plants for this. Jade, aloe, and echeveria work beautifully here. They stay small and need little root space.
Drainage matters most. Drill holes in the cup bottom carefully. Porcelain cracks easily, so work slowly with a diamond bit.
Layer gravel at the bottom first. Add cactus soil on top. Pick plants with shallow roots for best results.
Place saucers underneath to catch drips. Bright, indirect light keeps these mini gardens happy. Water every two to three weeks. Let the soil dry completely between drinks.
Your old teacups become living decor. No special planters needed. Just pick a pretty cup and start planting.
Cork and Succulent Wall Planters
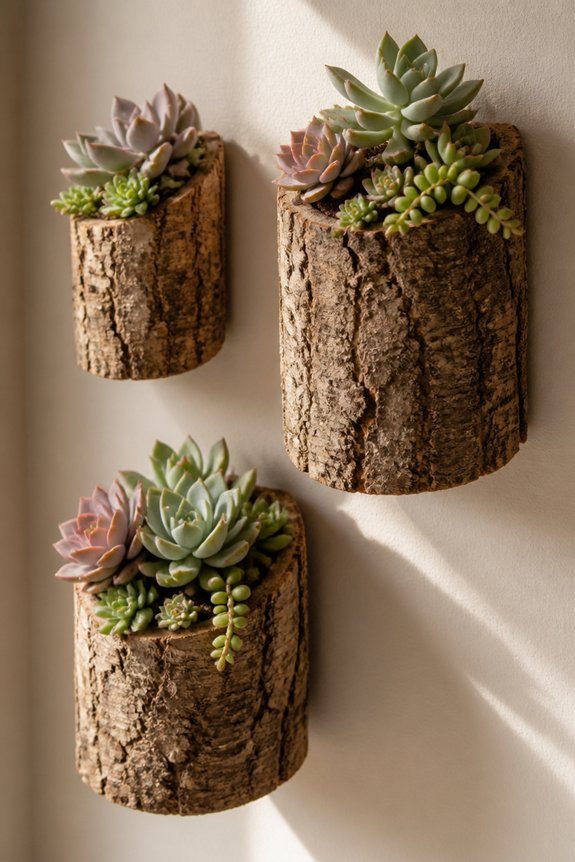
Cork sheets make vertical succulent displays simple and effective. They insulate naturally, drain well, and stay lightweight on your walls. Pick some up at a craft store, then shape them however you like. Cut individual pockets for each plant or create one flowing design.
Secure your cork firmly with the right fasteners for your wall type. Line each pocket with landscape fabric before adding soil. This step protects your walls from moisture damage down the line.
Small succulents thrive here. Try echeveria for rosette shapes, jade plants for structure, or sempervivum for hardiness. Use cactus soil mix exclusively. Regular potting mix holds too much water and rots roots quickly.
Hang your finished piece where it gets bright, indirect light. Water lightly every week or two. Cork dries faster than standard pots, so check soil moisture with your finger first.
Fabric Pot Covers With Decorative Stitching
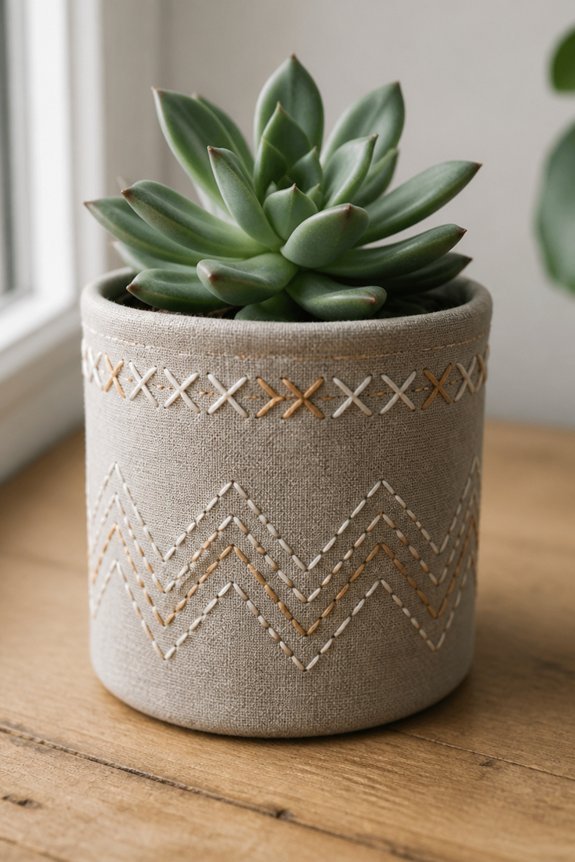
Want to dress up those plain plastic pots? Fabric covers do the trick nicely.
Start with sturdy materials like cotton duck or canvas. These fabrics keep their shape and handle a bit of moisture without falling apart. Linen works too if you prefer a softer look. Stick with solid neutrals for a clean style. Small patterns like ticking stripes add charm without overwhelming your plants.
Skip the sewing machine for this one. Hand stitching gives you better control and adds that homespun character. Try a simple running stitch around the rim. Blanket stitches along vertical seams look especially nice. Contrast your thread color against the fabric for visible detail. Matching thread creates subtle texture instead.
Measure your pot height plus an extra inch for folding under. Add two inches to the circumference for overlap. Secure the fabric with small dots of fabric glue first. This holds everything in place while you stitch. Leave the bottom open so drainage holes stay clear.
Your shelves will thank you. No more water rings or scratched surfaces. The covers slip off easily for soaking or repotting.
Geode-Inspired Resin Succulent Planters
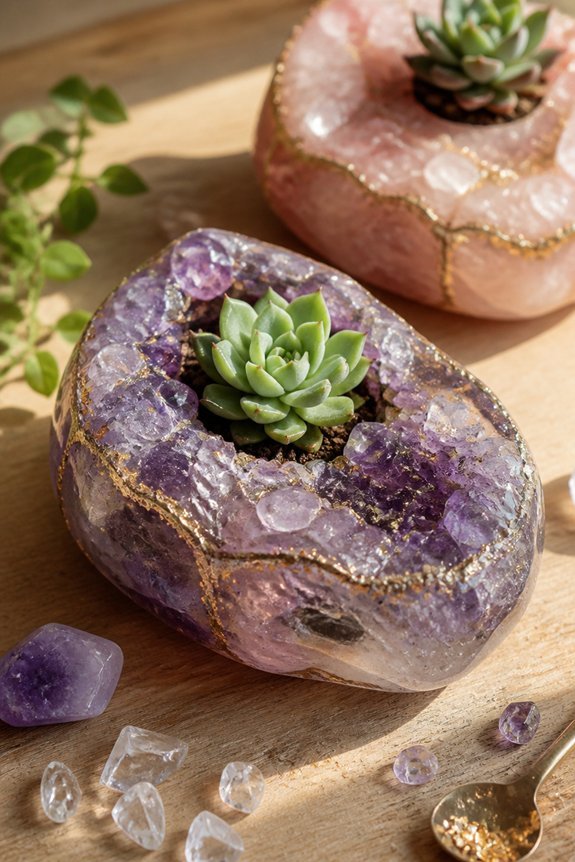
Imagine holding a slice of earth in your hands. These planters capture that magic. Resin artists build them layer by painstaking layer. Each one becomes a tiny window into an imaginary cave.
Start with a silicone mold shaped like a halved geode. Mix epoxy resin with mica powder for that pearlescent glow. Pour your first color and wait. Partial curing is crucial here. Rush it, and colors bleed together. Patience gives you those crisp bands you see in real geological specimens.
Embed texture between layers for authentic depth. Try rock candy for sugary crystal formations. Crushed glass catches light beautifully. Small amethyst or quartz chips elevate pieces into art objects. The goal is visual weight. You want something that looks excavated, not manufactured.
Drainage holes come last. Drill carefully after complete curing. One hole suffices for succulents. They hate wet feet anyway.
Color pairings matter more than you think. Purple and white reads classic and regal. Blue with silver feels arctic and modern. Pink and gold skews warm and playful. Match your planter to your space or your plant.
Size stays small for good reason. Echeveria fits perfectly. So do jade pups and trailing sedum. These plants share shallow root systems and low water needs. They won’t outgrow their glittering homes too quickly.
Stacked Stone Succulent Towers
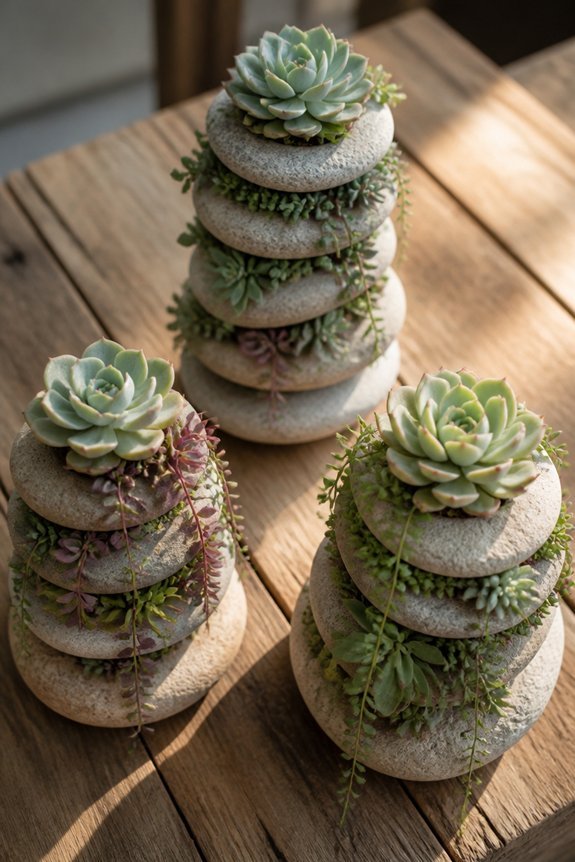
Stacked stone towers bring a raw, earthy quality to succulent displays. You gather flat stones yourself. You stack them in ascending sizes. Small gaps between layers become natural planting pockets.
Slate, limestone, and sandstone all work beautifully. Each stone variety weathers differently. Some develop moss. Others lighten in the sun. This aging becomes part of the charm.
Your tower will likely stand 18 to 36 inches tall. Start with your widest stones at the base. Taper upward for stability. Secure layers with outdoor adhesive or mortar if local winds demand it.
Sempervivum nestles into the tightest crevices. Echeveria wants slightly more soil depth. Sedum fills the middle ground happily. Pack gritty, fast-draining mix around each root cluster. Water trickles downward through the gaps. Excess drains away naturally.
Beginners often overthink the stone selection. Walk a creek bed or visit a landscape yard. Look for pieces roughly 2 to 4 inches thick with at least one flat face. Irregular shapes create more interesting planting opportunities than perfect rectangles.
Macramé Hanging Planters for Succulents
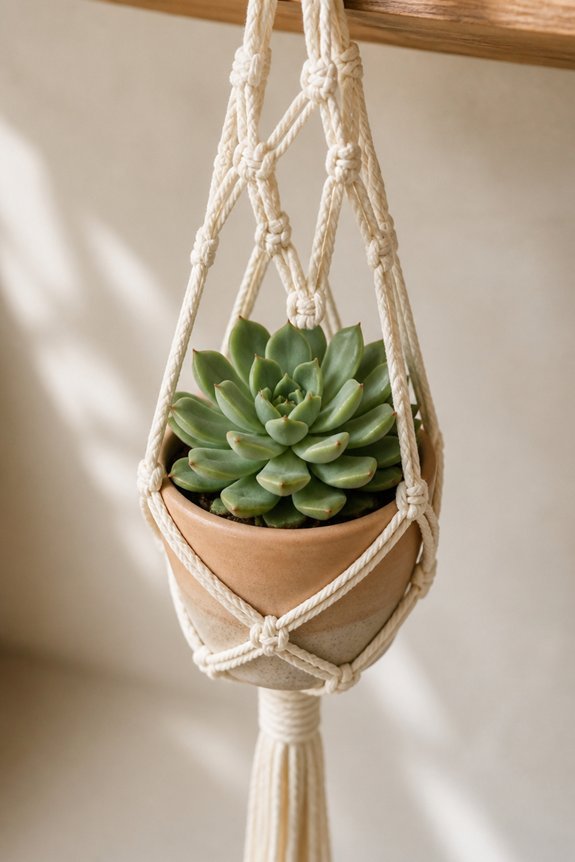
Macramé slings turn your succulents into floating art pieces. They lift potted plants off surfaces and into the air. You can hang them anywhere light streams in.
These holders use simple knotted cords to form a cradle. Cotton feels soft and casual. Jute brings a rustic, earthy vibe. Synthetic options last longer outdoors. Most cords run between quarter-inch and half-inch thick.
You’ll need basic knots to make one. Square knots create structure. Half hitches add decorative edges. Spiral patterns give visual interest. Plan on six to eight feet of cord for a standard pot. Smaller pots need less. Elaborate designs need more.
Your succulents will love the airflow up there. Echeveria glows in sunny windows. Jade plants grow sturdy and compact. String of pearls cascades beautifully downward. You free up shelf space and tabletops. You gain living sculpture instead.
Hand-Sculpted Air Dry Clay Succulent Planters
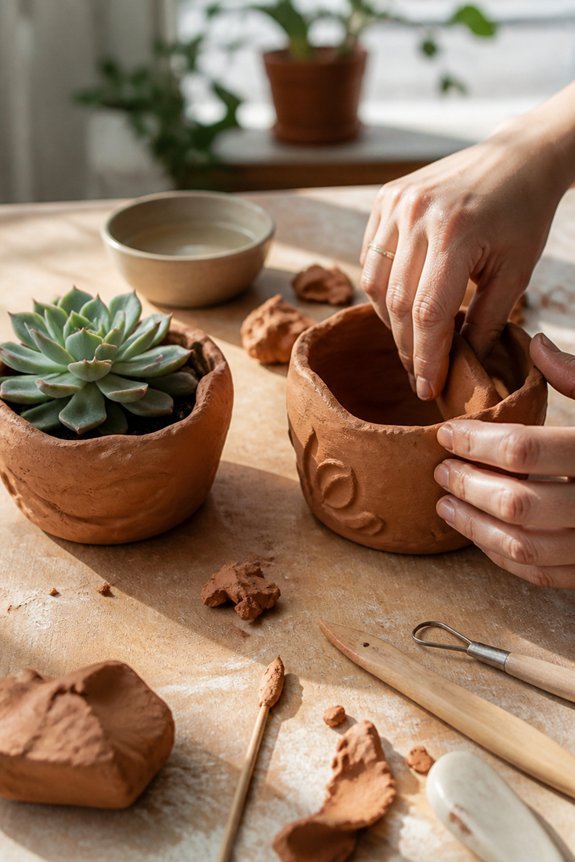
Air Dry Clay 101
You don’t need a kiln for this. Just your hands, some clay, and patience.
Shape it into bowls, cubes, or teardrop forms. Pinch it, coil it, or press it into a mold. Work fast though. It starts hardening the moment air hits it.
Poke drainage holes while the clay is still damp. A wooden skewer or straw works perfectly here. Wait too long, and you’ll crack the planter trying to add them later.
Finishing Touches
Sculpey and Fimo are solid choices for beginners. They dry firm enough to hold soil without crumbling.
Paint with acrylics once fully cured. Or seal with clear varnish for a glossy look. Skip both if you love that raw, earthy texture.
These planters work indoors or out. Just remember sized appropriately for your succulent’s root system.
Dollar Store Succulent Planter Hacks
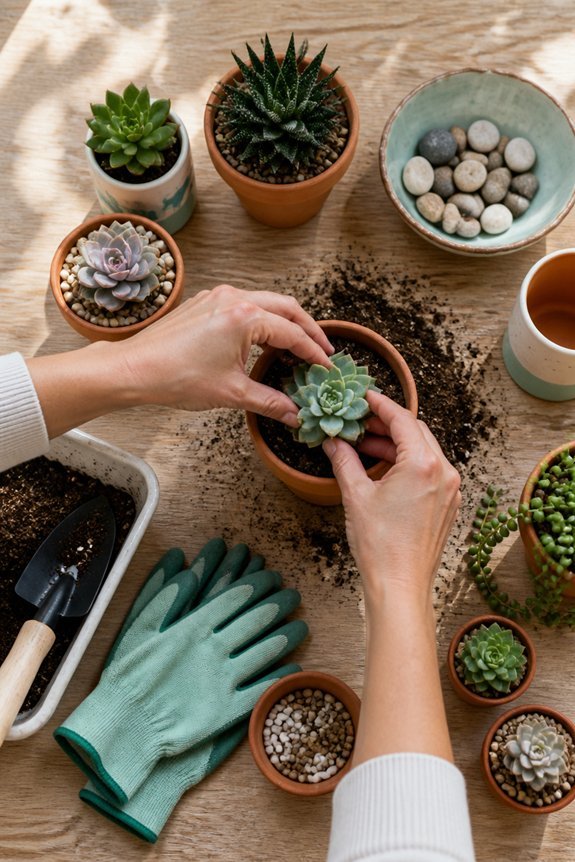
Ceramic bowls work beautifully for succulents. Just grab a drill and add a few holes in the bottom. Water needs somewhere to escape.
Vintage tins and teacups bring instant charm. Small mason jars do too. The same rule applies. Drill carefully. Your plants will thank you.
Line decorative baskets with plastic sheeting first. This keeps soil contained. It also protects the basket from moisture damage.
Metal containers add an industrial edge. Old paint cans and mint tins fit this vibe perfectly. They heat up quickly though. Keep them out of harsh afternoon sun.
Glass vases suit temporary arrangements best. They lack drainage. Use them for display only, or add a layer of pebbles at the bottom.
Terracotta pots, wooden boxes, and plastic containers are dollar store staples. Paint them to match your space. Group different sizes together for visual interest.
Your collection grows without draining your wallet.
Frequently Asked Questions
How Often Should I Water Succulents in DIY Planters?
One should water succulents every two to three weeks, allowing the soil to dry completely between waterings. During winter months, frequency decreases considerably. Overwatering remains the primary cause of succulent death, so caution is advised.
What Drainage Holes Do Succulents Need to Prevent Root Rot?
One must not put all eggs in one basket when selecting drainage holes. Succulents require at least one quarter-inch drainage hole per six inches of planter diameter. Multiple holes prevent water pooling, ensuring roots stay dry and healthy, effectively preventing rot development.
Which Succulent Types Work Best for Indoor Versus Outdoor Planters?
Indoor planters suit low-light tolerant varieties like Haworthia and Jade plants. Outdoor planters accommodate sun-loving types such as Echeveria, Sedum, and Aloe. Gardeners should match species light requirements to their planting environment accordingly.
How Do I Ensure My Homemade Planters Last Multiple Seasons?
Like a fortress shields its inhabitants, proper drainage holes and quality materials protect planters from deterioration. One should use weather-resistant wood, sealed concrete, or durable ceramics, apply protective finishes annually, and guarantee adequate drainage to prevent rot and water damage effectively.
What Soil Mixture Is Ideal for Succulent Planter Arrangements?
One should combine equal parts potting soil, coarse sand, and perlite to create an ideal growing medium. This mixture guarantees proper drainage, preventing root rot while providing necessary nutrients for healthy succulent growth and development.
Conclusion
DIY succulent planters transform ordinary materials into functional garden vessels. Concrete, terracotta, clay, and reclaimed wood serve as reliable foundations for these projects. Success depends on proper drainage, appropriate soil selection, and container size matching plant needs. Budget-friendly options like dollar store containers and mason jars deliver comparable results to expensive alternatives. These straightforward projects yield personalized decor while requiring minimal crafting experience or specialized tools.