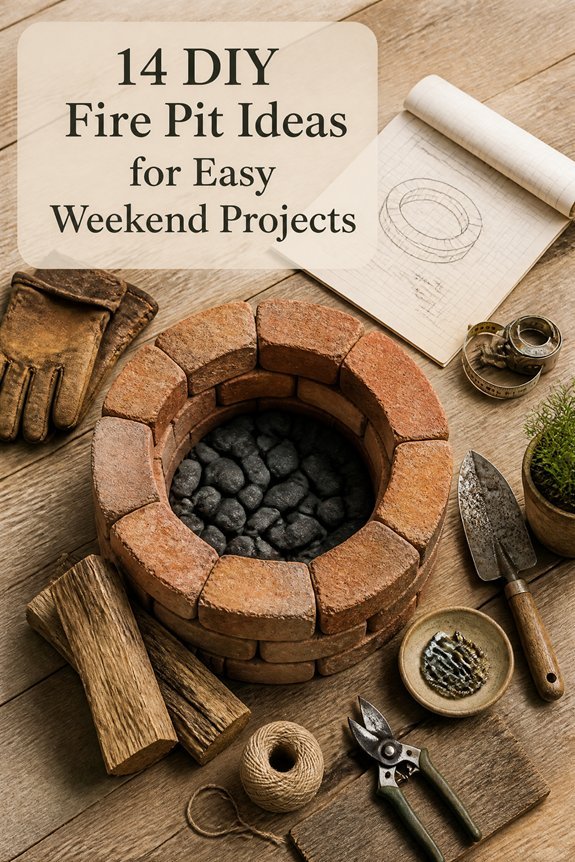
Adding a fire pit instantly turns any backyard into a welcoming destination for evening gatherings. The possibilities stretch from humble weekend builds to more ambitious permanent installations. With so many directions to take, the real challenge becomes narrowing down what actually fits your space and lifestyle.
Cinder blocks offer the quickest path for anyone watching their budget, while stacked stone or concrete pavers lend a more refined, permanent feel. Repurposed steel drums and galvanized stock tanks bring industrial character to modern patios. Traditional brick rings hold their own for classic charm, and each material carries different maintenance needs and heat retention properties worth weighing upfront.
Layout matters just as much as materials. Sunken designs create intimate, campfire-like atmospheres but require excavation and drainage planning. Keyhole configurations extend the cooking surface for ambitious outdoor chefs. Built-in bench seating maximizes social space in compact yards. Matching the right format to how you actually live outdoors prevents costly rework later.
Skill level, tools on hand, and local codes all shape what makes sense for your property. Some regions restrict open burning or require specific clearance from structures. Honest assessment of these constraints before breaking ground keeps the project enjoyable from start to first spark.
Choose the Right Fire Pit for Your Space and Budget
Start by looking at your space. Small backyards work great with tabletop fire pits or compact steel bowls. These typically run between $50 and $200.
Medium yards pair well with traditional metal rings or preformed concrete pits. Expect to spend $200 to $500 for these options.
Large properties can handle permanent stone structures or more elaborate designs. These start around $500 and go up from there.
Your budget affects material choices more than you might think. Steel costs less upfront but needs regular upkeep. Stone and brick demand a bigger initial investment yet last for years.
Fuel type matters too. Propane models offer push-button convenience. Wood-burning pits create that crackling atmosphere many people love. They also cost less to operate over time.
Think about how you’ll actually use your fire pit. Portable units work perfectly for casual get-togethers. Permanent setups make sense if you entertain often or want a true backyard centerpiece.
Taking time to weigh these three factors saves money and disappointment later. You’ll end up with something that fits your lifestyle rather than a costly mistake sitting unused.
Also read: 8 Fire Pit Ideas on a Budget for Affordable Backyard Style
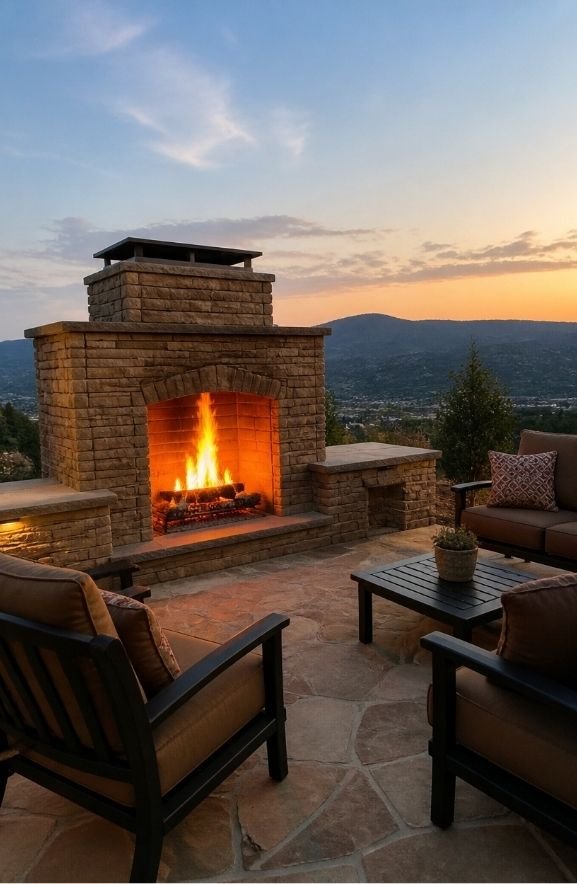
The Classic Stone or Brick Ring Fire Pit
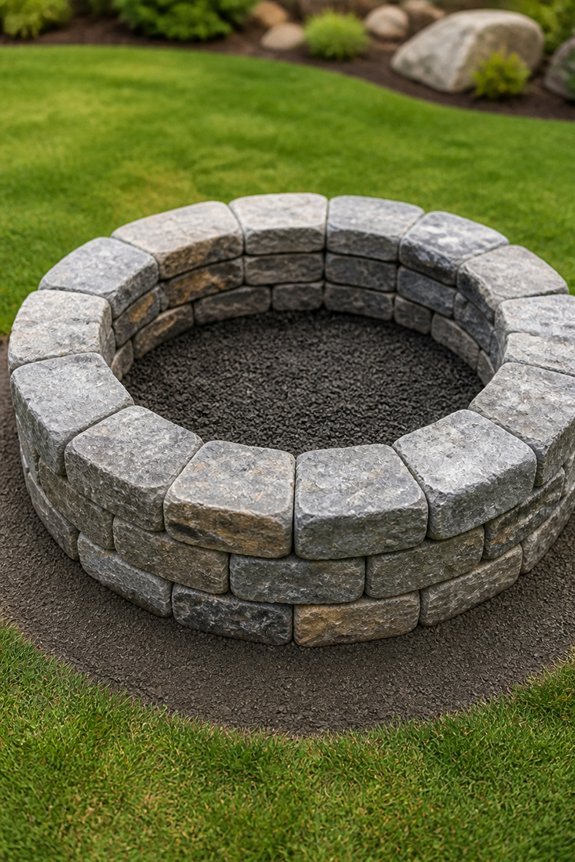
A classic stone or brick ring fire pit fits nicely into medium to large yards. It gives you that timeless look without breaking the bank.
You will stack stones or bricks in a circle about three to four feet across. Granite, limestone, or standard clay bricks all work great for this. The ring sits right on level ground. You do not need to dig much or do heavy prep work.
Slip a 36-inch metal fire ring inside the brick structure. It keeps embers contained and adds a safety buffer. Several people can gather around the perimeter without feeling cramped.
Your stone or brick ring will hold up against most weather. Just check it now and then for any needed touch-ups.
Steel Fire Pit Rings: Modern and Minimal
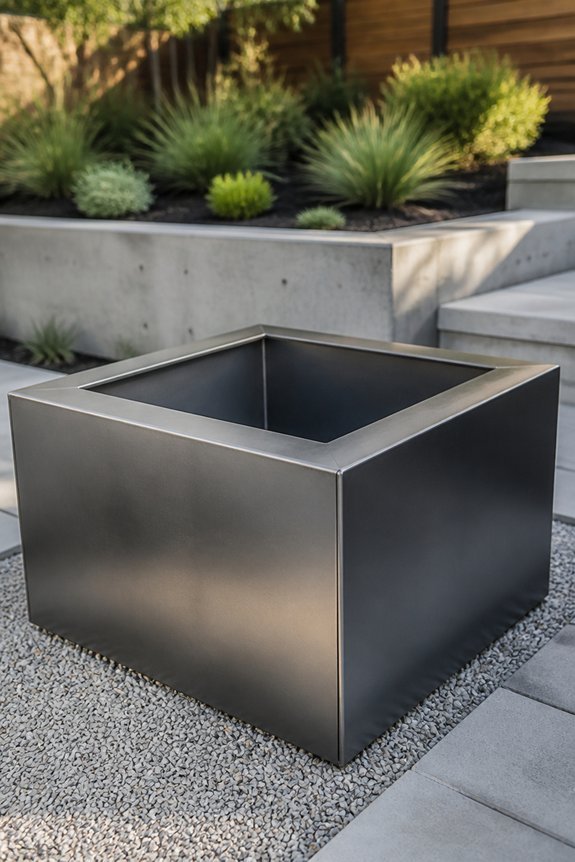
Steel fire pit rings strip away the fuss. You get clean lines and simple function without the bulk of stone or brick.
These metal rings come ready to use. Most are galvanized or powder-coated steel, so they handle heat well and look sharp in modern backyards. Setup takes little time. Level your ground, prep a base, and drop the ring into place.
Sizes run from 24 to 48 inches across. That range fits most spaces, from compact patios to sprawling lawns. Solo Stove and Breeo both make solid options with finishes built to last.
Steel heats fast and pushes warmth outward better than stone. You will need to treat for rust now and then and clear out ash and debris. But for quick assembly and weekend hangs with friends, this choice delivers.
DIY Fire Pit From Upcycled Barrels and Drums
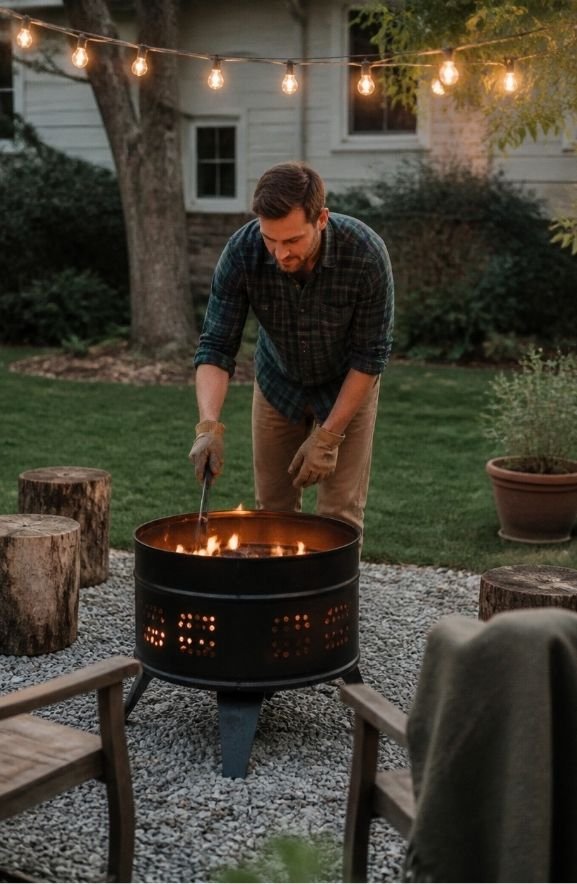
Steel drums make excellent fire pits without the hefty price tag. A standard 55-gallon size gives you plenty of room for a good blaze. Just remember to drill some holes near the bottom first. Your fire needs air to breathe.
You can leave the sides solid or cut out sections for easier access. Loading wood and cleaning ash becomes much simpler with a few strategic openings.
Food-grade barrels need a good scrub before you start. Leftover residue can create unpleasant smells or worse. For tighter spaces, consider a 30-gallon drum instead. It still delivers plenty of warmth without dominating your yard.
Drop a metal grate inside to catch hot coals. This simple step protects the drum bottom from burning through too quickly.
Elevating your fire pit makes a real difference. Weld on some legs from rebar or angle iron. Air flows better underneath, and you avoid moisture buildup that leads to rust. Your DIY creation will last seasons longer with this small addition.
Sunken Fire Pit: Ground-Level Gathering
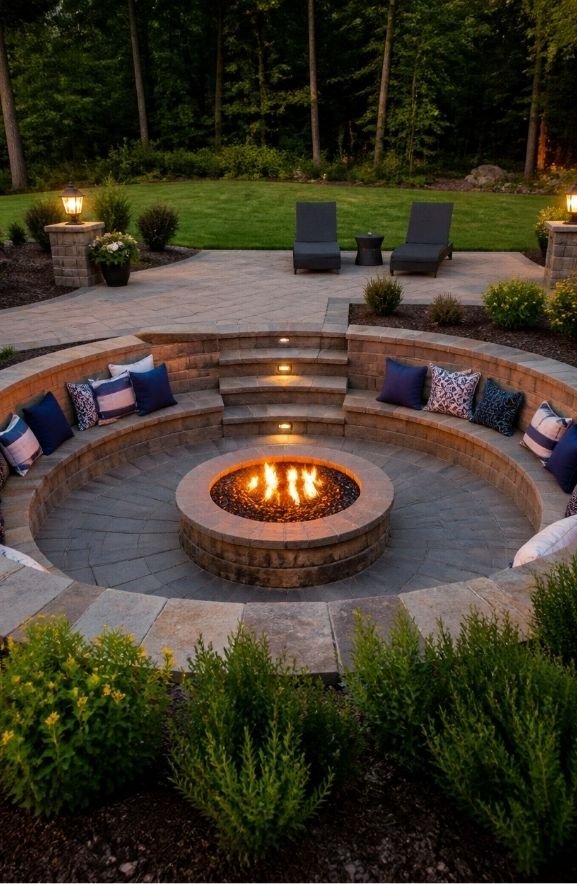
A sunken fire pit brings people together in a cozy, ground-level space. It feels tucked away. It feels special.
You dig about two to three feet down. Circle or rectangle, your choice. Line it with something tough that handles heat. Think concrete blocks, a steel ring, or stacked natural stone. Drop gravel or sand at the bottom. Water flows out. Heat spreads evenly.
Wind stays above you. The fire burns cleaner. Smoke rises where it should. You sit on the edge or add benches around the rim. Rain or shine, good drainage keeps everything solid. The pit lasts. The gatherings keep going.
Tabletop Fire Pit: Warmth for Small Spaces
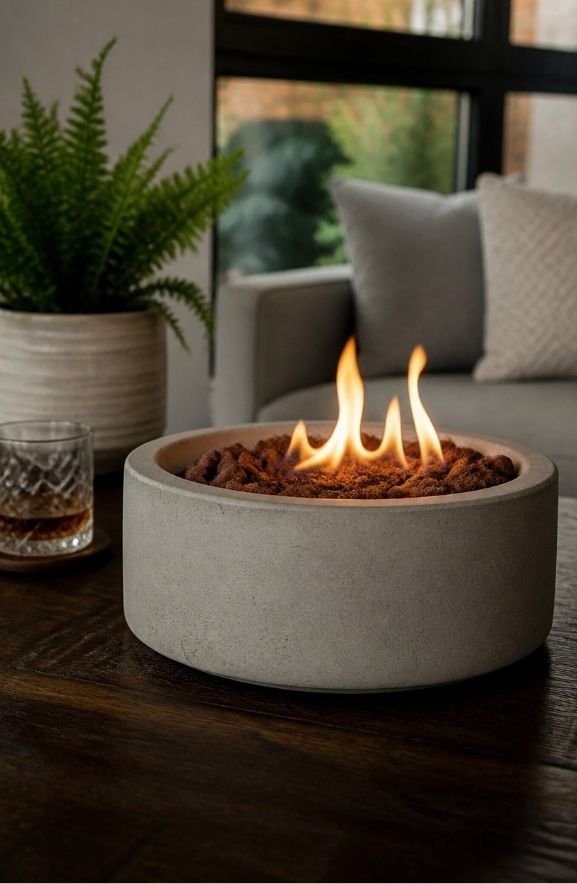
Tabletop fire pits step in when you need warmth without the work. They rest right on your table, patio, or deck. No digging required.
These compact units usually run on bioethanol or gel fuel. That means no wood piles and no ashes to dump later. Most models span 12 to 24 inches across. You’ll find sleek stainless steel bowls, concrete planters, and metal containers with built-in burners.
Setting one up takes minutes. Pick a flat spot, add fuel, and light it per the manual. You’ll get instant ambiance for small apartments, balconies, or tiny backyards. Just keep them away from curtains, plants, or anything flammable. Never leave them burning unattended.
Cinder Block Fire Pit: Budget-Friendly and Fast
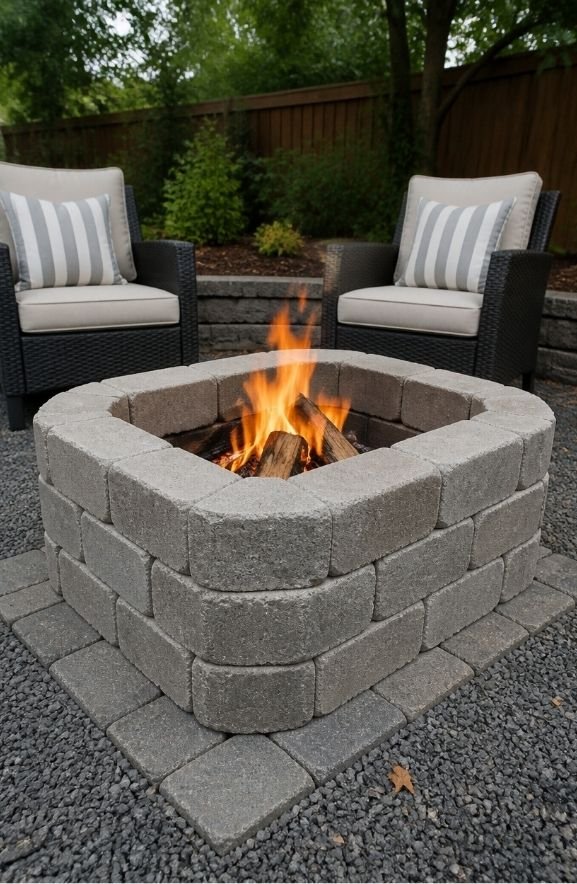
You can build this fire pit for $30 to $50. That beats most store-bought options by a wide margin.
The project needs just basic tools. Most people finish in one to two hours.
Start by arranging standard 8-by-8-by-16-inch cinder blocks in a circle. Stack them two or three layers high. Place a metal fire ring or grate on top to keep flames contained. Line the base with sand or gravel to protect the ground underneath.
This setup works great on patios, in backyards, or at campsites. You can take it apart and move it whenever you want. The blocks hold up well through many fires, despite the budget price tag.
Natural Stone Tiered Fire Pit
Natural stone creates lasting beauty in your outdoor space. Stack granite, limestone, or slate into tiered rings. The base contains flames, middle tiers provide seating, and upper levels display plants or decor.
Build on level ground with heat-resistant stone. Mortar ensures stability, though dry-stacking allows flexibility. These outlast concrete for decades with minimal upkeep and cost between several hundred to several thousand dollars.
DIY Fire Pit With Metal Grate and Log Base
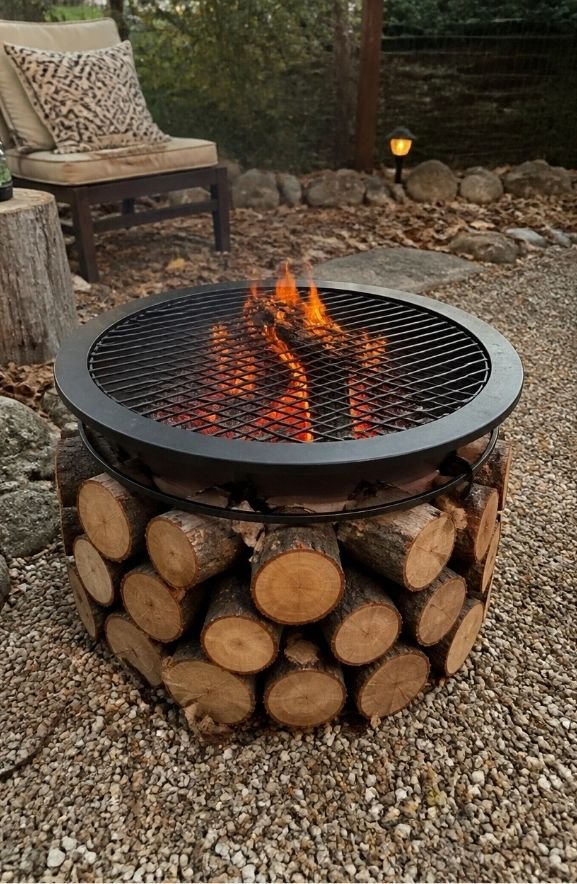
A metal grate fire pit keeps things simple. No stones to stack, no cement to mix. Just a few materials and an hour or two of your time.
Start with a circular grate. Twenty-four to thirty-six inches across works well for most backyards. This becomes your fire surface and cooking area.
You’ll need a base underneath. Four to six logs do the trick. Arrange them in a square or rectangle with some space between them. Cedar, oak, or pine all hold up nicely. Make sure they’re at least six inches thick and eight to ten feet long.
The grate sits right on top. Air flows through the gaps below. This keeps your fire burning clean and distributes heat evenly. You can grill dinner one minute and roast marshmallows the next.
Portable Propane Fire Pit: Flexibility and Control
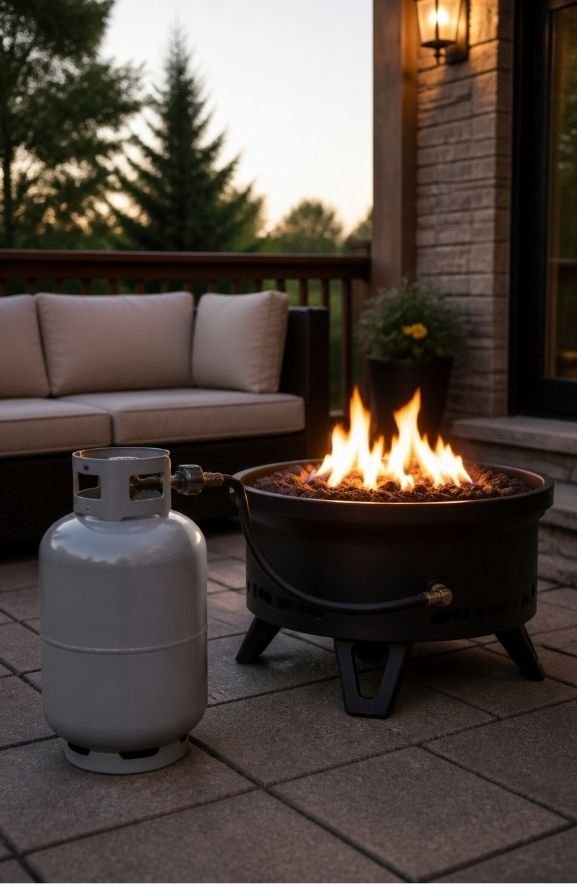
Metal grate fire pits keep things simple. But propane models give you something different: real control over your flame.
You will not need to hunt for firewood or find storage space. These units run on 20-pound propane cylinders that swap out in seconds. Turn a valve to adjust the height. Dial the heat up or down as you please.
Tabletop versions fit small gatherings. Wheeled standing units roll wherever you need them. Solo Stove and Outland Living both make solid options. Setup takes minutes. Just connect the tank and light it up.
Patios, decks, and campsites all work well here. You get almost no smoke. Cleanup becomes nearly effortless. The trade-off? You need fuel on hand. The upfront cost runs higher than wood-burning styles too.
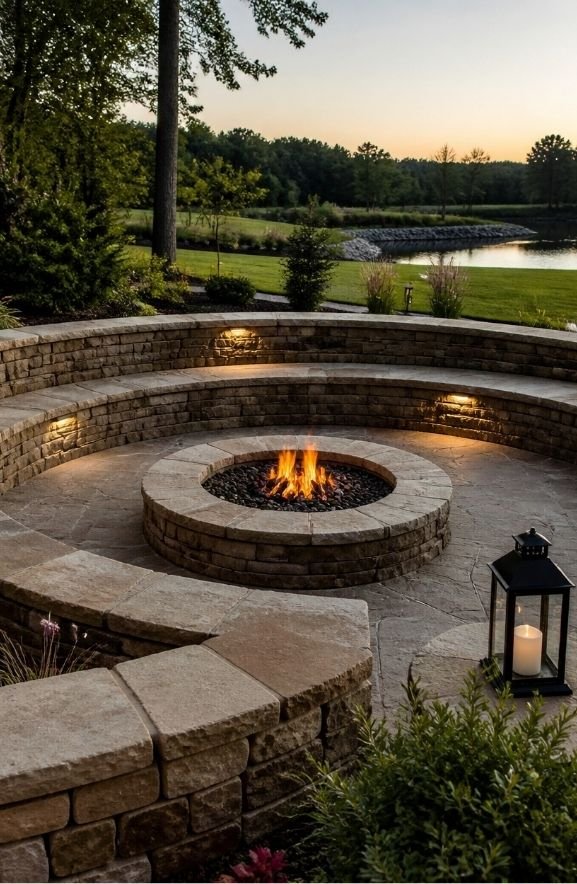
Decorative Stone Wall Fire Pit
Stone wall fire pits bring something special to your backyard. They stay put year-round, unlike those portable propane tanks you drag around. You get real warmth and real character in one package.
Most folks build these circular beauties from stacked stone, brick, or concrete blocks. Three to four feet across works well for gathering everyone close. Pick your stone wisely. Flagstone, limestone, and granite all handle heat beautifully and look stunning after dark.
Getting started means digging down a few inches first. Add gravel underneath so water drains away properly. Then comes the fun part. Stack your materials with mortar, or go dry-stacked if you prefer that rustic look. Either way, slide a metal fire ring inside to keep your wood and embers contained.
These setups burn wood only. You’ll want decent airflow and plenty of space from your house and trees. Keep an eye on your mortar joints over time. Scoop out ashes after each use. A quick weatherproofing treatment every season helps too.
Grab basic masonry tools and clear a weekend. That’s really all it takes to add this permanent gathering spot to your yard.
Keyhole Fire Pit: Efficient Heat and Garden Integration
The keyhole fire pit blends a circular burn area with a rectangular cooking chamber. You get warmth and cooking space in one compact design. This setup works perfectly for outdoor gatherings and meal prep.
Your fire sits in the round section. The rectangular extension becomes your grill or cooking surface. Build it from concrete blocks, metal drums, or stacked stone. Heat concentrates right where you need it. You end up using less wood than with traditional round pits.
These pits slip easily into garden corners or along edges. The rectangular chamber fits cast iron pots, grilling grates, or even pizza stones. Homeowners get a capable outdoor kitchen without surrendering half their yard.
Stock Tank Fire Pit: Instant Rustic Style
Stock tank fire pits bring instant country charm to any yard. These sturdy metal tubs once watered livestock. Now they warm up your evenings instead.
Most tanks hold 100 to 300 gallons. Round ones span about two feet across. Oval shapes stretch four by eight feet. You have options to fit your space.
Setting one up takes little effort. Scrub the inside clean first. Drill a few holes in the bottom for drainage. Add a metal grate to hold your firewood. That is really all it takes.
The galvanized steel handles heat like a pro. No worries about warping or wearing out fast.
Once operational, make it yours. Brush on heat-safe paint in your favorite color. Ring the base with river rock or pea gravel. Set it on a stone slab for a finished look. These touches elevate the basics into something special.
Your tank fits right in at a farmhouse, cabin, or anywhere rustic vibes feel right. You skip the expense of masonry work too. Stone and brick pits cost far more. A stock tank delivers the same warmth and glow for less.
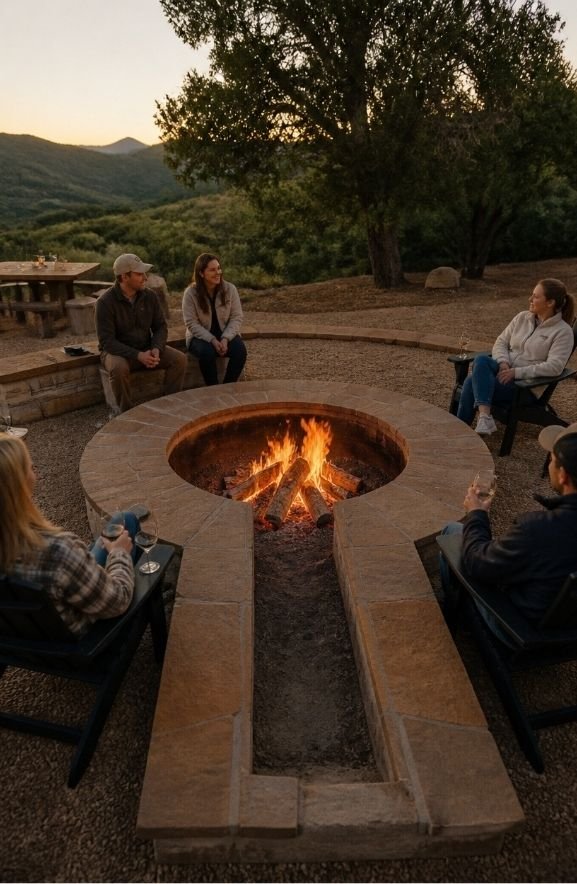
Fire Pit With Built-In Seating
Built-in seating transforms how you gather around the fire. No more dragging chairs from storage or worrying about uneven lawn spots. You get comfort and convenience built right into your outdoor space.
Homeowners have plenty of material options to work with. Concrete blocks and poured concrete forms create weatherproof benches that last for years. Stone arrangements bring that rustic charm while staying rock-solid underfoot. Prefer something warmer? Treated lumber with proper backing lets you customize heights and lengths to fit your crew.
Safety matters when placing these permanent seats. Keep them eight to ten feet back from the flames. This distance keeps everyone cozy without the worry.
Built-in designs cut down on clutter and setup time. They carve out clear social zones in your yard. Add some outdoor cushions or pillows, and people will linger for hours. This setup shines in established outdoor living areas, turning simple fire pits into true backyard destinations.
Frequently Asked Questions
What Permits or Regulations Do I Need Before Building a DIY Fire Pit?
Before constructing a fire pit, one must check local zoning laws and building codes. Most municipalities require permits for permanent structures. Regulations typically dictate placement distance from property lines, dwellings, and combustible materials. One should contact the local fire marshal’s office for specific requirements.
How Do I Safely Extinguish and Maintain My Fire Pit After Use?
One should fully extinguish fires using water or sand, stirring ashes thoroughly until completely cool. Regular maintenance includes removing debris, inspecting structural integrity, clearing surrounding vegetation, and covering the pit during non-use periods.
What Type of Wood Should I Burn, and What Should I Avoid?
Burning treated wood releases toxic chemicals—a frightening reality many overlook. One should use seasoned hardwoods like oak or maple. Avoid softwoods, plywood, and painted lumber, which emit harmful fumes and creosote buildup.
How Far Should a Fire Pit Be From My House and Trees?
A fire pit should be positioned at least 10-15 feet from one’s house and 20 feet from trees or overhanging branches. This distance minimizes fire risk and protects structures from heat damage and flying embers.
Can I Install a Fire Pit on a Deck or Wooden Platform?
Installing a fire pit on a deck or wooden platform is not recommended. The intense heat and flying embers pose significant fire hazards to flammable materials. A non-combustible surface like concrete or stone is essential for safety.
Conclusion
Building a DIY fire pit requires selecting among stone rings, steel drums, sunken designs, and stock tanks. Each option suits different budgets and skill levels. Homeowners can gather around flames using their smartphones to record memories, just as ancestors did centuries ago. Proper material selection, location planning, and safety considerations guarantee a functional outdoor space. These projects transform yards into practical gathering areas with minimal professional assistance needed.