Studies show that homes with professionally designed outdoor lighting increase curb appeal by up to 80 percent. You don’t need an expensive contractor to achieve this polished look; instead, you can strategically layer warm white LED lights, create focal points at your entryway, and frame your roofline with precision. Discover how these affordable techniques combine to produce results that rival high-end installations.
Start With Warm White Lights as Your Foundation

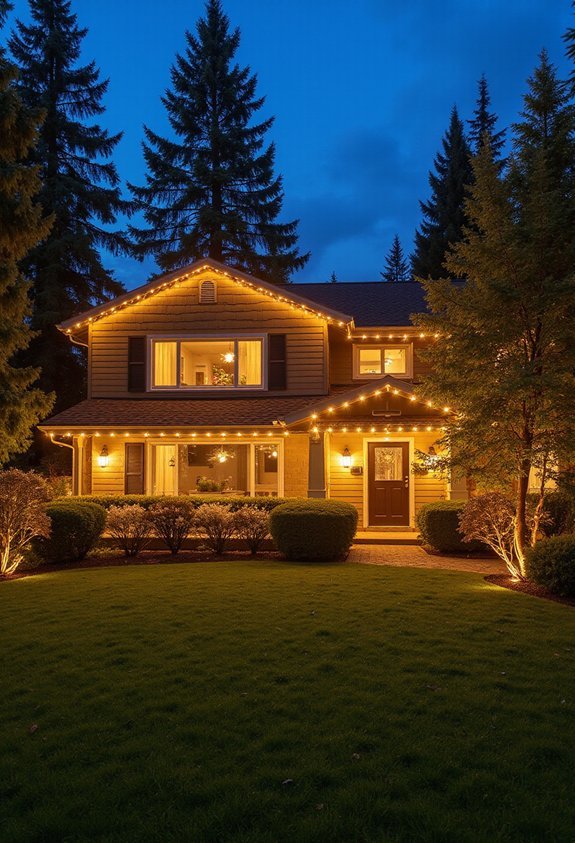
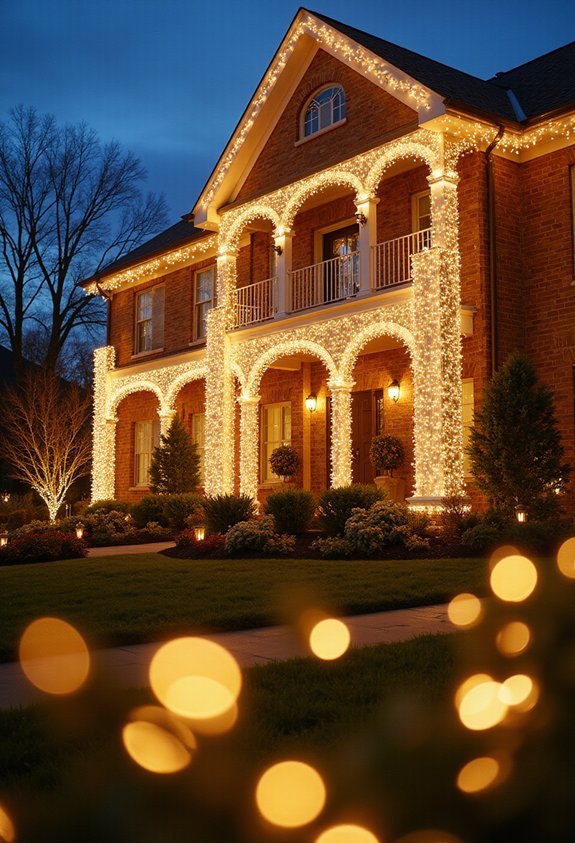
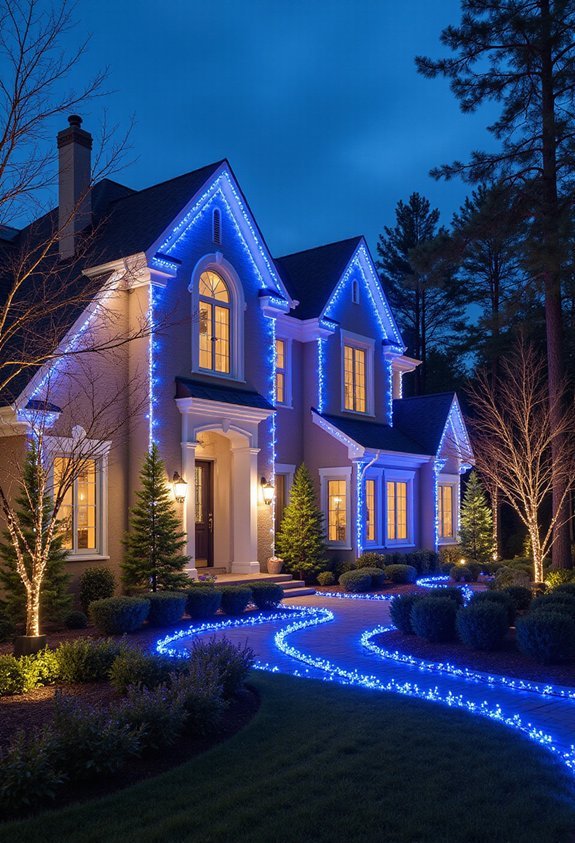
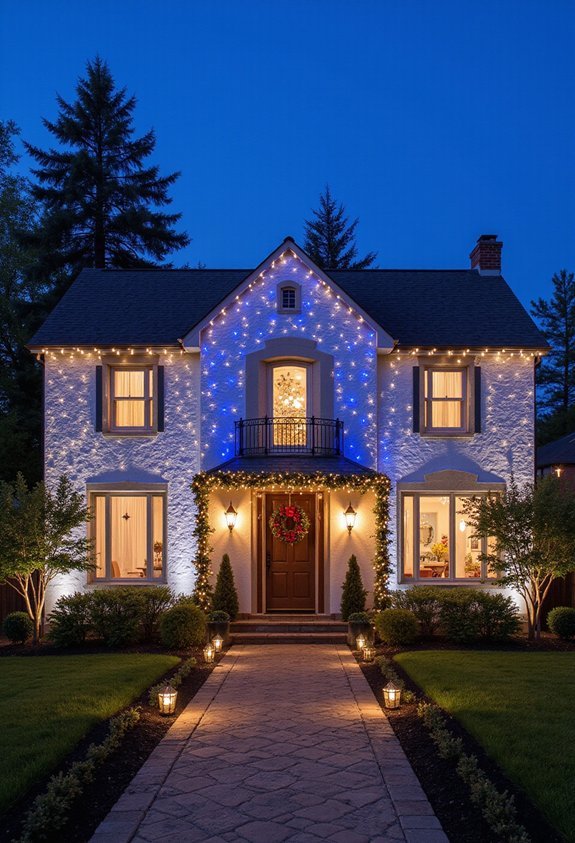
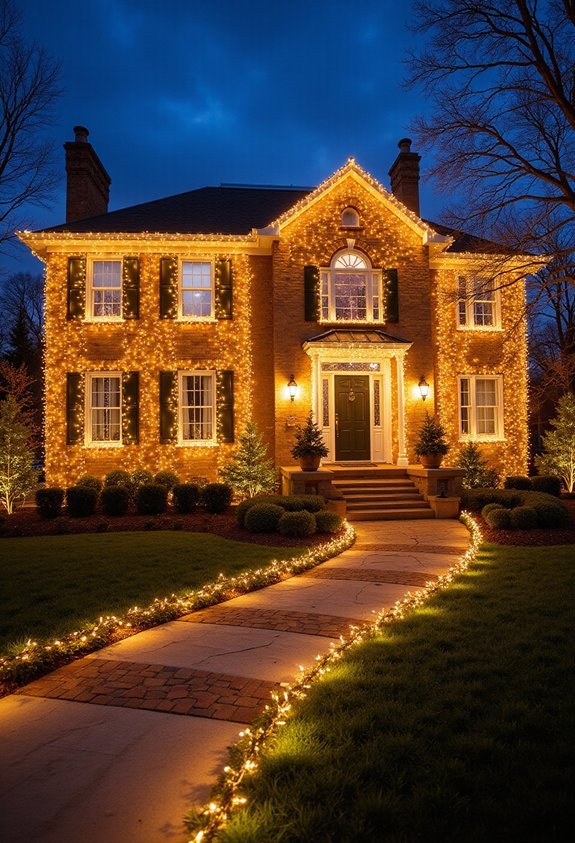
When you’re planning your front yard Christmas display, warm white lights should form the backbone of your lighting scheme because they’ll create a welcoming, classic aesthetic that complements virtually any decorating style. You’ll find that warm white lights, typically ranging from 2700K to 3000K on the color temperature scale, provide a soft, inviting glow that mimics traditional incandescent bulbs. They’re versatile enough to work with other color schemes you might add later, such as cool blues or multicolored accents. Start by outlining your home’s roofline, wrapping trees, or framing your front entrance with these foundational lights. This approach guarantees you’ve established a cohesive base before layering additional decorative elements, preventing an overwhelming or chaotic appearance in your final display.
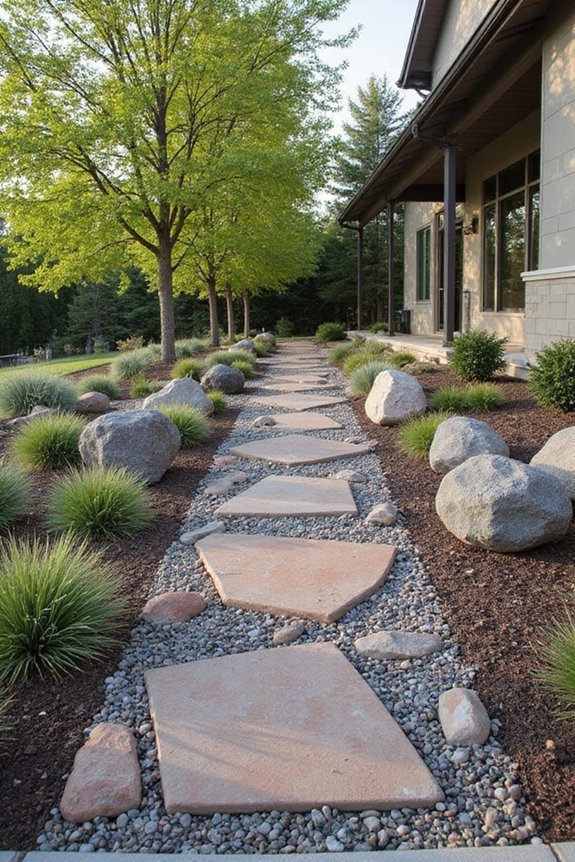
Also read: 22 LANDSCAPE WITH ROCKS FRONT YARD Ideas That Look Designed!
Choose LED Lights to Save Money Long-Term
Now that you’ve established your warm white foundation, it’s time to examine the type of bulbs you’ll use for your entire display, and LED lights offer significant financial advantages over traditional incandescent options. LEDs consume approximately 75% less energy than incandescent bulbs, which means your electricity bills will decrease noticeably during the holiday season. Additionally, LED bulbs last considerably longer, sometimes functioning for up to 50,000 hours compared to incandescent bulbs’ 1,000-hour lifespan. This extended durability reduces replacement costs substantially over multiple years. While LED lights require a higher initial investment, the long-term savings on both energy and replacements make them the economically superior choice. You’ll recover your investment within two to three holiday seasons while enjoying a more reliable, efficient lighting system for your front yard display.
Create a Focal Point at Your Entryway
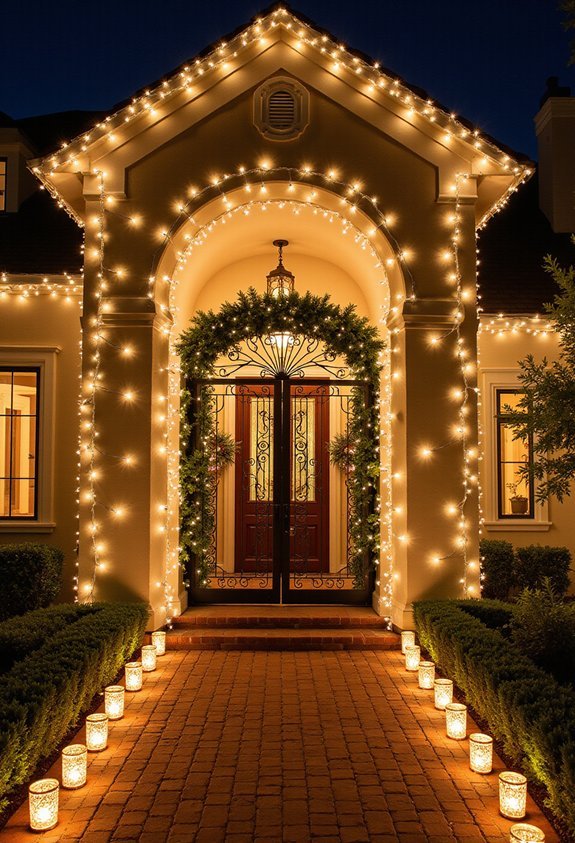
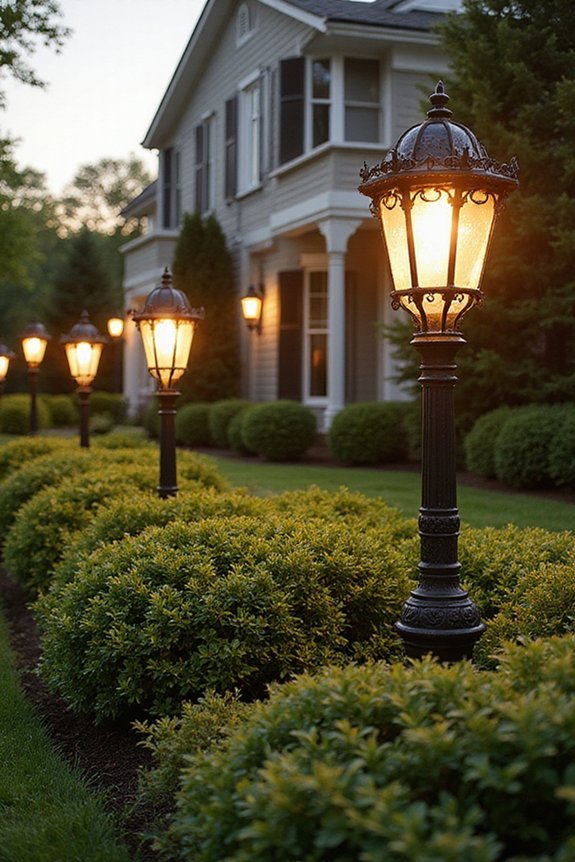
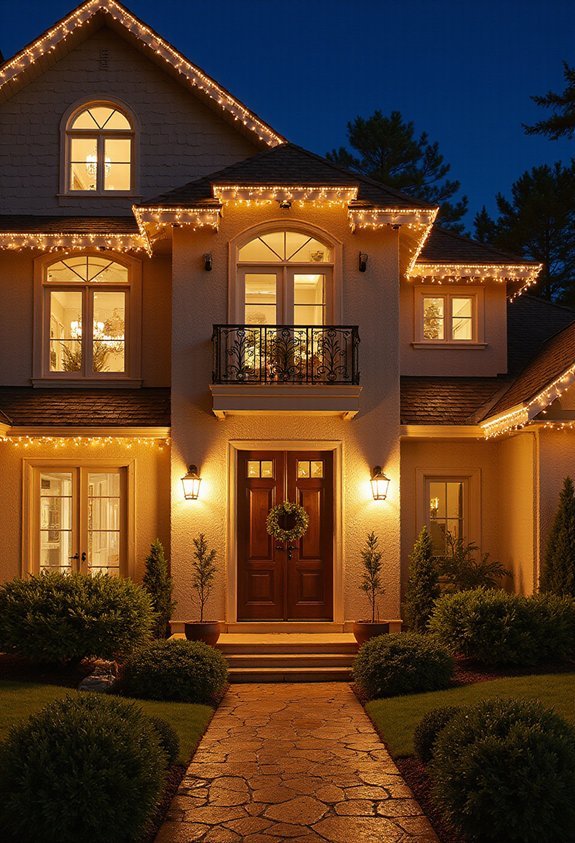
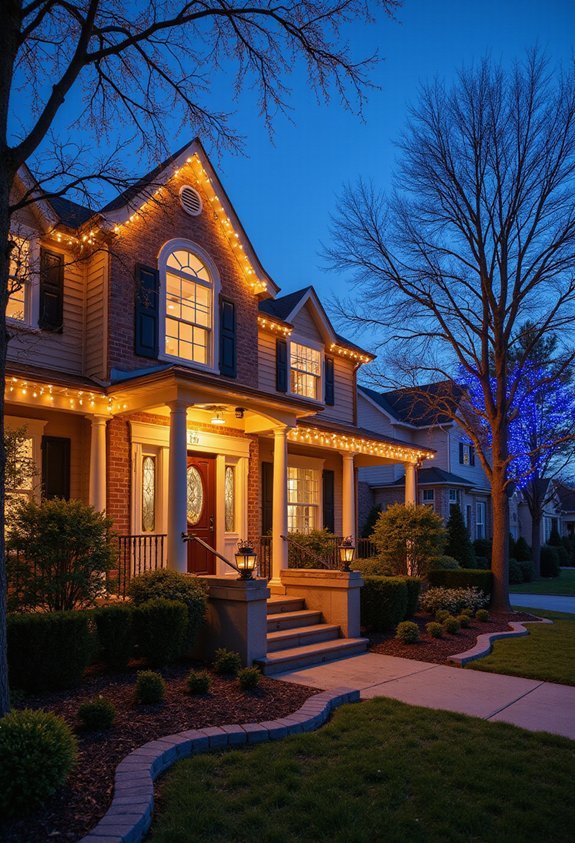
Because your entryway’s the first thing visitors notice when they arrive at your home, you’ll want to concentrate your most eye-catching decorations in this area to create a strong visual impact. Position bright, multicolored lights around your front door frame, which’ll draw immediate attention and welcome guests effectively. String lights along your porch railing or drape them across your entryway columns to establish height and dimension. Consider adding illuminated wreaths, garland, or luminous figures near your entrance, which’ll enhance the focal point you’re creating. Layer different light types and colors strategically, ensuring your entryway stands out distinctly from surrounding yard areas. This concentrated approach maximizes visual appeal while minimizing the number of lights you’ll need elsewhere, ultimately creating an impressive entrance display that appears professionally designed.
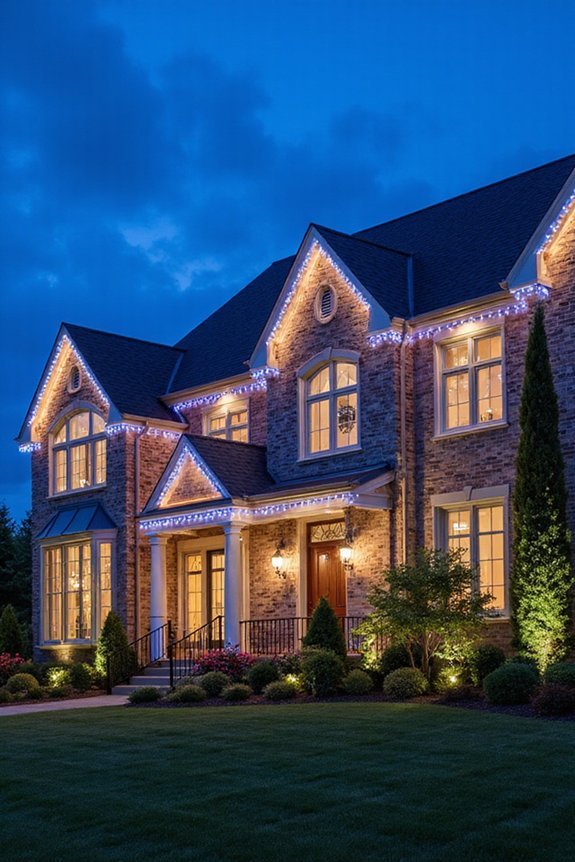
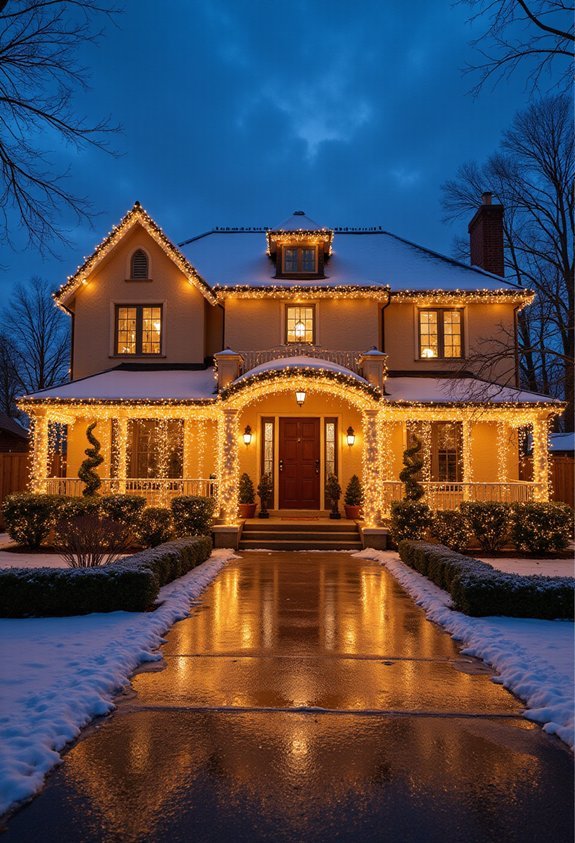
Frame Your Roofline With Precision and Balance
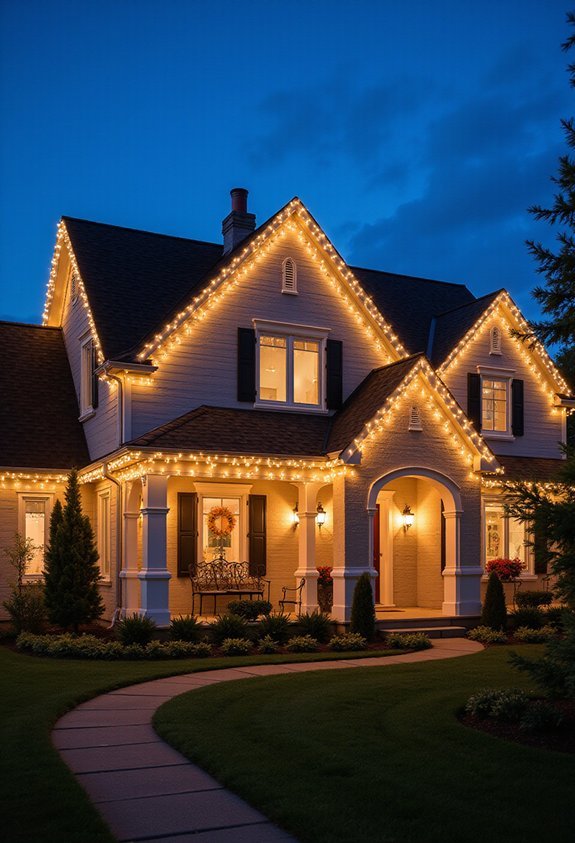
After you’ve established a welcoming focal point at your entryway, you’ll want to extend your lighting design upward to frame your home’s roofline, which’ll create a complete and polished appearance that ties your entire front yard display together. To achieve precision, measure your roofline carefully before purchasing lights, ensuring you have adequate coverage without excess or gaps. Space your lights evenly along the edge, typically six to twelve inches apart, depending on your desired brightness and light density. Use clips or hooks designed specifically for roofline installation to secure lights firmly, preventing sagging or shifting during wind or weather. Maintain consistent color temperature throughout, selecting either warm white or cool white lights exclusively, as mixing creates visual discord that undermines your sophisticated aesthetic.
Layer Your Lights for Depth and Dimension
How can you transform a flat, one-dimensional lighting display into something that genuinely captivates viewers? You’ll layer your lights strategically by positioning them at different distances from your home’s front. Start by placing string lights close to your house, then add lights further forward toward your yard’s perimeter, creating depth that draws the eye inward and outward simultaneously. You’ll also vary your light heights—install some lights along your roofline, others on bushes or posts, and additional strands at ground level. This vertical variation prevents your display from appearing monotonous. Additionally, you’ll combine different light types: warm white bulbs for foundational elements, cool white for accents, and colored lights for selective highlighting. This strategic layering produces visual interest and professional-quality dimension.
Vary Mounting Heights for Visual Drama
While layering your lights creates depth, varying the heights at which you mount them will dramatically amplify the visual impact of your entire display. You’ll want to attach lights at multiple levels, including rooflines, gutters, posts, and ground level, to create a dynamic three-dimensional effect that captures attention from different viewing angles. Install uplighting along your foundation to illuminate lower sections, position string lights at mid-height along railings or fences, and stretch strands across your roofline at the highest point. This strategic height variation prevents your display from appearing flat and one-dimensional, instead creating layers that draw the viewer’s eye upward and across your yard in a sophisticated, intentional pattern.
Space Your Lights Evenly for a Polished Look
Even spacing between your lights is essential for achieving a professional, well-organized appearance that demonstrates intentional design rather than random placement. You’ll want to measure the distance between each light fixture carefully, ensuring consistent gaps along your roofline, walkway, or fence. Use a tape measure to mark intervals, whether you’re spacing lights twelve, eighteen, or twenty-four inches apart, depending on your display’s scale. Uniform spacing creates visual rhythm that guides viewers’ eyes smoothly across your yard. When you maintain this consistency, your display appears intentional and expensive, rather than haphazardly arranged. Pay special attention to corners and junctions where spacing might naturally shift, adjusting your pattern beforehand to accommodate these areas seamlessly without disrupting the overall balance.
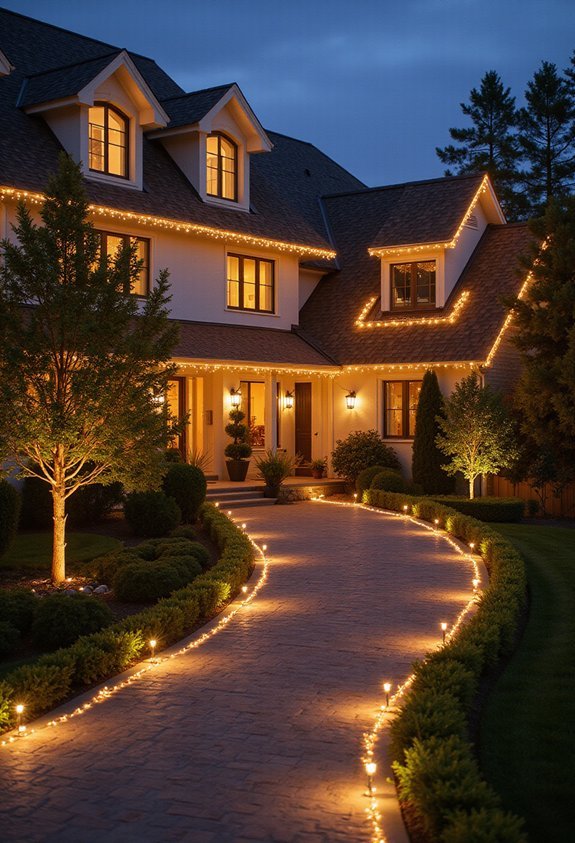
String Lights Along Pathways and Walkways
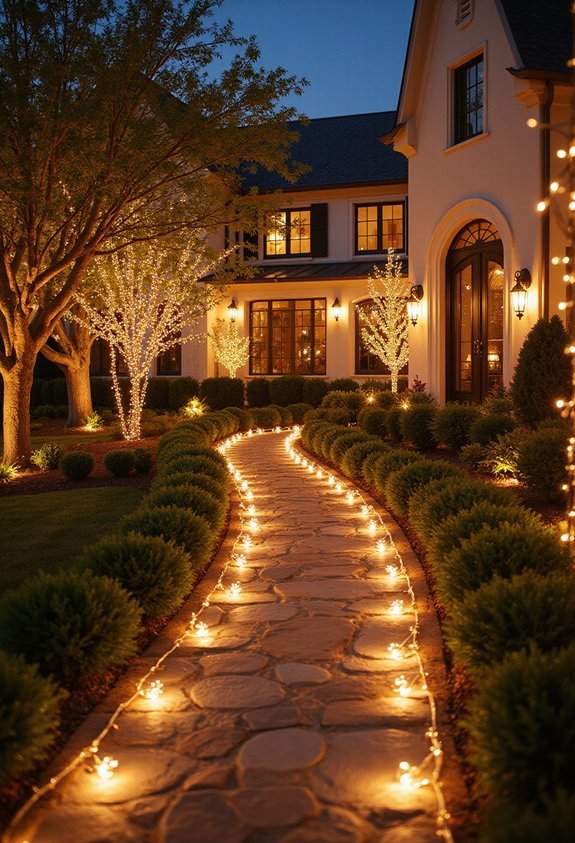
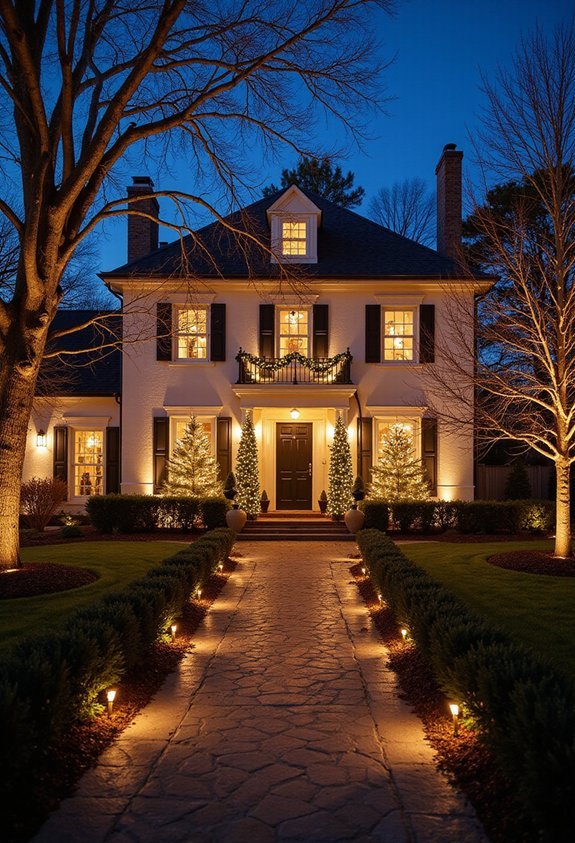
Why shouldn’t your entryway and pathways receive the same attention as your roofline? Stringing lights along walkways creates an inviting entrance that guides visitors while enhancing your home’s overall visual impact. You’ll want to drape warm white or soft-colored lights along both sides of your pathway, spacing them approximately twelve to eighteen inches apart for consistent coverage. Secure lights using clips or hooks to prevent sagging and guarantee safety. Consider outlining your front steps with lights, positioning them at regular intervals along each edge. This technique draws attention to architectural features and creates depth throughout your landscape. Pathway lighting also serves a practical purpose, illuminating walkways for nighttime visitors while maintaining the polished, intentional appearance that distinguishes expensive-looking displays from amateur efforts.
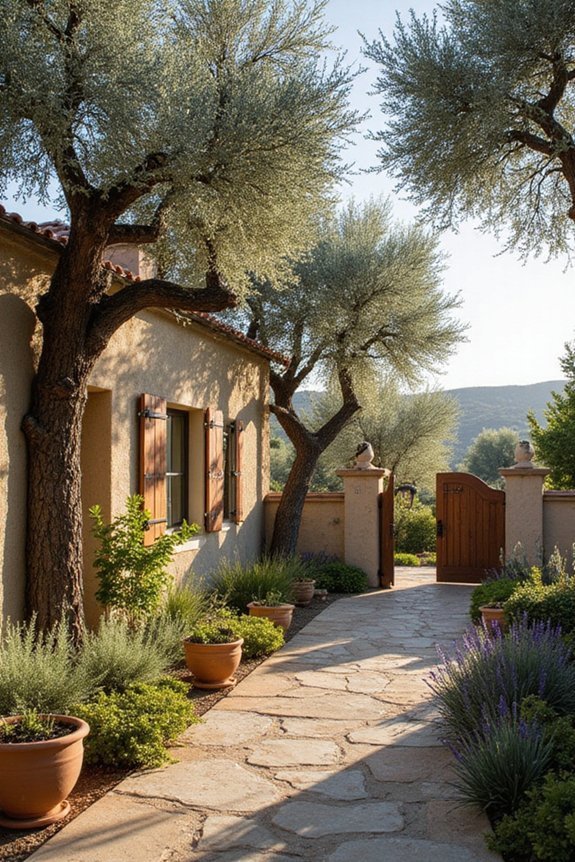
Wrap Trees and Shrubs for Maximum Impact
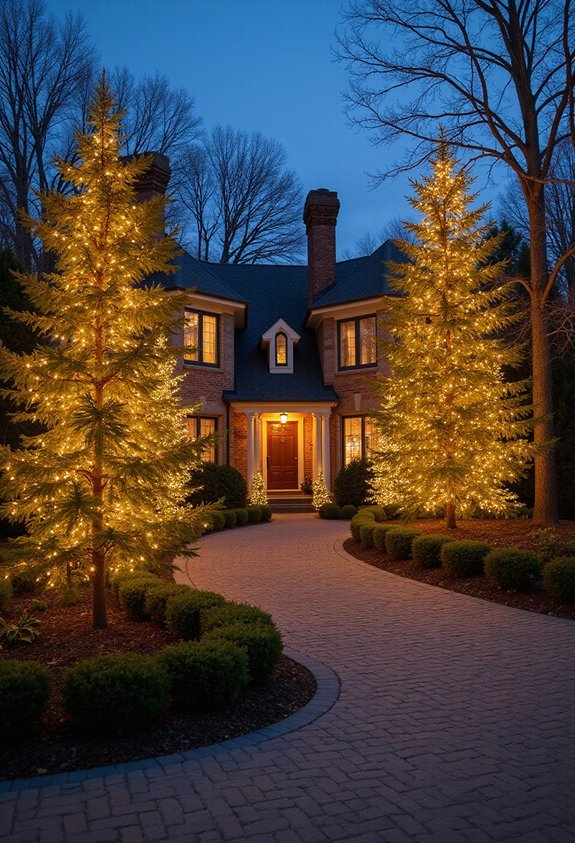
Since trees and shrubs provide natural focal points in your yard’s landscape, wrapping them with lights transforms these existing structures into stunning visual anchors that draw the eye and create dimension throughout your front yard display. You’ll want to start at the base of each tree, spiraling the light strands upward around the trunk and branches, spacing them evenly for a polished appearance. For shrubs, weave lights horizontally through the foliage, ensuring coverage on all visible sides. Use warm white or cool white lights consistently throughout your yard for cohesion. Secure the strands gently with soft ties or clips, avoiding damage to bark and branches. This wrapping technique creates depth and visual interest, making your landscape appear professionally decorated and considerably more expensive than the actual investment.
Use Net Lights on Bushes for Full Coverage
Net lights offer an efficient alternative to wrapping individual strands around bushes, allowing you to cover larger shrub areas quickly and uniformly with minimal effort. You’ll drape these pre-assembled net-style light strings directly over your bushes, securing them with small clips or stakes to prevent shifting from wind or weather. This method creates a polished, full appearance since the lights distribute evenly across the entire surface, eliminating visible gaps that single-strand wrapping sometimes produces. When selecting net lights, you should measure your bush dimensions to guarantee you’re purchasing the correct size, as nets come in various widths and lengths. You’ll find that net lights consume less installation time compared to traditional wrapping techniques, making them ideal for larger landscaping projects where inclusive coverage matters most.
Outline Windows and Doors With Elegant Lines
After you’ve covered your bushes with net lights, directing your attention to your home’s architectural features will create a polished, cohesive display that ties your entire front yard together. Outline your windows and doors with string lights to highlight these structural elements and add sophistication to your home’s exterior. You’ll want to use warm white or cool white lights depending on your existing décor, ensuring they complement your overall color scheme. Run lights along the top and sides of each window frame, then down around your doorway in neat, parallel lines. This technique emphasizes your home’s geometry and creates elegant visual boundaries that distinguish your house from the surrounding landscape. The result is a refined, intentional appearance that suggests professional installation and careful planning.
Mix Light Colors Strategically (Not Randomly)
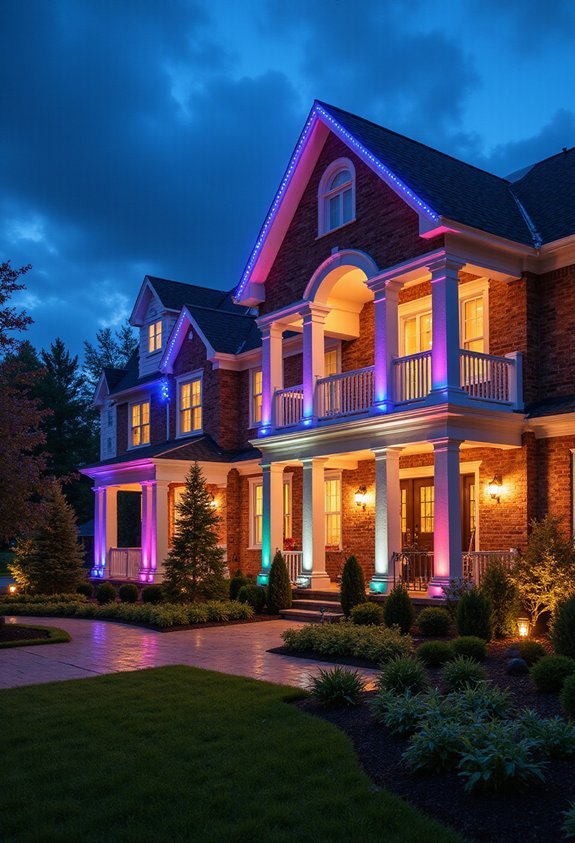
While it’s tempting to combine every color of lights you’ve got on hand, you’ll create a more impressive display when you’re intentional about which colors you’re mixing together. Choose a primary color scheme first, such as warm white and gold, cool white and blue, or multicolor with white accents. Limit yourself to two or three colors maximum to maintain visual cohesion and sophistication. Warm whites pair beautifully with amber and soft gold tones, creating an elegant, classic appearance. Cool whites work well with blue, purple, or silver combinations for a modern aesthetic. If you’re using multicolored lights, anchor them with white lights to prevent the display from appearing chaotic. Strategic color placement, where you concentrate similar colors in sections rather than scattering them randomly throughout your yard, enhances the overall professional quality of your arrangement.
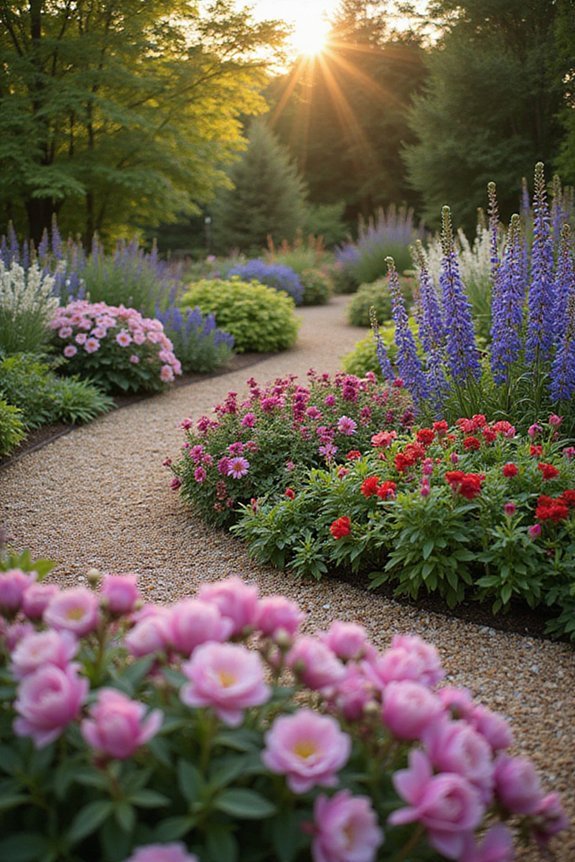
Build Color Gradients for a Luxury Look
Once you’ve established your color scheme, you can elevate your display by creating gradients that move seamlessly from one shade to another across your yard. Start by placing your darkest color on one side of your house, then gradually shift to lighter shades as you move toward the center or opposite end. This progression creates visual depth and sophistication that catches the eye. Use warm whites to bridge between contrasting colors like deep blue and soft purple, allowing the shift to feel natural rather than abrupt. Position lights strategically along pathways, rooflines, and trees to guide the gradient flow. This layered approach demonstrates intentional design choices, making your display appear professionally curated and expensive while maintaining visual harmony throughout your front yard.
Use Icicle Lights Sparingly for Elegance
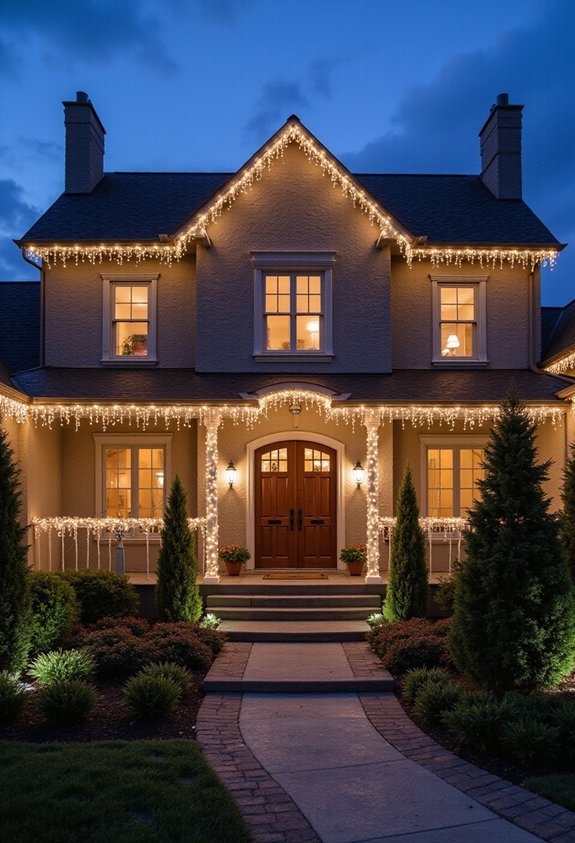
Many people think that covering their entire house with icicle lights will create a dramatic, luxurious appearance, but using them strategically actually produces a more sophisticated and intentional look. Instead of draping icicles across every roofline, you’ll want to focus on key architectural features like entryways, windows, or roof peaks that naturally draw attention. This selective placement creates visual interest without overwhelming your yard’s design. You should choose icicle lights in consistent colors that match your existing display, ensuring they complement rather than compete with other lighting elements. By restraining yourself to specific areas, you’ll achieve an elevated aesthetic that communicates careful planning and refined taste, which are hallmarks of expensive-looking holiday decorations.
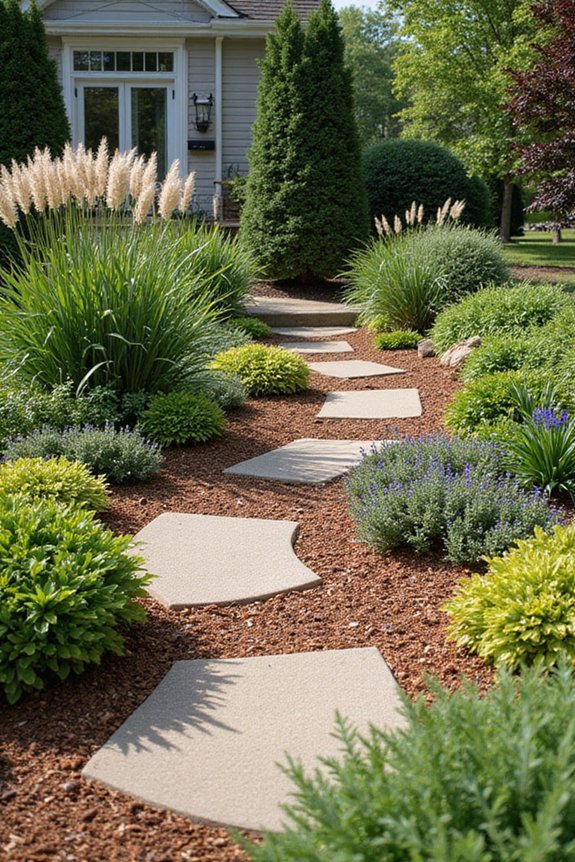
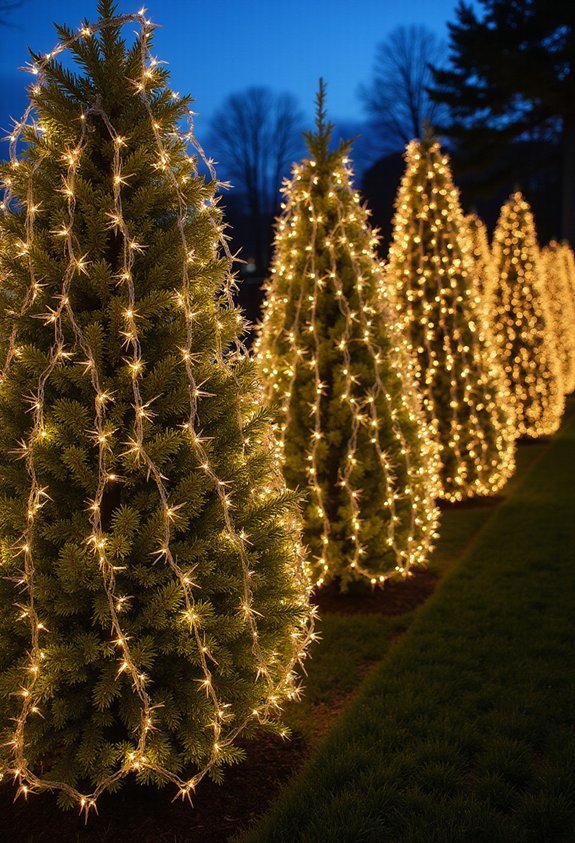
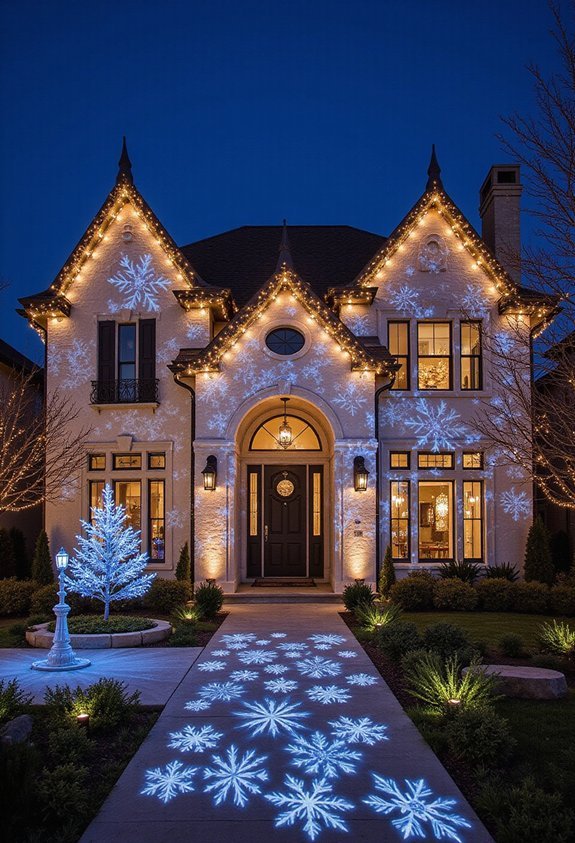
Install Uplighting Behind Landscaping for Glow Effects
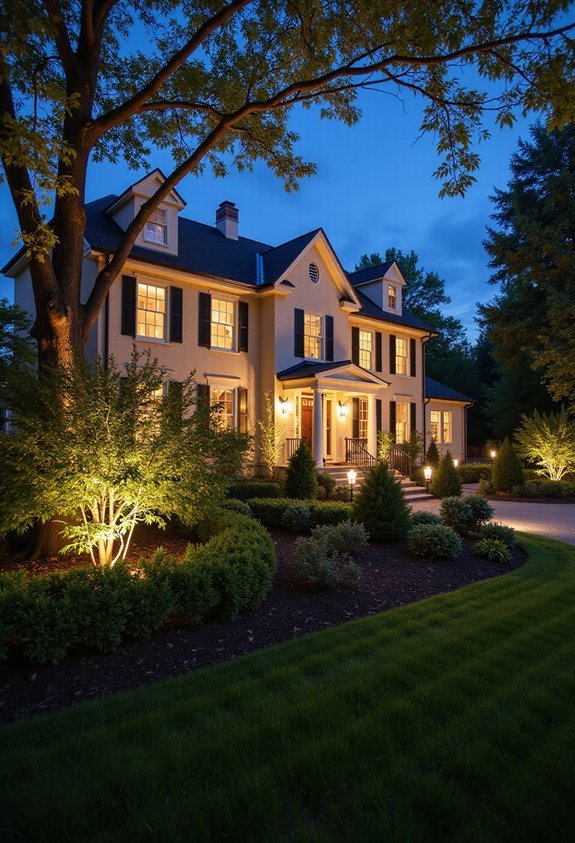
Strategic placement of uplighting behind your landscaping creates a stunning visual effect that’ll elevate your front yard’s appearance beyond standard string lights and icicles. Position uplights at ground level behind shrubs, trees, and bushes to cast dramatic shadows and highlight foliage with warm or cool tones. This technique works particularly well with evergreens, which’ll glow beautifully when illuminated from below. Install lights pointing upward along your home’s foundation plantings to create depth and dimension. Use weatherproof LED uplights with adjustable angles so you can direct light precisely where you need it. Space lights approximately three to four feet apart for consistent coverage, and choose fixtures that blend into your landscape during daylight hours. This strategic approach transforms ordinary plants into architectural focal points that showcase your home’s natural features elegantly.
Cluster Similar Displays to Create Order
Because visual chaos can overwhelm your front yard’s overall appearance, you’ll want to organize your Christmas lights by grouping similar displays together rather than scattering them randomly across your property. Clustering similar elements creates visual coherence and makes your yard feel intentionally designed rather than haphazardly decorated.
Group all string lights in one section, cluster your inflatable decorations in another area, and concentrate projection lights on a single wall or surface. This organizational strategy prevents your eyes from jumping chaotically between different decoration types, allowing viewers to appreciate each section distinctly.
When you arrange displays by category, you’ll establish clear zones that guide the viewer’s gaze logically through your yard. This methodical approach transforms your front yard into an organized, sophisticated holiday display that appears professionally planned and executed.
Hide Cords and Connections From View
What’s one detail that can instantly undermine an otherwise beautiful Christmas display? Tangled cords and visible connections scattered across your yard. You’ll want to conceal these unsightly elements because they distract from your carefully arranged lights and decorations. Start by planning your cord routes before installation, positioning them along the back of shrubs, behind fence lines, or underneath landscape edging where they’re hidden from view. Use cord covers or PVC tubing painted to match your home’s exterior, which blends seamlessly into the background. Secure cables with clips or ties to prevent tripping hazards while keeping them organized and out of sight. By strategically hiding your electrical connections, you’ll elevate your display’s overall appearance, making it look professionally designed and intentionally arranged rather than hastily assembled.
Invest in a Timer for Consistent On-Off Times
One of the most practical investments you can make for your front yard Christmas display is an outdoor timer that automates when your lights turn on and off each day. By installing a timer, you’ll eliminate the need to manually control your lights, ensuring they activate at dusk and deactivate at a predetermined time each evening. This consistency creates a professional appearance and prevents you from forgetting to turn lights off, which reduces energy waste and lowers your electricity bills. Choose a timer with weather-resistant features and easy-to-program settings that accommodate seasonal daylight changes. Digital timers with multiple on-off cycles allow you to customize your display’s schedule precisely, giving your home a polished, intentional look throughout the holiday season.
Use Dimmers to Control Intensity and Mood
While timers guarantee your lights operate on a consistent schedule, dimmers take your display to the next level by letting you adjust the brightness of your lights to create different moods and effects throughout the evening. You can start with full brightness during peak viewing hours when family and neighbors are most likely to admire your display, then gradually reduce the intensity later in the night for a softer, more subtle appearance. Dimmers also help you conserve energy and extend your light bulbs’ lifespan by running them at lower wattage during off-peak hours. Many modern dimmers work wirelessly with your existing timer system, allowing you to program multiple brightness levels that automatically change at scheduled times without requiring manual adjustments.
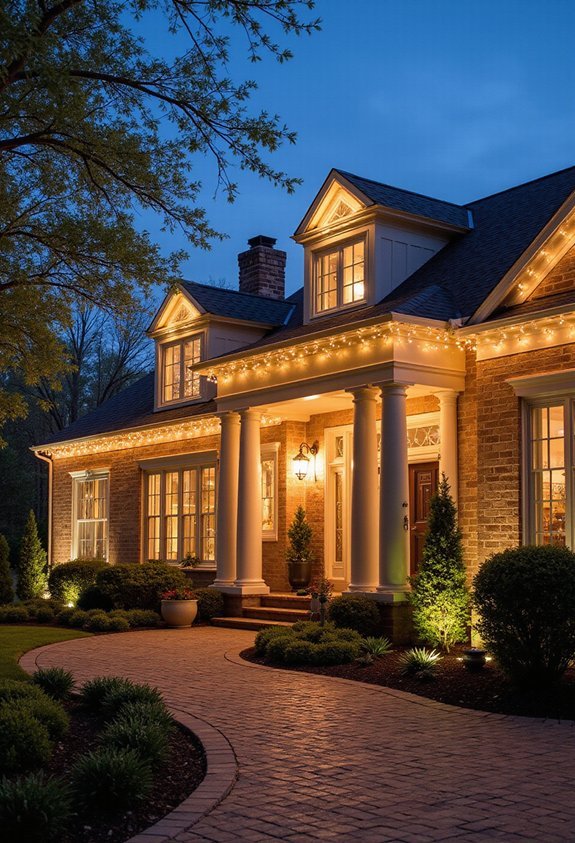
Add Uplighting to Highlight Your Home’s Architecture
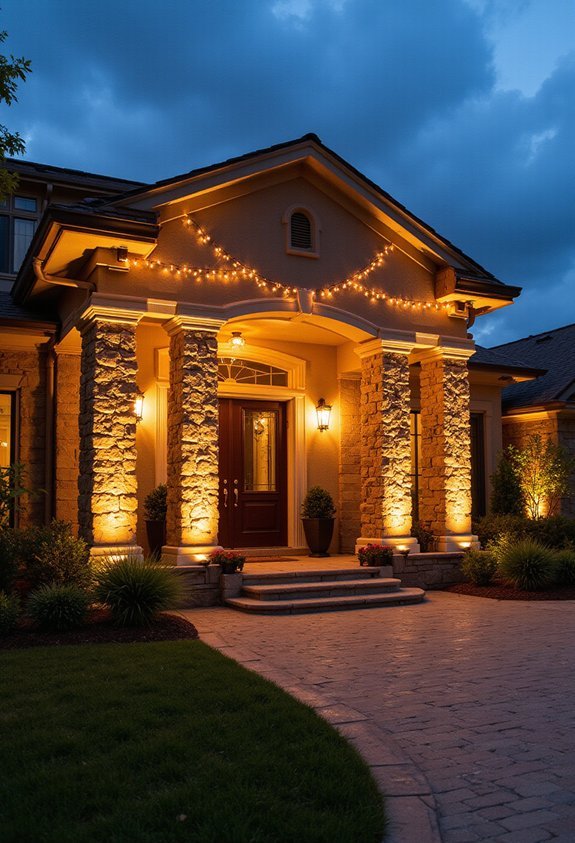
Beyond controlling brightness levels with dimmers, you can strategically position lights to showcase the unique features of your home’s exterior. Uplighting involves placing fixtures at ground level, angling them upward to illuminate architectural elements like columns, rooflines, and decorative stonework. This technique creates dramatic shadows and depth that enhance your home’s visual appeal substantially. Position uplights at least two feet away from your house’s foundation, directing beams upward at a 45-degree angle for best results. You’ll want to use warm white or colored LED lights to complement your home’s existing color palette. Uplighting transforms ordinary architectural details into focal points, making your display appear professionally designed and far more expensive than standard string light arrangements.
Sync Lights to Music for Premium Appeal
Taking your front yard display to the next level means synchronizing your Christmas lights with music, which creates an immersive experience that captures attention and transforms your home into an entertainment destination. You’ll need a controller that’s compatible with both your lights and a music source, whether that’s a smartphone app or a dedicated device. Start by programming your lights to match the beat, rhythm, and melody of your chosen songs. You can adjust timing so that color changes, brightness variations, and light sequences align perfectly with musical peaks and shifts. This coordination requires patience during setup, but the result delivers a polished, professional appearance that impressively showcases your holiday investment and creativity.
Add Projection Mapping for Wow Factor
Projection mapping builds on the synchronized light displays you’ve already created by adding dynamic visual elements that transform your home’s exterior into a canvas for animated images and patterns. You’ll need a projector designed for outdoor use, which handles brightness and weather conditions effectively. Position the projector to cover your home’s front surface, ensuring you adjust angles and focus for crisp images. Install mapping software that coordinates with your existing light system, creating seamless shifts between projections and synchronized lights. Test different content options, including holiday animations, moving snowflakes, or custom designs that match your home’s architecture. This technology elevates your display profoundly, making it distinctly more impressive than standard lighting alone, and you’ll notice the substantial difference in visual impact from your street.
Conclusion
You’ve now got all the tools you need to transform your yard into a professional-looking holiday display without overspending. By strategically layering warm white foundation lights, energy-efficient LEDs, and architectural uplighting, you’ll create impressive depth and dimension. Studies show that homes with coordinated outdoor lighting increase property appeal by up to 27 percent, making your investment worthwhile. Start with your entryway focal point, then expand outward for maximum visual impact.