Every succulent lover ends up with a stack of plain terracotta pots. They’re cheap, they breathe, and they look exactly like every other pot on the shelf. A little paint fixes that, and these succulent pot painting ideas show you how to do it without hurting the plant inside.
You’ll find 15 designs, from a quick dipped rim to gold leaf bands and folk-style cobalt florals. Most need nothing more than acrylic craft paint, painter’s tape, a paint pen, and an afternoon. Each idea is paired with a specific succulent, like echeveria, zebra haworthia, or string of pearls, because the right plant is what makes a painted pot look finished.
The practical side is covered too. Terracotta is porous, so brushing on clay pot sealer before you paint keeps water from bubbling the finish. Leaving some clay bare helps the soil dry out between waterings. Late fall is a good time to start, since many succulents are coming indoors and handmade pots make easy holiday gifts.
1. Pastel Ombre Pots That Fade Into Echeveria Pink
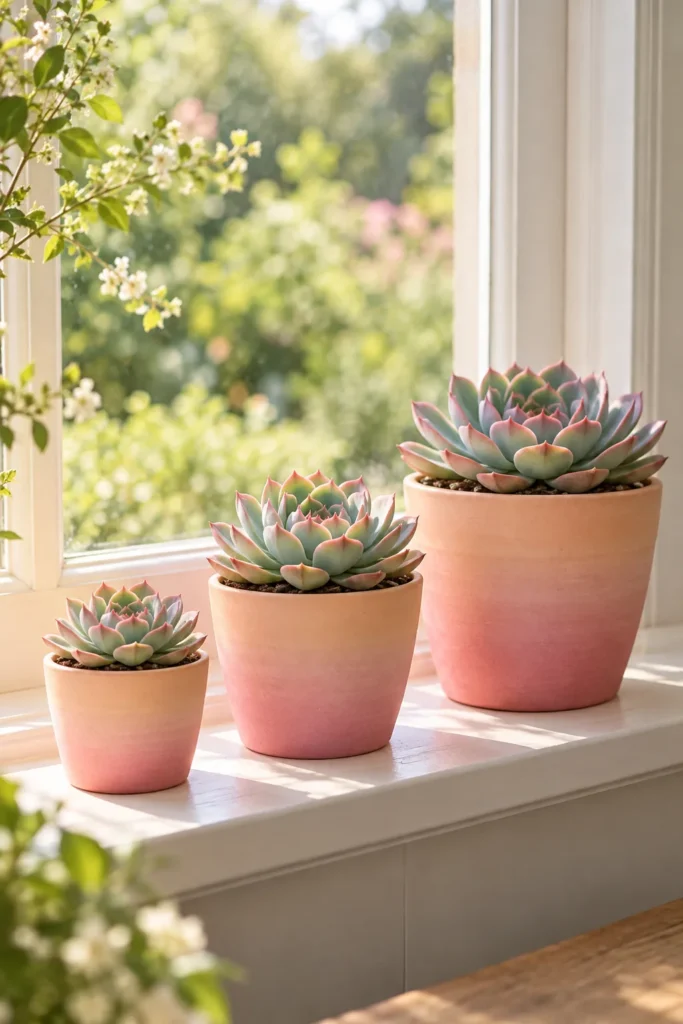
A blush ombre fade makes a plain terracotta pot look store bought. Start with a white base coat so the pastels stay soft instead of muddy. Paint the bottom third blush pink and the top third pale peach. Then blend the middle with a damp brush while both colors are still wet.
The plant finishes the job. A pink-edged echeveria rosette sitting above that fade looks like the color climbed out of the pot and into the leaves. Line up a small, a medium, and a large pot on a sunny kitchen windowsill, and the gradient reads as a set.
Planting note: Brush clay pot sealer inside and out before any paint goes on. Water seeping through bare terracotta is what lifts pastel paint into bubbles.
2. Color-Dipped Terracotta With a Raw Clay Base
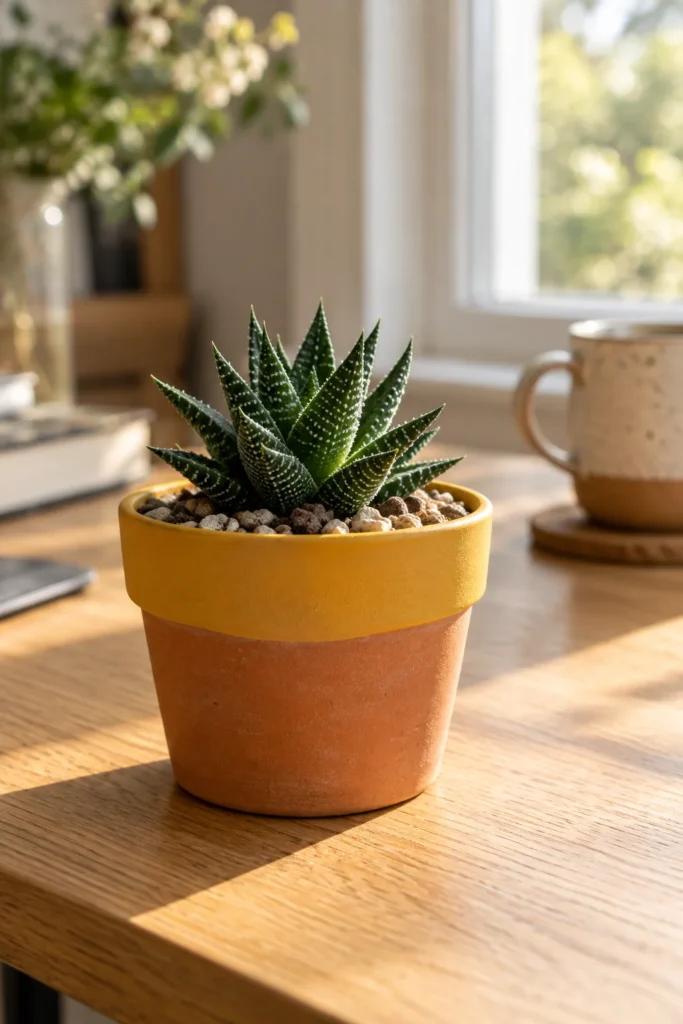
Worried that paint will trap moisture around your succulent’s roots? A color-dipped pot gets around that by leaving most of the clay bare. Only the rim and top band get painted, here in deep mustard yellow. The lower two thirds stays raw terracotta, which keeps pulling water out of the soil.
To get the dip line, hold the pot upside down by its base and lower the rim into a wide tub of paint at a slight tilt. Drag a foam brush around the edge right away to catch drips. A slanted line looks intentional, so don’t chase perfect.
The mustard warms up a dark green haworthia planted in gritty cactus and succulent potting mix. On a bright home office desk, the bare clay keeps it looking earthy. Let the soil dry fully between waterings.
3. Tape-Resist Triangles in Sage, Cream, and Rust
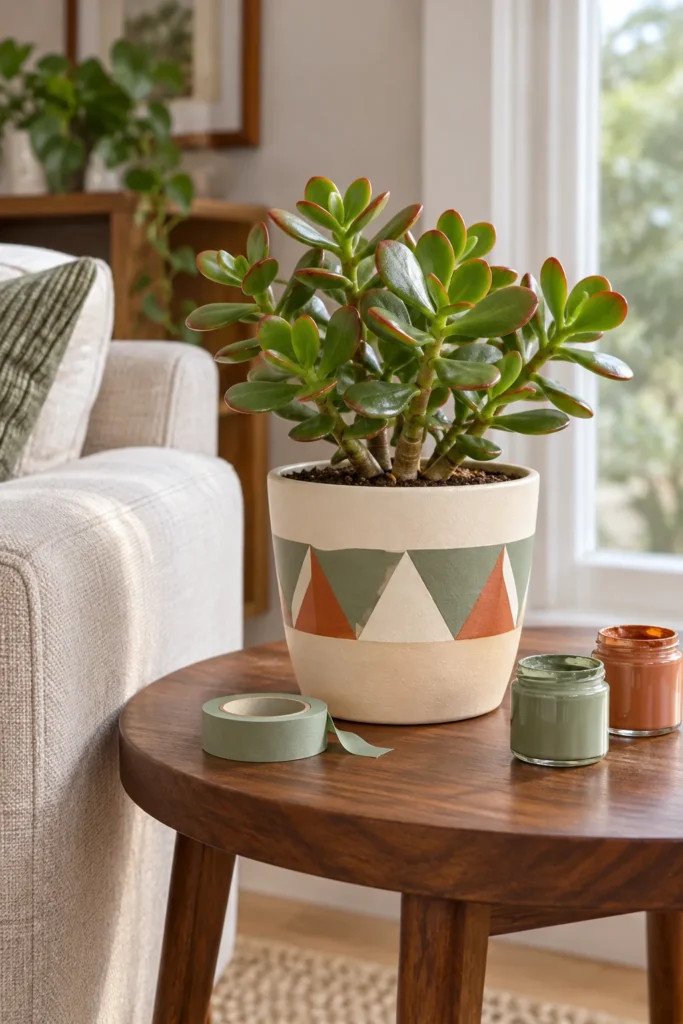
Painter’s tape does the hard work here. Paint the whole pot cream and let it dry. Then press short strips of tape around the middle at angles to mark off triangles. Fill a few with sage and a few with rust, and leave some cream so the pattern has room to breathe.
Round pots fight straight tape. Use narrow strips and press each edge down with a fingernail before painting. Pull the tape while the paint is still slightly tacky for the cleanest line. A chunky jade plant suits the bold shapes. The rust triangles pick up the reddish leaf edges jade often shows in bright light, which ties the plant and the pot together on a living room side table.
Get the look: a medium terracotta pot, cream, sage, and rust acrylic paint, narrow painter’s tape, and a jade plant.
4. Pots Painted to Match the Succulent Inside
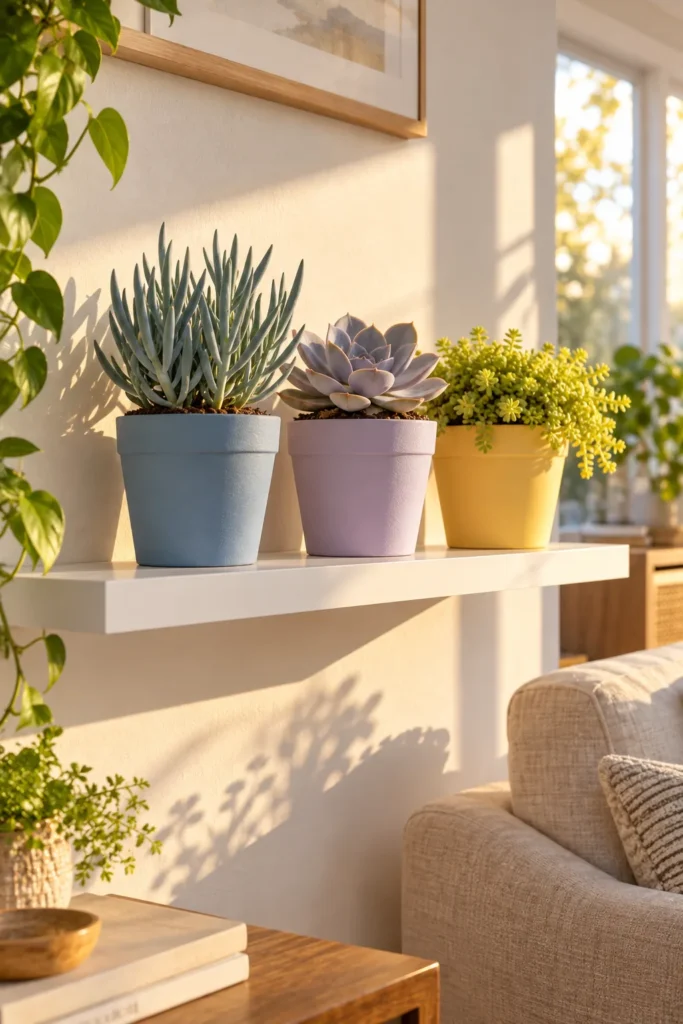
The fastest way to make a painted pot look designed is to steal its color from the plant. Hold your succulent up to paint chips at the hardware store. Pick the shade hiding in the leaves, not the obvious green, and grab a sample pot of it.
A dusty blue pot under blue senecio looks calm and pulled together. Put the same plant in a bright red pot and the two fight for attention. Keep going with a pale lavender pot for a silvery ghost plant and a buttery yellow pot for golden sedum.
Line the three pairs along a white floating shelf. They read as one collection even with three different colors, because every pot repeats its own plant. For more ways to group them, these pretty succulent arrangements work with any palette.
5. Speckled Terrazzo Pots With a Toothbrush Flick
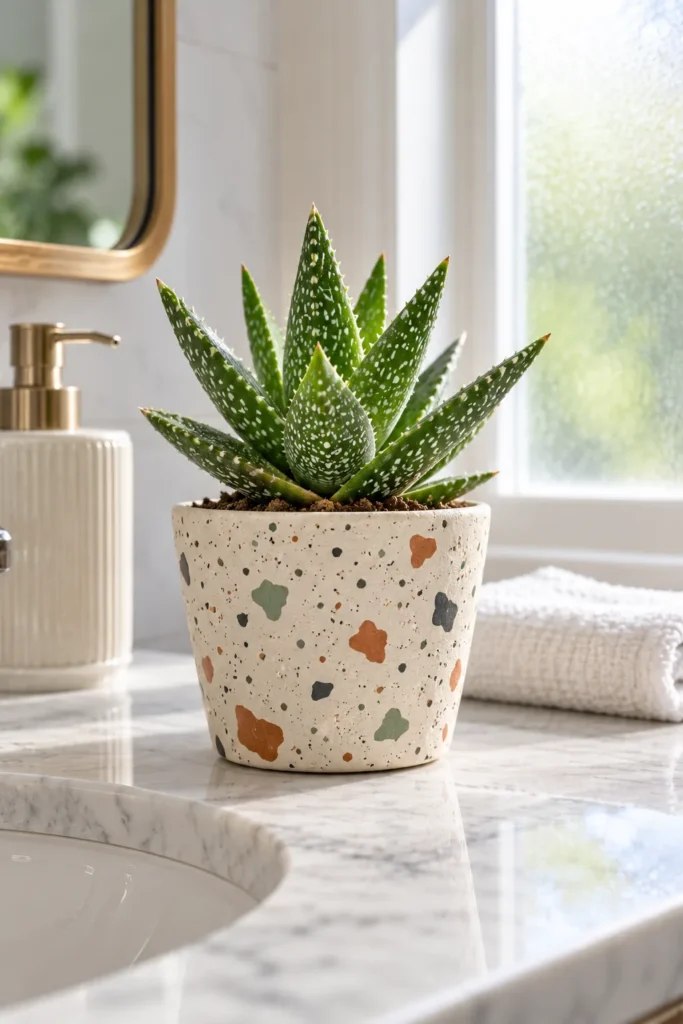
Look closely at a terrazzo pot and the charm is all in the flecks. Tiny chips of rust, sage, and charcoal sit scattered across a cream background like crushed stone. You can fake that look with an old toothbrush.
Paint the pot cream in two coats. Dip the toothbrush in slightly thinned acrylic and hold it close to the pot. Run your thumb across the bristles so fine specks land on the surface. Work one color at a time and let each dry. Then press a pencil eraser into paint to add a few bigger “chips.”
A small spotted aloe finishes it, because the white speckles on the leaves repeat the pattern on the pot. Set it on a white marble bathroom vanity by the window. Kids love the flicking part, so work outside or inside a cardboard box.
6. Black and White Line Art Pots for Zebra Haworthia
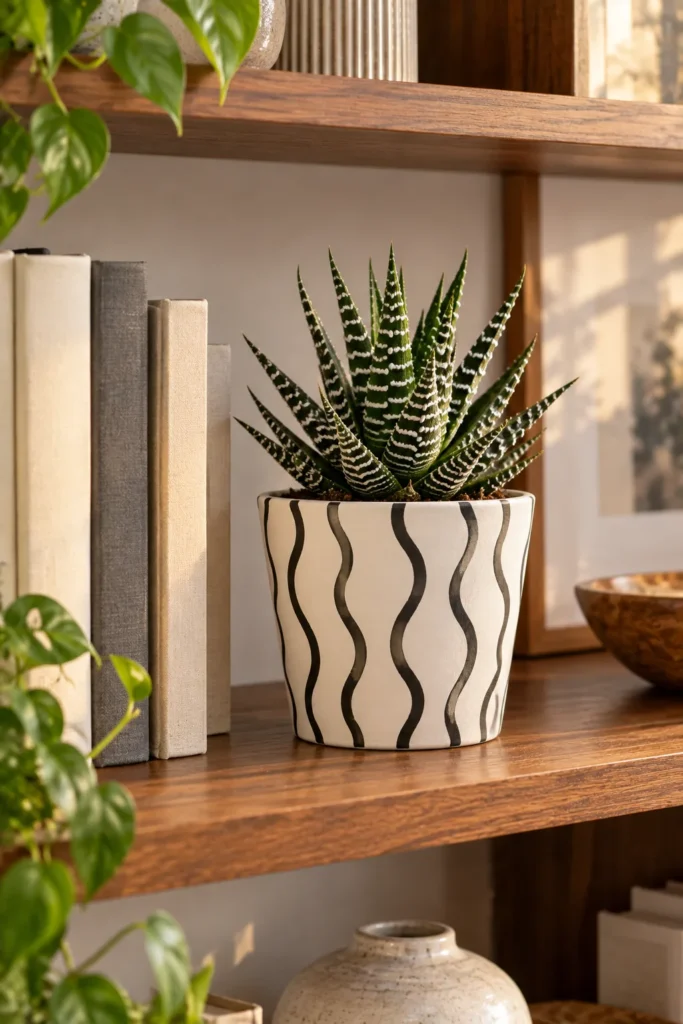
Black and white line art is the design to try if you’re nervous about painting. Give a terracotta pot two coats of matte white. Then draw loose, wavy vertical lines all the way around with a black acrylic paint pen. Wobbly lines look hand drawn on purpose, so there’s no way to get it wrong.
The pairing is the clever part. Zebra haworthia carries raised white bands across its dark leaves. The pot’s black lines flip that pattern, so plant and pot look like they were made for each other. Haworthia tolerates bright indirect light better than most succulents, which makes it a good fit for a walnut bookcase shelf beside a stack of books.
Styling note: Paint pens glide best over a sealed, base-coated surface. Once the lines cure, add a clear matte topcoat so watering splashes don’t smudge your hand painted succulent planters.
7. Dotted Mandala Rims on Mini Hens and Chicks Pots
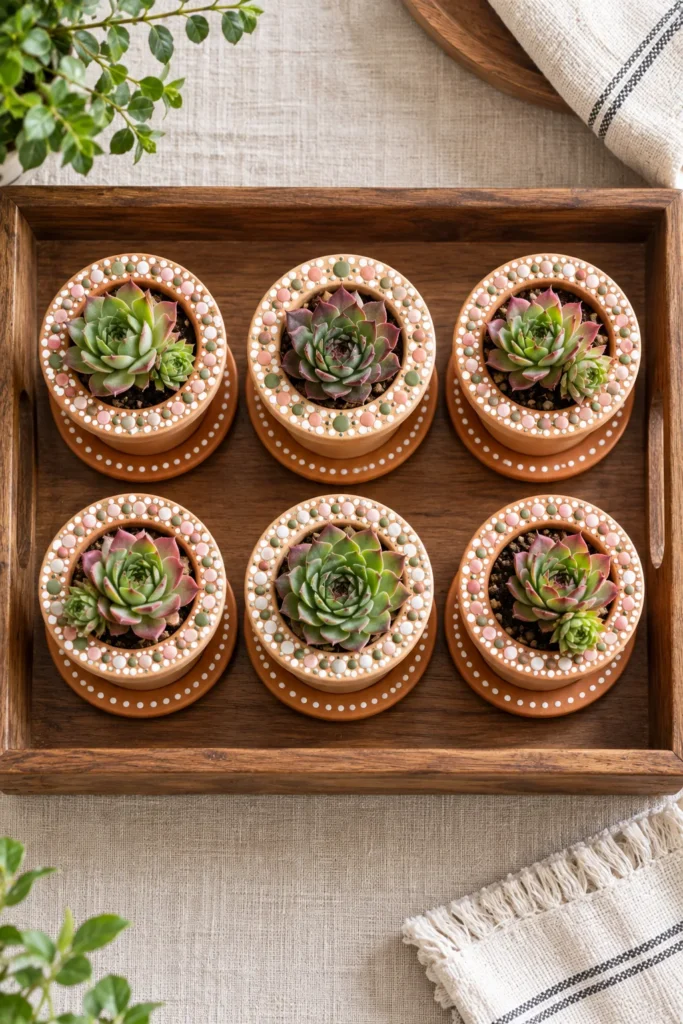
Tiny pots need tiny details, and dots are the easiest detail there is. Paint only the rims of mini terracotta pots. Start with one center dot, then build rings of smaller dots around it in white, blush, and sage. A dotting tool works, and so does the handle end of a paintbrush or a pencil eraser for bigger dots.
Keeping the paint on the rim leaves the body of each pot bare. That bare clay lets the soil dry quickly, which hens and chicks prefer. These little rosettes also send out baby offsets. Pot those up in more dotted minis and you have beginner-friendly succulent propagation that doubles as decor.
Styling note: Give each pot a matching mini saucer with a single ring of dots. Then group six on a wooden tray so they move together at watering time.
8. Whitewashed Aged Terracotta on a Potting Bench
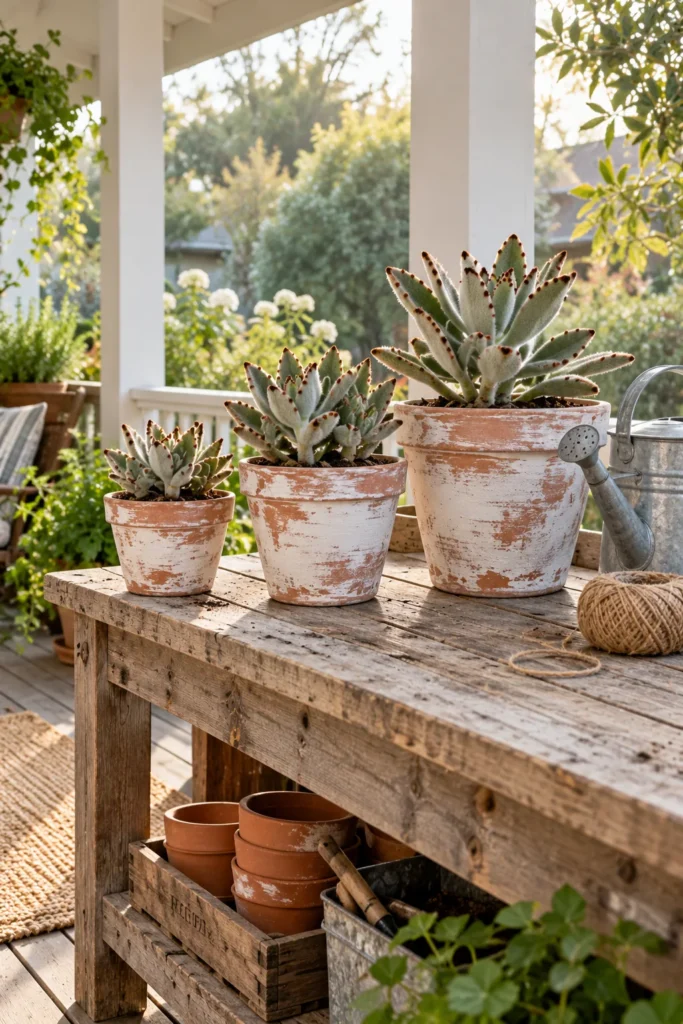
Brand new terracotta can look loud and orange, almost like it still has the price sticker on. A chalk paint whitewash knocks it back to the soft, chalky look of pots that have spent years in a garden shed.
Thin white chalk paint with a splash of water. Dry brush it on in quick, uneven strokes, then wipe some away with a rag while it’s wet. Let the clay show through in patches, and rub the rim with fine sandpaper so the edges look worn. A panda plant suits the finish, because its fuzzy silver-green leaves with brown tips have the same dusty softness.
Group three on a covered potting bench on the back porch with a galvanized watering can. Chalk paint wears quickly in the rain, so seal it with an exterior matte topcoat or keep the pots under cover.
9. Sleepy Little Faces With String of Pearls Hair
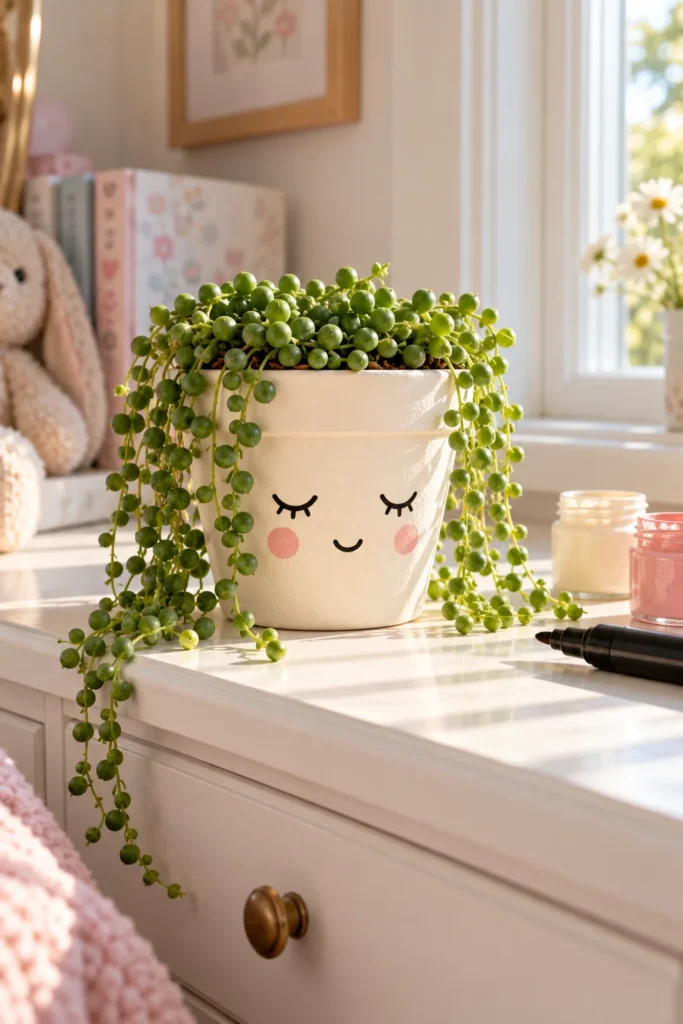
A sleepy face is the cutest beginner design, and it takes about three strokes. Paint a small terracotta pot soft cream. Draw two closed eyes as downturned curves with tiny lashes using a black paint pen. Add a small smile, then dab on two blush cheeks with a fingertip.
The plant does the hair. String of pearls spilling over the rim reads as a mop of green curls, so the pot looks like a little character napping on a kid’s bedroom dresser. Gardeners call trailing plants like this “spillers,” and they make every face pot funnier. String of pearls likes bright light and soil that dries out between waterings, so a sunny spot keeps the curls full.
You will need: a small terracotta pot, cream and blush acrylic paint, a black paint pen, and a string of pearls.
10. Matte White Pots With Gold Leaf Bands for Moonstones
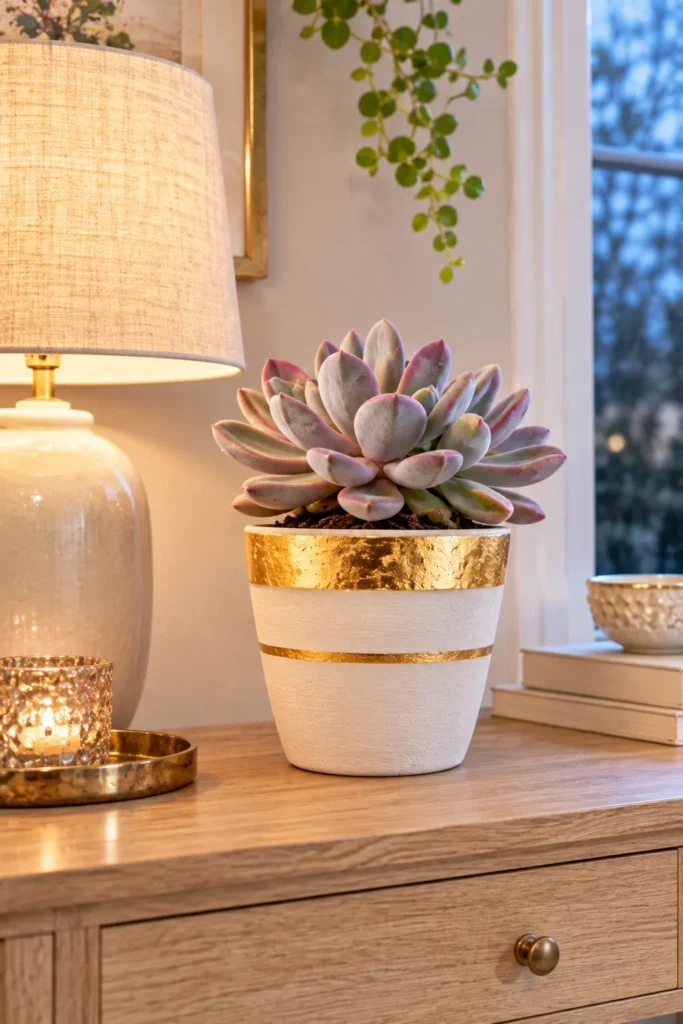
Paint a gold stripe and it often looks like craft paint. Lay down imitation gold leaf and it catches light like real metal. That difference is the whole idea behind this pot.
Paint a terracotta pot matte white. Brush a band of gold leaf adhesive just under the rim and let it turn tacky. Press on the leaf, then sweep away the loose flakes with a soft dry brush. A second, thinner band lower down gives the pot rhythm. Seal everything with a clear topcoat so the leaf doesn’t rub off.
Moonstones fit this pot well. Their plump, pearly leaves with a lavender blush look expensive next to gold. That’s especially true on an entryway console, where a lamp makes the metal glow in the evening.
11. Cobalt and White Talavera-Inspired Florals for a Paddle Plant
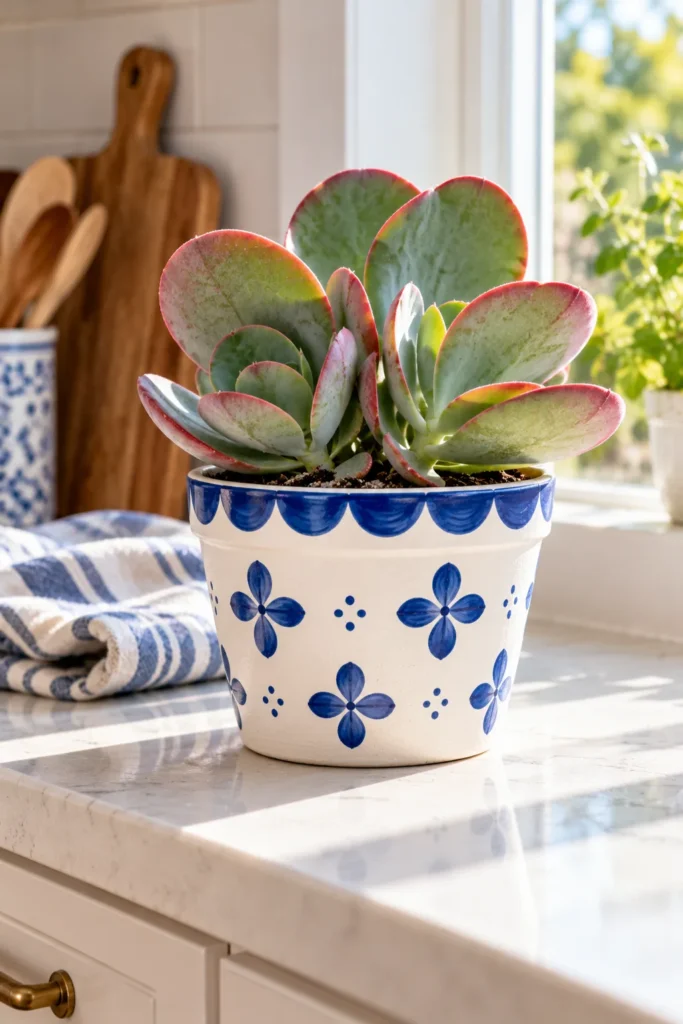
Blue and white is a classic pottery pairing, and it still looks fresh on a kitchen counter. This Talavera-inspired pot uses a white base, a scalloped cobalt band around the rim, and simple four-petal flowers repeated around the body with dots in between.
Sketch the flowers lightly in pencil first so the spacing works all the way around. Fill them with cobalt acrylic and a fine round brush, then add the dots with a blue paint pen. A paddle plant, sometimes sold as flapjack kalanchoe, stacks its round leaves like plates. The red edges those leaves get in bright sun look sharp against the cobalt.
Painting note: Work on one side, let it dry, then turn the pot. Resting your hand on wet florals is how smudges happen.
12. Thrifted Mismatched Pots in One Rust-to-Blush Family
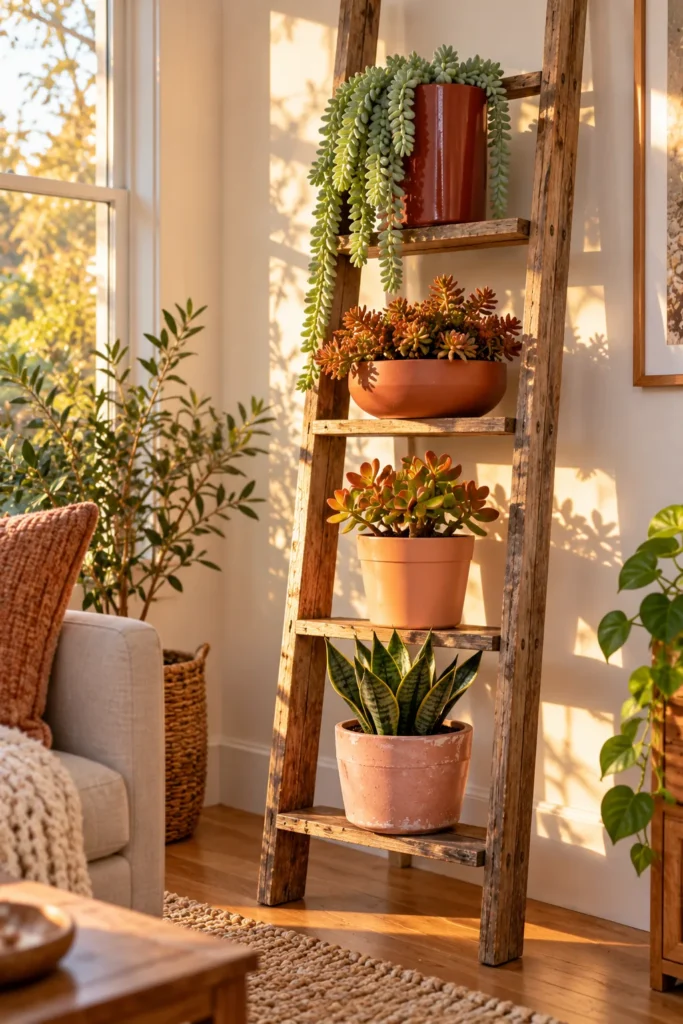
Thrift store shelves are full of odd pots: a glazed ceramic planter here, a plastic nursery pot there, a chipped terracotta one for pocket change. Painted in random colors, they look like clutter. Painted in one color family, they look collected on purpose.
Pick a range that runs from deep rust through terracotta and peach to soft blush, and give each pot one shade. That shared warmth ties together different shapes, so a tall cylinder and a squat bowl suddenly belong on the same ladder shelf. Fill them with warm-toned plants like coppery sedum, red-tipped crassula, and a trailing burro’s tail. If thrift finds are your thing, these easy succulent planter DIY ideas run on the same budget mindset.
| Thrifted pot | Prep before painting | Paint that works |
|---|---|---|
| Unglazed terracotta | Wipe clean, dry fully, seal inside and out | Acrylic craft paint |
| Glazed ceramic | Scuff the shine with fine sandpaper, then a bonding primer | Acrylic or spray paint |
| Plastic nursery pot | Wash off residue, then a primer made for plastic | Spray paint in light coats |
Check for a drainage hole before you buy. A pot without one works best as a cover with a plain nursery pot tucked inside.
13. Hand-Lettered Gift Pots for Holiday Season Swaps
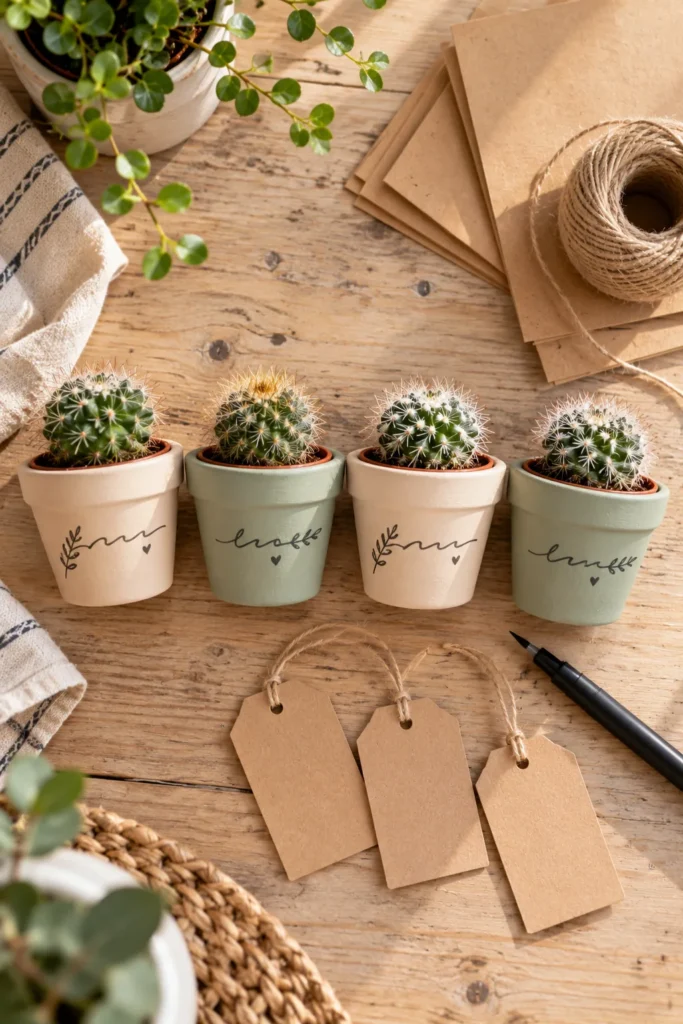
A name painted on a pot turns a small succulent into a real present. Paint the pots in a quiet base like oatmeal or pale sage. Then letter a name, a plant name, or a short pun of your own across the front with a fine charcoal paint pen. A pincushion cactus in a pot that says “Stay sharp” gets a laugh at any office gift swap.
Make a batch in one sitting at the kitchen table. Paint all the bases first, then letter the first pots while the others dry. Wrap each one in a square of kraft paper and tie it with jute twine and a blank kraft tag. Fold an extra layer of paper over the spines so nobody gets poked.
Gift tip: A clear matte topcoat keeps the lettering from wearing off at watering time. Tuck in a note to water only when the soil is dry.
14. A Painted Shallow Succulent Bowl for the Dining Table
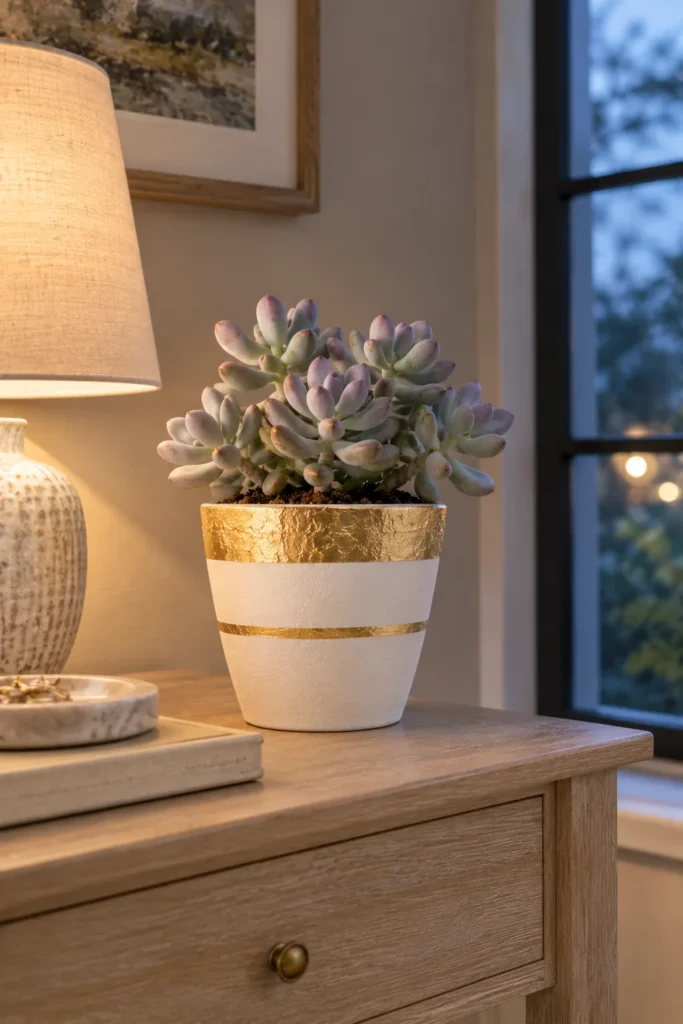
The painted band is what makes this bowl. A wide, shallow terracotta bowl gets a deep sage stripe around its outer rim and stays raw clay below. That one stripe makes it read as a centerpiece instead of a plant pot.
Plant it like a tiny landscape. Set a blue-gray echeveria rosette slightly off center. Ring it with low red-tipped sedum, and let a piece of string of bananas trail over the edge. Top dress the soil with pale pebbles so the gaps look finished.
Shallow bowls hold little soil. That suits shallow-rooted succulents, but it also means the bowl dries out faster near a sunny dining room window. Keep the arrangement low so people can still see each other across the table. For more planting combinations, these easy, low-mess succulent bowls work with a painted rim too.
15. Weatherproof Succulent Pot Painting Ideas for a Sunny Patio
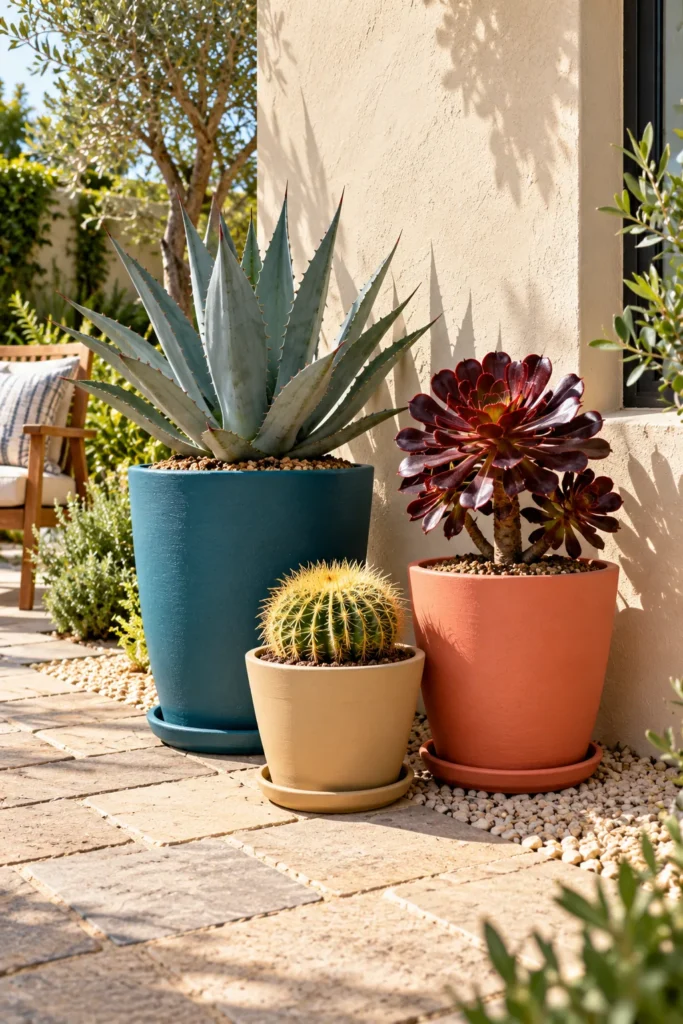
Outdoor pots take a beating from sun, rain, and sprinklers, so the paint plan changes. Start with larger terracotta pots and seal them inside, outside, and underneath. Paint with exterior acrylic, then finish with two light coats of outdoor clear sealer. Bold, simple color blocks hold up better than fine detail, because fading shows less on solid shapes.
Group three sizes on a sunny patio in deep teal, warm coral, and sand. Give each color a strong plant shape to frame. Put a spiky blue agave in the tallest pot, a deep burgundy aeonium rosette in the middle one, and a golden barrel cactus in the smallest. Set each pot on a saucer so runoff doesn’t stain the pavers, and empty the saucers after rain.
⚠️ Watch Out
Move painted terracotta indoors or under cover before freezing weather. Wet clay can crack in a hard freeze, and the paint usually flakes first. Bright colors also fade in full sun over time, so plan on a quick touch-up and a fresh topcoat each spring.
How to Paint Terracotta Pots for Succulents So the Paint Lasts
Every design in this list shares the same routine. Skip a step and the paint usually peels from behind, because terracotta pulls water from the soil straight through to the surface. Follow it in order and a painted pot can look fresh for years indoors. Outdoor pots get an exterior sealer on top.
The paint that lasts formula
Succulent Pot Painting FAQ
What kind of paint do you use on terracotta pots for succulents?
Acrylic craft paint is the easiest choice for indoor pots. It sticks well to sealed clay, dries fast, and comes in endless colors. Use exterior acrylic for patio pots, chalk paint for an aged look, and spray paint over a primer for plastic or glazed pots. Ideas 8, 12, and 15 cover each one.
Do you need to seal terracotta pots before painting?
Yes, if a living plant is going inside. Water moves through bare terracotta and gets trapped under the paint, which causes bubbling and peeling. Seal the inside, outside, and bottom, let it cure, then paint. A clear topcoat afterward protects the design from splashes.
Does painting a terracotta pot hurt succulents?
Not usually. Paint slows how fast the clay lets moisture escape, so the soil stays damp a little longer. Water only when the soil is completely dry. If you worry about root rot, try a design that leaves most of the clay bare, like the dipped pots in idea 2 or the dotted rims in idea 7.
Can you paint a pot that already has a succulent in it?
You can, but it isn’t ideal. Moisture from the soil moves through unsealed clay and can push the paint off from behind. If repotting isn’t an option, let the soil dry fully first. Cover the soil with paper while you work, and choose a rim-only or dipped design.
Can painted pots stay outside?
Yes, with the right finish. Use exterior paint, seal the pot inside and out, and add two light coats of outdoor clear sealer. Bright colors still fade in strong sun, so expect a touch-up each spring. Bring terracotta under cover before freezing weather, as idea 15 explains.
Conclusion
A plain pot and a small succulent already make a good pair. Paint just gives them some personality. Start with the easy wins, like the dipped rim or the sleepy face, and work up to gold leaf or cobalt florals once your brush hand feels steady. Seal first, paint in thin coats, and let the plant choose the color when you’re stuck. Most of these succulent pot painting ideas cost little more than a pot and a sample of paint, so try three at once. When you need new spots to show them off, browse these easy-care succulent container ideas. Save this for the weekend you finally tackle that stack of bare pots.