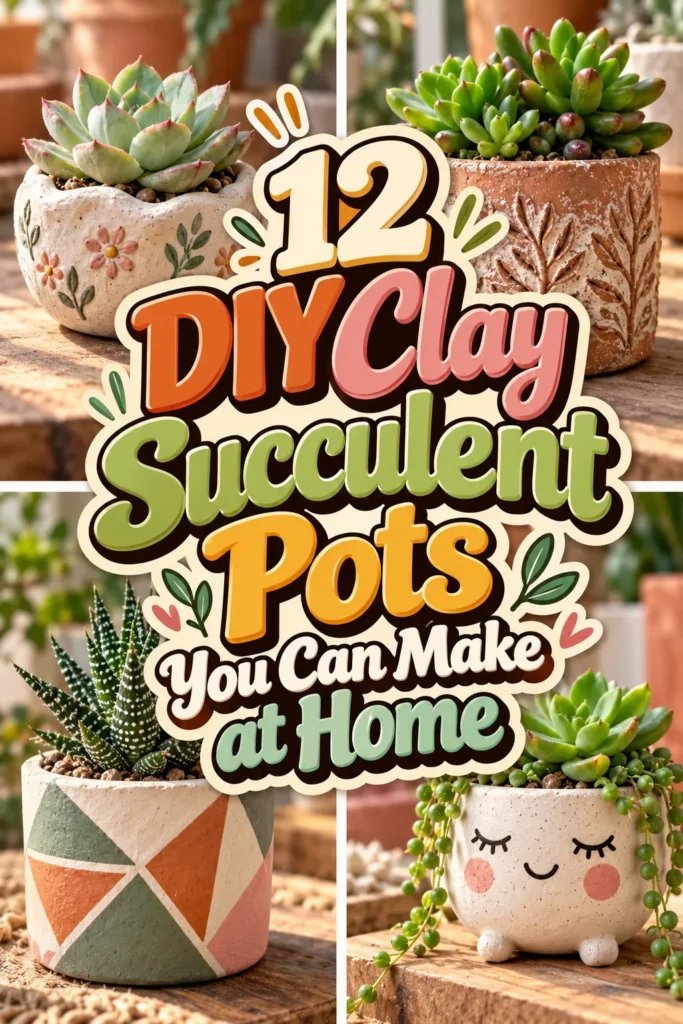
Store-bought succulent pots start to look the same after a while: the same terracotta, the same white ceramic, the same price tag. Making your own is easier than it looks. These DIY clay succulent pots need nothing more than a kitchen table, a rolling pin, and an afternoon. No kiln, no pottery wheel.
You’ll find 12 projects, from a first-timer pinch pot to coil-built ribbed planters and a balloon-molded pot for the patio. Each one is paired with a real succulent, like echeveria, string of pearls, or a spiky agave, so you can see the finished look before you start.
There’s an honest catch with homemade succulent planters: air-dry clay softens when it stays wet. So every project shows how to handle water. That might be a drainage hole, a hidden liner, a good sealer, or switching to polymer clay, which bakes waterproof in a home oven.
1. Classic Pinch Pots With a Straw-Punched Drainage Hole
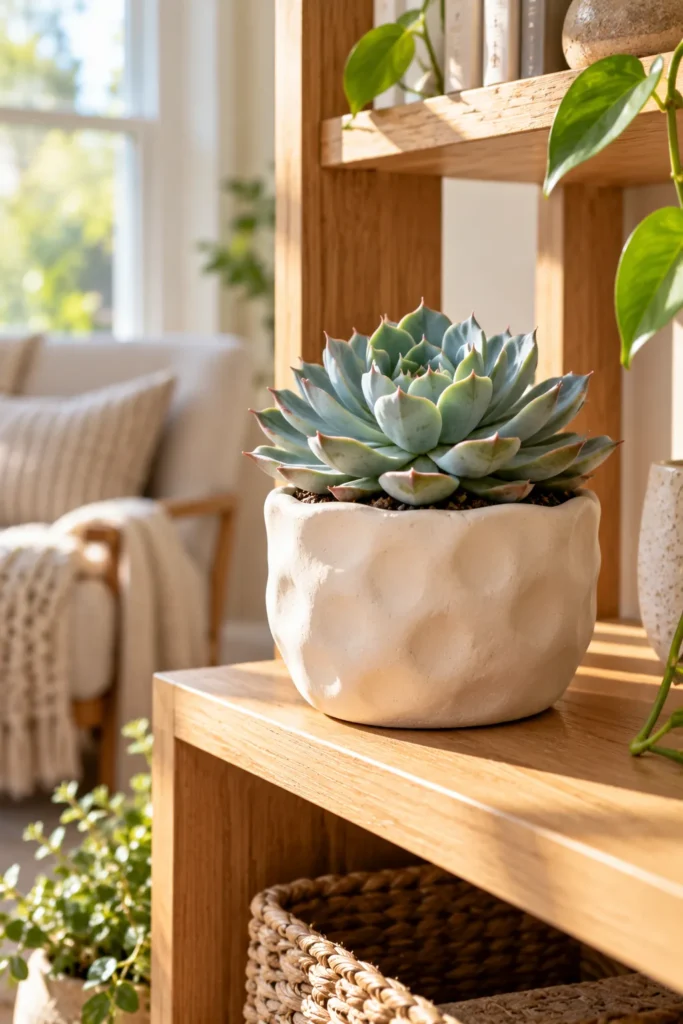
A pinch pot is the first clay pot almost everyone makes, and it still looks charming on a shelf. Roll a lump of air-dry clay into a smooth ball about the size of a lime. Press your thumb into the center, then pinch and turn, pinch and turn, until the walls feel even all the way around. A slightly wobbly rim is part of the appeal.
Before the clay dries, push a drinking straw straight through the base to make a drainage hole. Let the pot dry for a day or two, then brush acrylic sealer on the inside.
Planting note: Air-dry clay softens when it stays wet. Slip a small plastic nursery pot inside and plant the echeveria in that. The clay stays dry while the roots still drain, and the pair looks right at home on a sunny reading nook shelf.
2. Burlap and Lace Textured Slab Pots
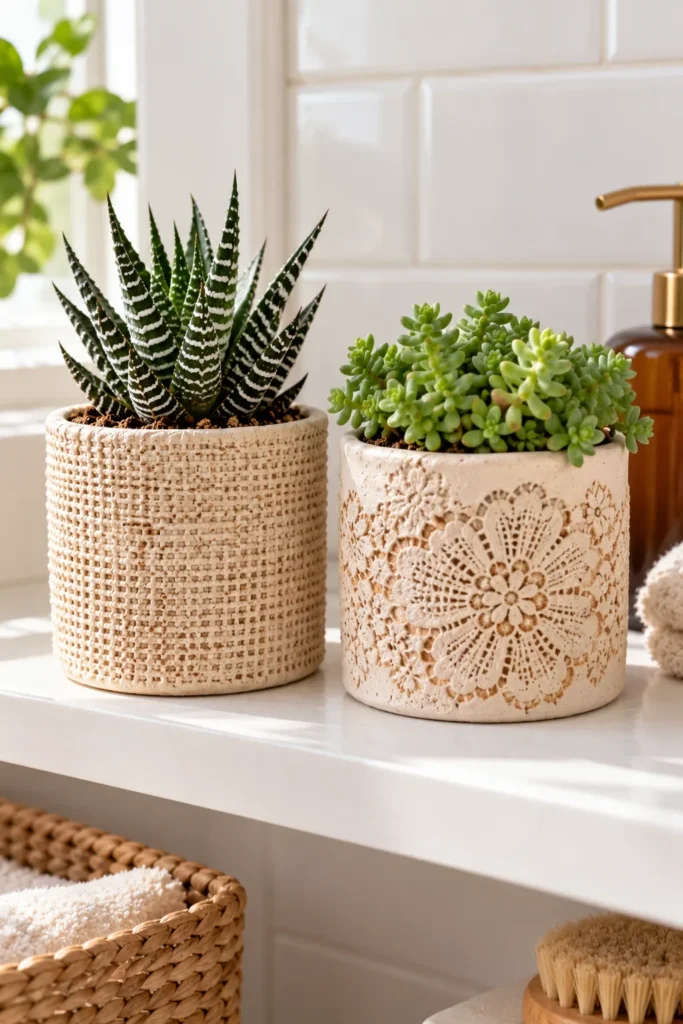
The charm of these pots lives on the surface. One carries a fine woven grid and the other a lacy flower pattern, and both come from fabric you probably already own.
Roll air-dry clay into an even slab, using two paint stirrers on either side of the rolling pin as thickness guides. Lay damp burlap or a cotton lace doily on top and roll over it once with light pressure. Peel the fabric away, cut a rectangle, and wrap it around a jar covered in parchment paper. Score and wet the seam, press on a round base, and poke a drainage hole.
Once the pots are dry, rub a little thinned brown acrylic into the texture and wipe the high spots clean so the pattern shows. A striped haworthia suits the burlap pot, because its ridged leaves repeat the texture. A soft green sedum fills the lace pot on a bright bathroom shelf.
3. Scalloped-Rim Pots Wrapped Around a Recycled Liner
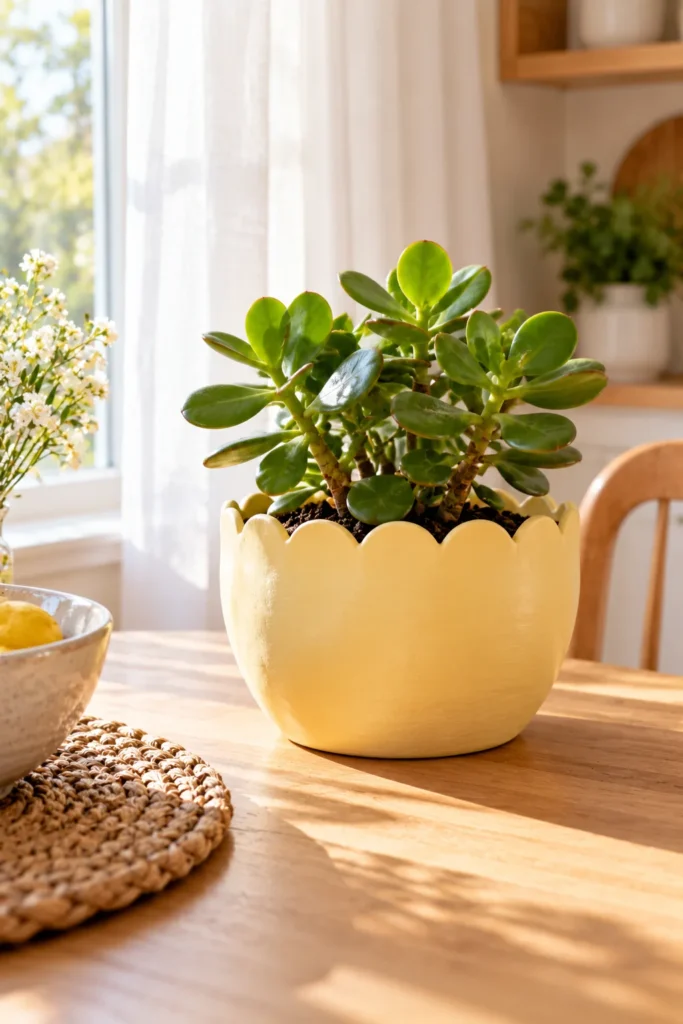
Air-dry clay and watering cans don’t get along. Let damp soil sit against bare clay and the walls slowly soften until the pot slumps. The fix is to build the pot around a waterproof liner from the start.
Cut the bottom off a plastic water bottle, a little shorter than the finished pot. Cut a small hole in the plastic base. Roll a long strip of clay that’s taller than the liner, then press a quarter along the top edge and cut around the marks for even scallops. Wrap the strip around the liner, smooth the seam with a damp finger, and attach a round base, poking its hole to line up with the plastic.
Paint the outside butter yellow and finish with clear polyurethane. On a breakfast nook table, a small jade plant’s round, glossy leaves echo the curves of the scallops.
4. Speckled Faux-Stoneware Minis
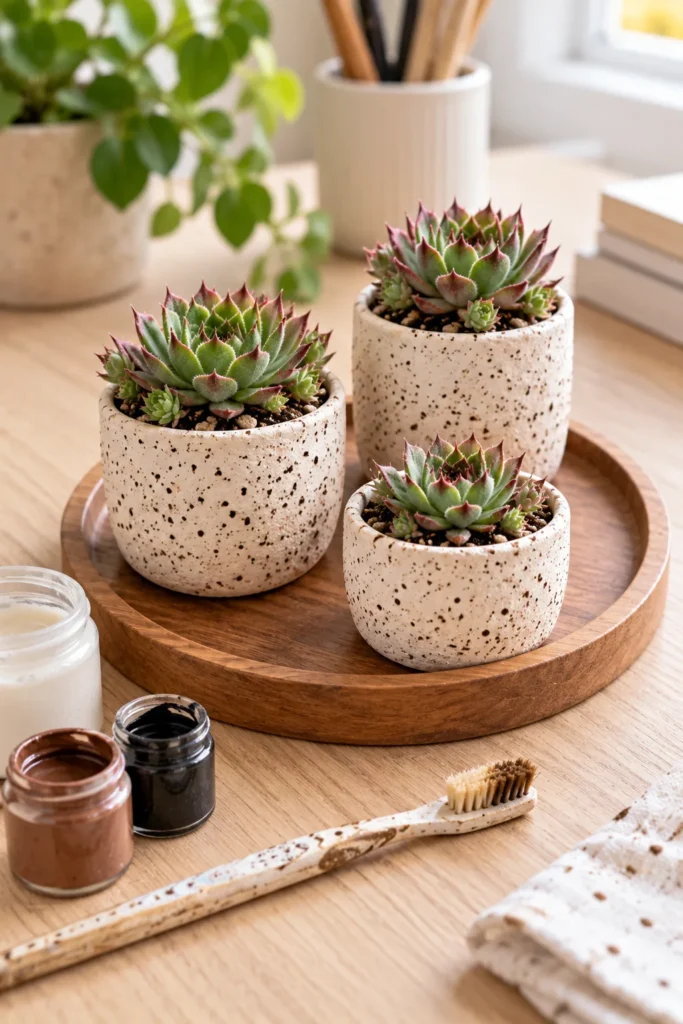
Plain white air-dry clay can look like a craft project. Add a scatter of tiny brown flecks and it suddenly looks like stoneware from a pottery studio. That’s the whole trick.
Make three small pinch or slab pots and let them dry completely. Thin brown and black acrylic with a few drops of water, dip an old toothbrush in it, and run your thumb across the bristles so fine specks land on the clay. Finish with a matte varnish so the surface keeps that unglazed, earthy look. The shared speckle ties the three together, so they read as a set on a wooden tray. Hens and chicks suit these minis because the rosettes fill the small openings neatly.
Get the look: white air-dry clay, an old toothbrush, brown and black acrylic paint, matte varnish, a round wooden tray, and hens and chicks.
5. Marbled Polymer Clay Pots Baked in the Oven
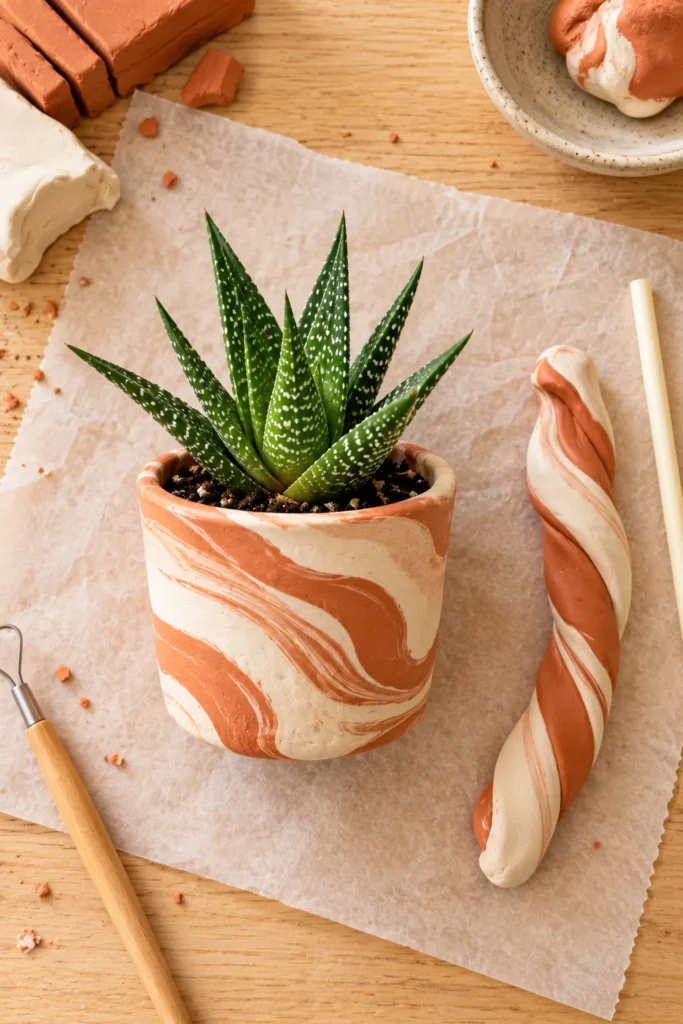
Polymer clay is the pick when you want a pot you can water like normal. Once it’s baked, it doesn’t soften, which is exactly why the drainage hole has to go in before it hits the oven.
Twist a log of terracotta-colored polymer clay with a log of cream. Fold and roll a few times until soft swirls appear, and stop before the colors blend into mud. Press it into a small cup shape, smooth the rim, and push a straw through the base. Bake on a baking sheet you use only for crafts, follow the temperature on the package, and open a window while it bakes. A small aloe with speckled leaves picks up the cream swirls.
| Question | Air-dry clay | Polymer clay |
|---|---|---|
| How it sets | Hardens in open air over a day or two | Bakes hard in a home oven |
| With water | Softens if it stays wet, so it needs a sealer and a liner | Waterproof once baked, so it needs a drainage hole |
| Best size | Small to large pots | Small pots and minis |
| Good for | Kids, textured pots, low-water plants | Color swirls, pots you water often |
6. Hanging Pinch Planters on Jute Cord
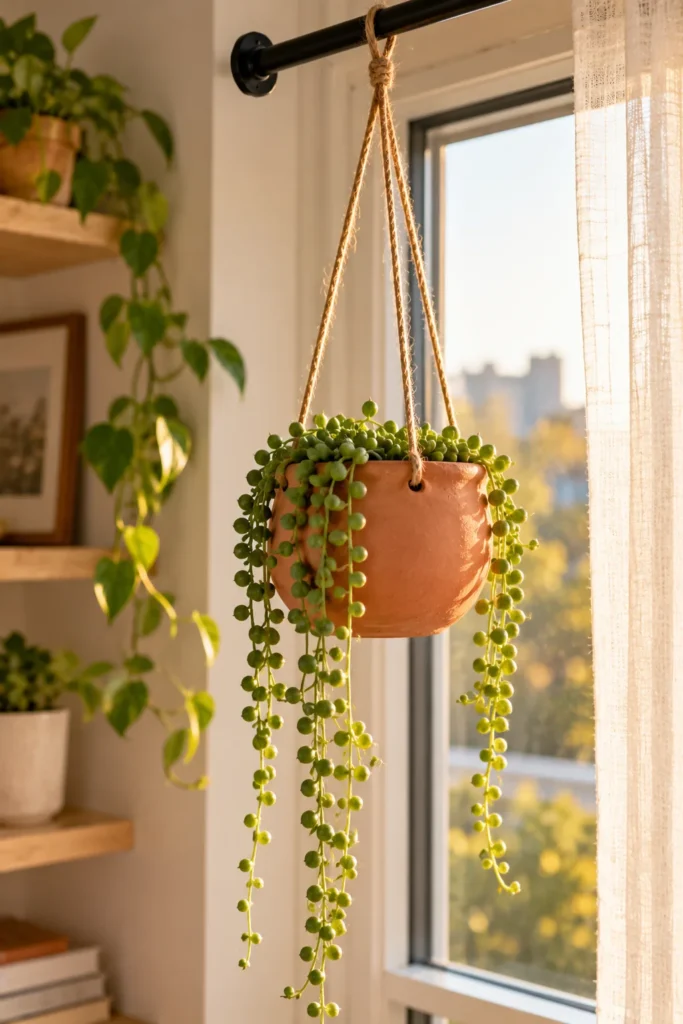
Out of shelf space? Hang your succulents in the window instead. These planters start as pinch pots. While the clay is still soft, poke three small holes evenly around the rim with a wooden skewer, plus a drainage hole in the bottom.
Once the pot is dry, paint the outside soft terracotta and seal it inside and out. Thread three lengths of jute cord through the holes and knot them together above the pot. Then hang it from a curtain rod in a small apartment window. String of pearls is the plant to choose here, because its beaded strands spill over the rim and swing below the pot.
Air-dry clay works if you seal it well, but polymer clay is the sturdier choice if you water often. Water at the sink and let the pot finish dripping before you hang it back up.
7. A Wide, Shallow Clay Dish Garden
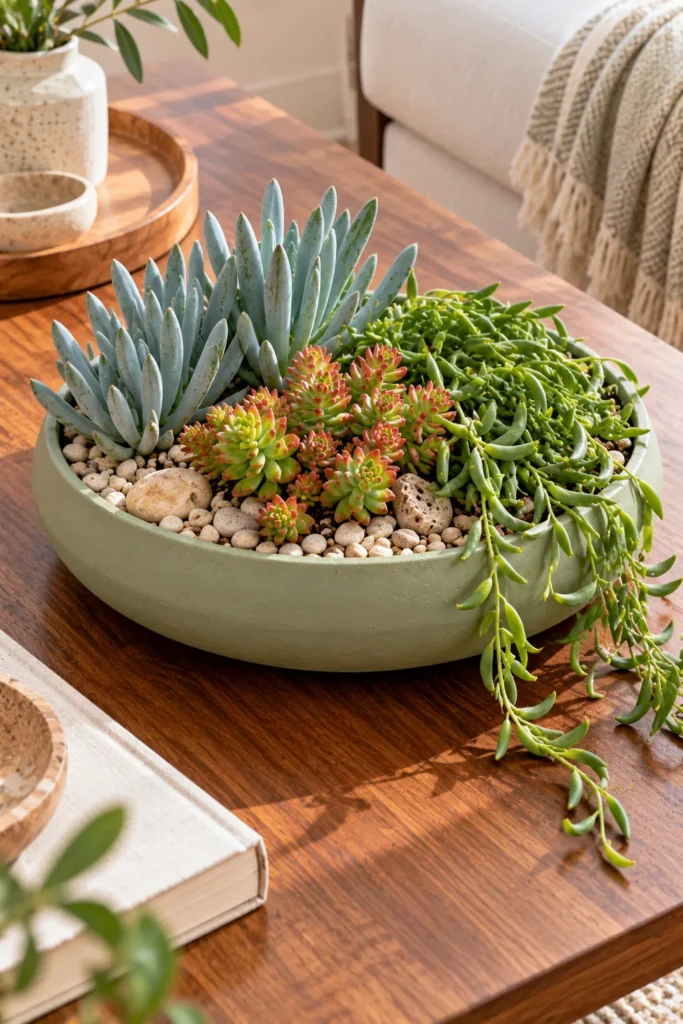
Succulents have shallow roots, so a pot that’s wider than it is tall suits them better than a deep one. This dish garden takes that idea and runs with it.
Press a slab of air-dry clay over the outside of an upside-down plastic plant saucer and trim the edge into a low, wide dish. Once it firms up, lift it off, flip it over, and set the plastic saucer back inside as a liner. Poke a drainage hole through both layers. Seal it, then paint the outside soft sage.
Plant it like a small landscape. Use blue chalk sticks for height, a red-tipped sedum in the middle, and string of bananas trailing over the edge, then finish with pale pebble top dressing. On a coffee table, it reads as a living centerpiece. These easy, low-mess succulent bowls offer more planting combinations for the same shape.
8. Little Bear and Bunny Animal Planters
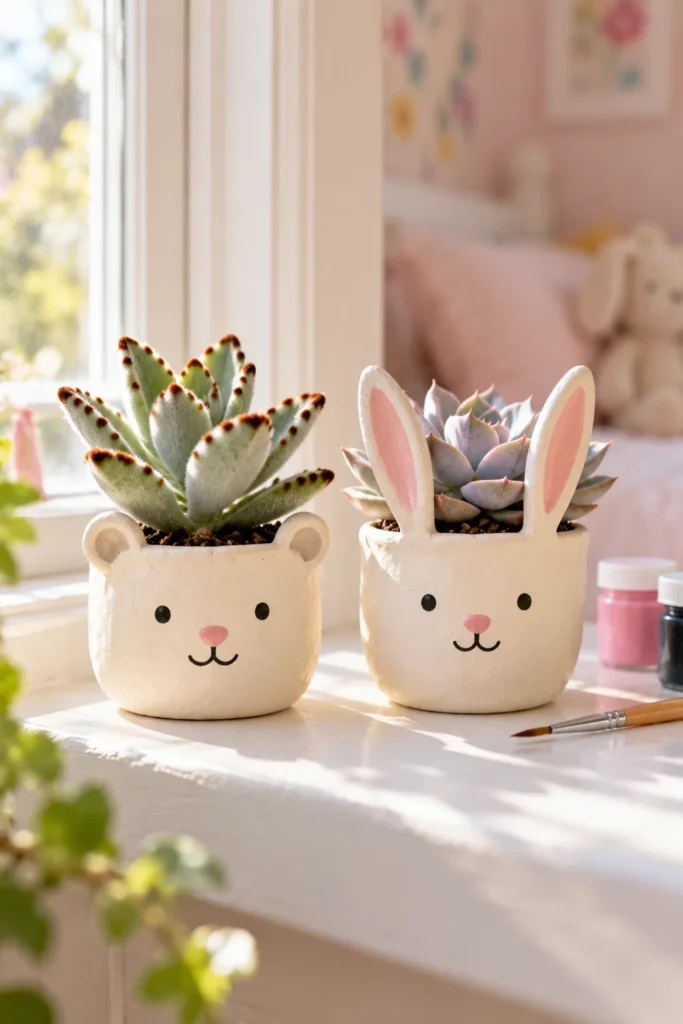
Two little round ears turn a pinch pot into a bear. Make a pinch pot, roll two pea-sized balls of clay, flatten them, and press them onto the rim with a dab of water. Give a second pot long, pointed ears for a bunny. Once dry, paint simple faces with a fine brush: dot eyes, a small nose, and a smile.
The plants finish the characters. A fuzzy panda plant reads as fur on the bear, and a silvery ghost plant gives the bunny a soft, pale look. Lined up on a kid’s bedroom windowsill, they look like a tiny family.
Kids love this one, but keep the small clay bits away from toddlers, who may put them in their mouths.
You will need: air-dry clay, a fine paintbrush, black and pink acrylic paint, a panda plant, and a ghost plant.
9. Coil-Built Ribbed Planters
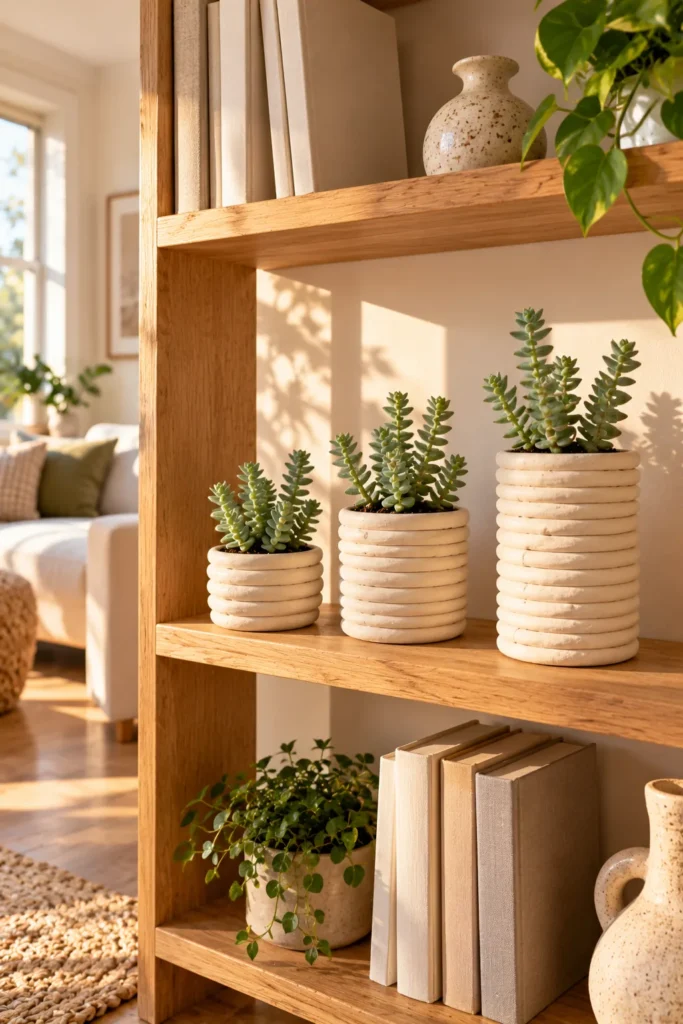
Look at the side of this planter and you can see how it was made: rope after rope of clay, stacked in rings. Those ridges are the design.
Roll ropes of air-dry clay about as thick as a pencil, keeping them even. Cut a round base, then coil the first rope around its edge. Score the top of each row and brush on slip, which is just clay stirred with water into a paste, before pressing on the next rope. Smooth the inside with a damp finger and leave the outside ridged. Poke a drainage hole, seal the pot, and tuck a plastic nursery pot inside.
Make three in different heights and line them up on an open living room shelf. String of buttons, with its stacked triangular leaves, repeats the layered coils.
10. Magnet Propagation Pots on a Kitchen Board
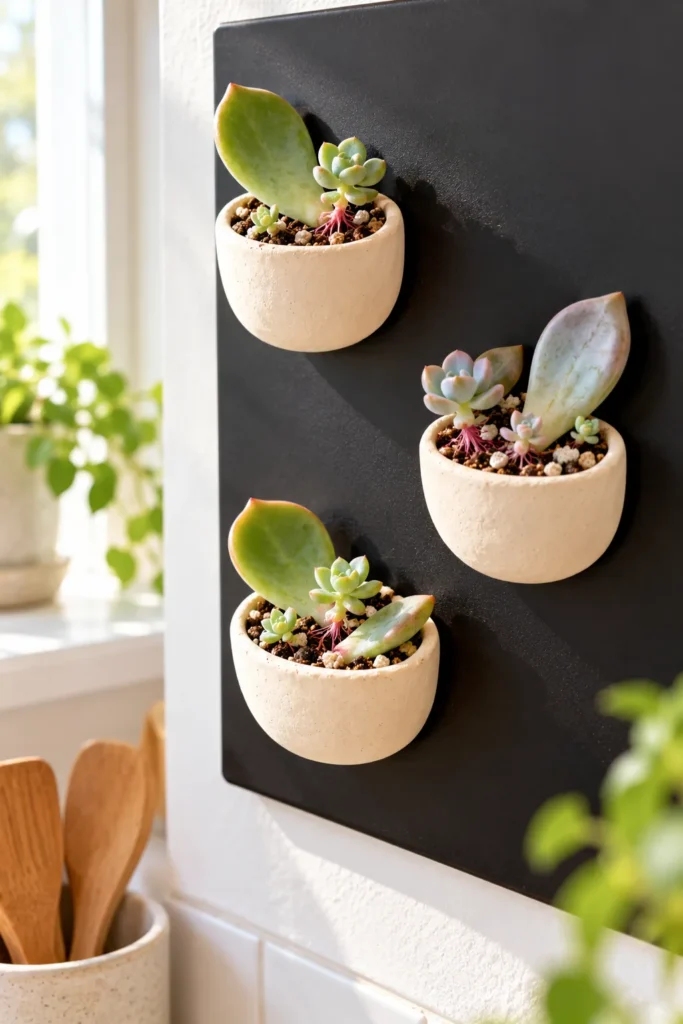
Leaf cuttings tend to end up in a messy row of jar lids on the windowsill. Give them tiny clay pots that stick to a magnetic board instead.
Make small pinch pots, then press one side flat against the table so each pot has a flat back. Poke a drainage hole with a straw and let them dry. Glue a strong magnet to each flat back, seal the inside, and lay a scrap of coffee filter over the hole so water drains while the soil stays put. Fill with cactus and succulent potting mix and rest the cuttings on top.
Hang the pots on a magnetic board by a bright kitchen window, since cuttings root best in bright, indirect light. These succulent propagation ideas for beginners pair well with the pots.
Small, strong magnets are dangerous if swallowed, so keep them out of reach of young kids.
11. Matching Clay Saucer Sets
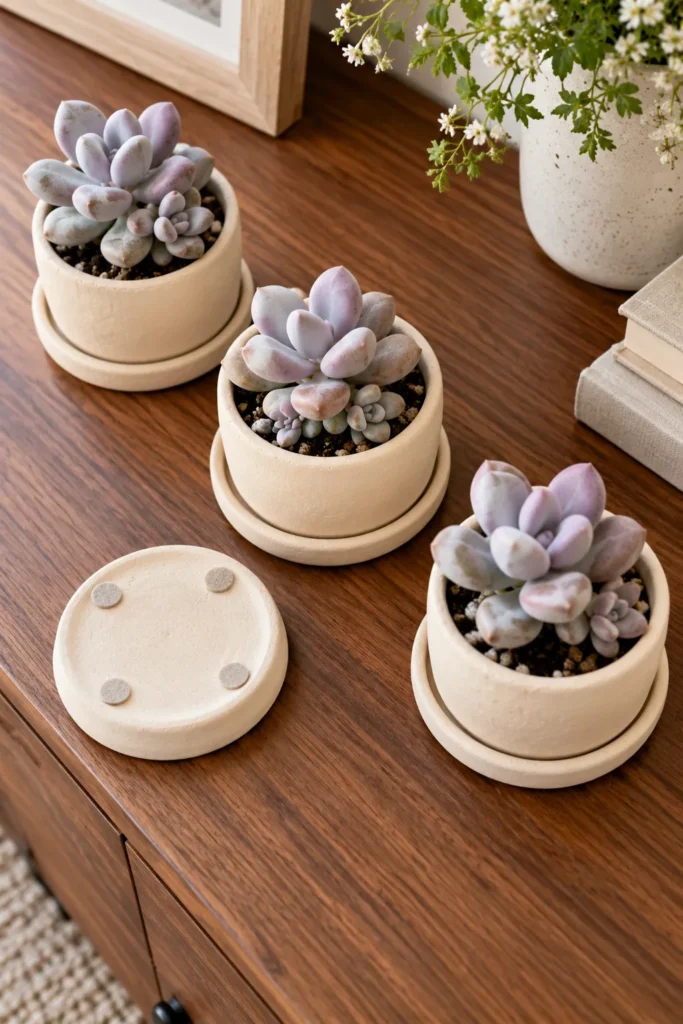
A homemade pot without a saucer is a water ring waiting to happen, so make the saucer while you have the clay out.
Roll a slab and cut a circle a little wider than the pot’s base. Press a thin rope of clay around the edge to form a low lip, and smooth the join. Make it from polymer clay if you can, because a saucer sits in water and baked polymer won’t soften. Keep the pot and saucer the same color so the pair reads as one piece.
Styling note: Stick small felt pads under each saucer before it goes on a wooden sideboard. Moonstones, with their plump, pearly leaves, look polished in a cream pot and saucer set.
12. Balloon-Molded Round Planter for a Covered Patio
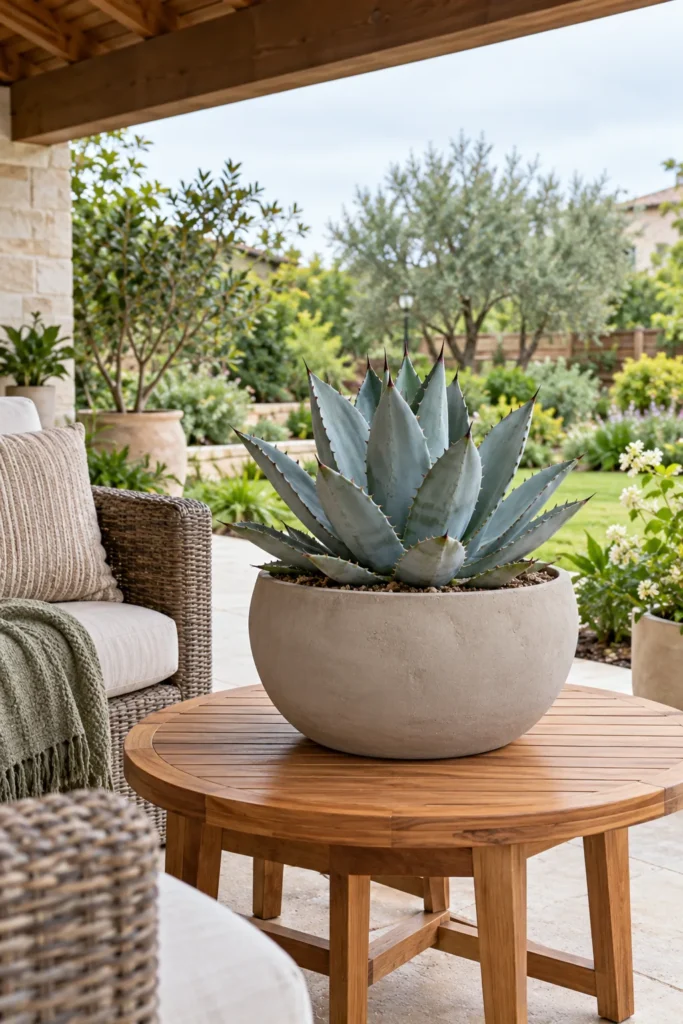
A balloon makes the roundest pot you’ll ever shape by hand. Blow one up, set it knot-down in a bowl, and drape a slab of air-dry clay over the top half. Smooth the folds with damp fingers, press the very top flat so the finished pot won’t roll, and poke a few drainage holes while the clay is soft. Once it’s dry, pop the balloon and lift the pot free. Throw the balloon scraps away right away, because they’re a choking hazard for young kids.
Paint the pot warm stone gray, seal it inside and out with an exterior clear sealer, and set a plastic nursery pot inside. A spiky blue agave suits the big round shape on a covered patio side table. For more outdoor options, browse these easy-care succulent container ideas.
⚠️ Watch Out
Even sealed, air-dry clay isn’t truly waterproof. Keep this pot under a roof and away from rain and sprinklers, and bring it indoors before freezing weather.
How to Make Clay Pots for Succulents That Last
Every pot on this list follows the same few rules. Skip one and the pot either rots the roots or crumbles on the windowsill.
The clay pot checklist
DIY Clay Succulent Pot FAQ
Is air-dry clay waterproof enough for succulents?
Not on its own. Air-dry clay softens and can crumble when damp soil sits against it. A sealer makes it water resistant, not waterproof, so pair the sealer with a liner like a plastic nursery pot or a cut bottle. Ideas 1, 3, and 7 show three ways to do it.
What is the best clay for plant pots without a kiln?
Polymer clay is best for small pots you water often, because it bakes waterproof in a home oven. Air-dry clay suits larger, textured, or kid-made pots, as long as you seal it and use a liner. The comparison table in idea 5 lays out the differences.
Do DIY clay pots need a drainage hole?
Yes. Succulents rot quickly when water pools around their roots. Poke the hole with a drinking straw or skewer while the clay is still soft, because drilling hardened clay can crack it. A scrap of coffee filter over the hole keeps the soil from washing out.
How long does air-dry clay take to dry?
Thin pieces usually firm up within a day, but thicker pots can take two days or more, depending on wall thickness and humidity. Turn the pot over partway through so the base dries too. Wait until it feels dry and evenly pale before you paint or seal it.
Can homemade clay pots go outside?
Only with care. Polymer clay handles outdoor use better, but air-dry clay should stay under a roof, sealed inside and out, with a liner, and away from rain and sprinklers. Bring every homemade pot indoors before freezing weather, as idea 12 explains.
Conclusion
Clay is forgiving, which makes it a good place to start. Begin with a pinch pot and get comfortable with drainage holes and sealer. Once your hands know the clay, try a coil planter or a balloon pot. Pair each one with a succulent that echoes its shape or color, and the whole thing looks planned. The most important habit is simple: keep water away from bare air-dry clay, or switch to polymer for pots you water often. These DIY clay succulent pots make easy handmade gifts too, and these succulent planter DIY ideas give you more weekend projects. Save this for your next rainy craft afternoon.