Somewhere in your kitchen cabinet is a teacup nobody has used since the last tea party. It has a chip, or a pattern that never matched the set, and it happens to be the right size for a plant. These teacup succulent planter ideas put that cup to work with a few small succulents, a scoop of gritty soil, and a bright windowsill.
Inside are 14 setups. One is a single echeveria rosette on a bone china saucer, and another is a full tea set centerpiece with a teapot, creamer, and sugar bowl. You will also find a drilled drainage hole and a no-drill method, a fairy garden, a hanging wall board, and a way to grow new plants from leaves.
Each idea names the cup, the plant, and the one move that makes it work, so you can copy it with things you already own or can find at a thrift store and a garden center. Save the ones that fit your space, then start with the cup that has been waiting longest.
Choosing Succulents and Soil for a Teacup Planter
Start with a cup that holds water without leaking and a plant that stays small. Hens and chicks, echeveria, zebra haworthia, and burro’s tail all handle shallow soil well. Fill the cup with a gritty cactus and succulent mix rather than regular potting soil, because a teacup holds little and drains slowly. Decide how extra water will escape before you plant, since a cup with no outlet is where trouble usually starts. Then pick the brightest window you have.
QUICK CUP CHECK
Where will your teacup live?
1. Vintage Bone China Teacup With One Echeveria Rosette
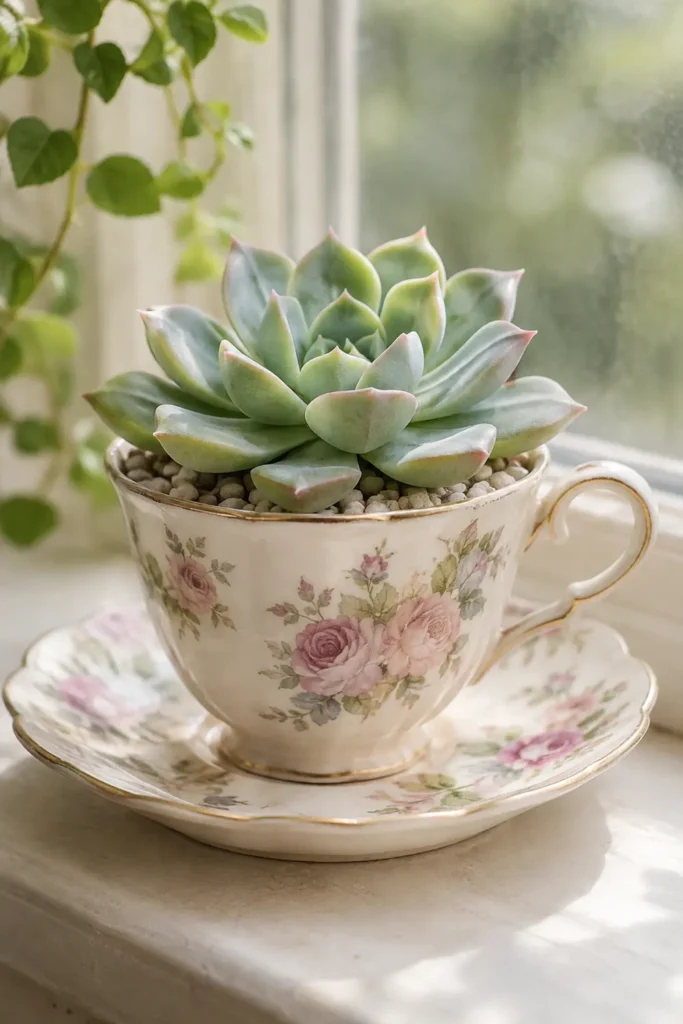
A single echeveria rosette in a thin-walled bone china teacup says more than a crowded cup ever could. The pale blue-green leaves sit above a cream cup with a faded rose pattern, and the saucer underneath frames the whole thing like a small portrait.
Fill the cup about halfway with gritty cactus and succulent soil. Set the rosette in so its lowest leaves just clear the rim, then spoon fine white pebbles around the base. The pebbles keep wet soil off the leaves, which is where rot usually starts. A bright kitchen windowsill gives the rosette the light it needs to hold its color.
Planting Tip: choose a rosette a little smaller than the cup mouth so it has room to grow for a season. No echeveria? A small hens and chicks does the same job and tolerates a cooler spot.
2. Mismatched Thrifted Teacups Lined Up on a Windowsill
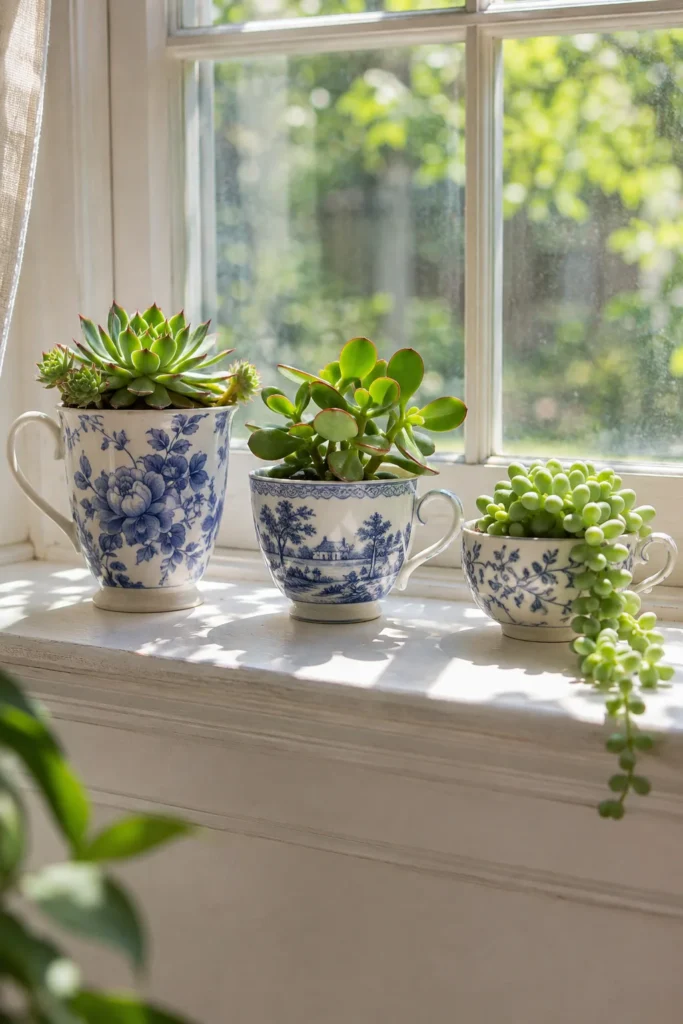
The thrift store shelf of orphan teacups is the cheapest planter aisle you will ever shop. Pick three or five cups, because odd numbers read as a deliberate group. Keep them in one color family, such as blue and white or soft pink florals, so the mismatch looks chosen.
Then give the row some rhythm with the plants. A hens and chicks rosette goes in the tallest cup, a trailing burro’s tail spills over the lip of the shortest, and a rounded jade plant cutting anchors the middle. The three shapes stop the line from looking like a parking lot of identical pots.
Care Tip: a bright window with a few hours of direct sun suits this lineup. Turn each cup a quarter turn every week or two so the plants do not lean toward the glass.
3. Full Tea Set Centerpiece With Teapot, Creamer, and Sugar Bowl
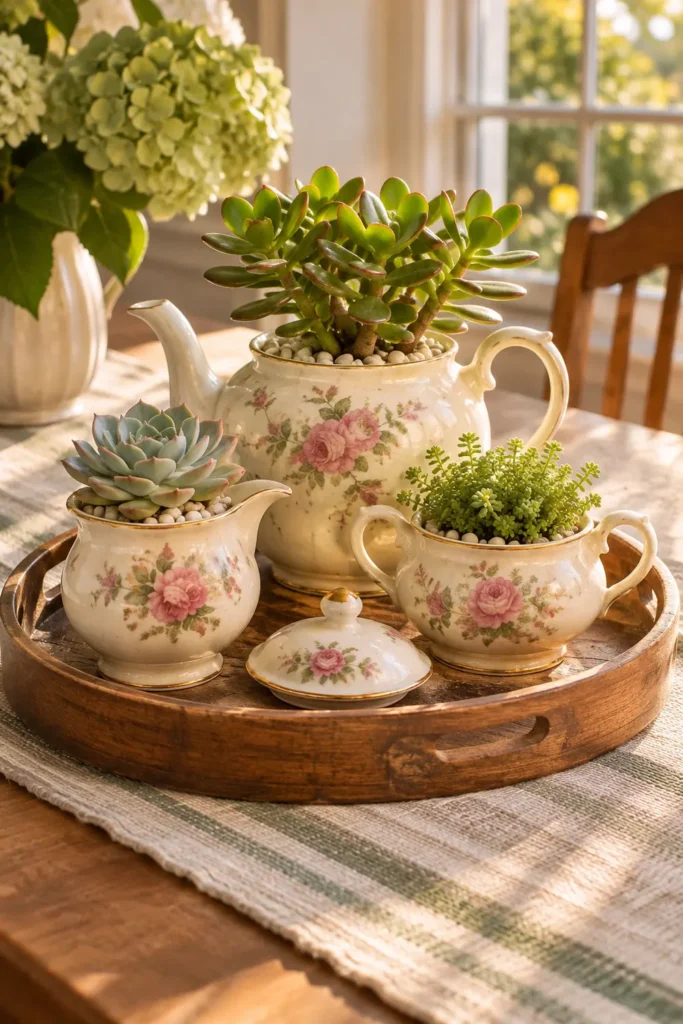
Put a lone vase of flowers on the table and dinner looks like a catalog photo. Plant a whole tea set and it looks like someone with a good eye lives here.
Set a cream teapot at the back as the tall piece, filled with a chunky jade plant. Put the creamer and sugar bowl in front with small echeveria rosettes and a tuft of sedum. Then park the trio on a wooden tea tray over a linen table runner. The tray keeps the pieces grouped, so the whole centerpiece lifts off in one move when the plates arrive. For more ideas along these lines, browse these succulent centerpiece ideas.
Display Tip: leave the teapot lid resting on the tray beside the set, since it adds one more shape without crowding the plants. Water the creamer and sugar bowl with a spoon, a little at a time, because neither has a hole. No full set? Three mismatched cups on a bread board do the same job.
4. Teacup Succulent Planter Ideas Start With a Drilled Drainage Hole
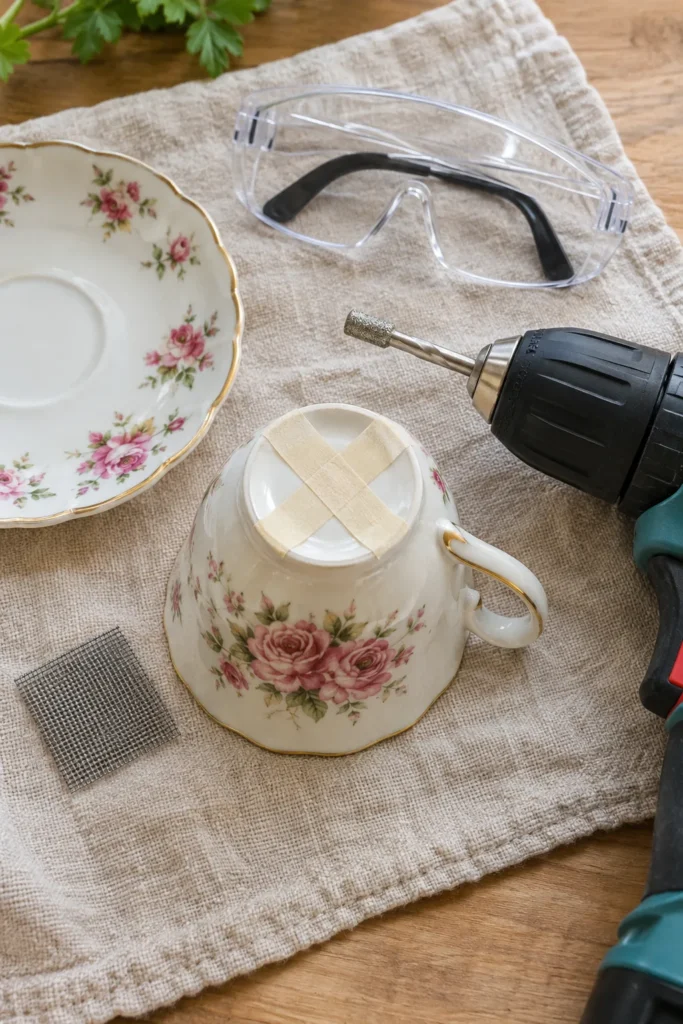
A hole in the bottom is the biggest upgrade you can give a teacup planter, because succulent roots rot when they sit in wet soil.
Press a square of masking tape over the center of the cup’s base so the bit does not skate. Drill slowly with a diamond-tip or ceramic bit, keeping the spot damp. Then lay a small square of window screen over the hole, which keeps the soil in and lets the water out. Set the cup on its own saucer and the saucer catches the runoff.
Garden Tip: tip the saucer out after every watering so the cup never stands in a puddle.
⚠️ Watch Out
Wear safety glasses and drill slowly. Ceramic can crack, and thin bone china is the riskiest, so practice on a spare or chipped cup before you drill a favorite.
5. Teacup Fairy Garden With Moss, Pebble Path, and a Tiny Bench
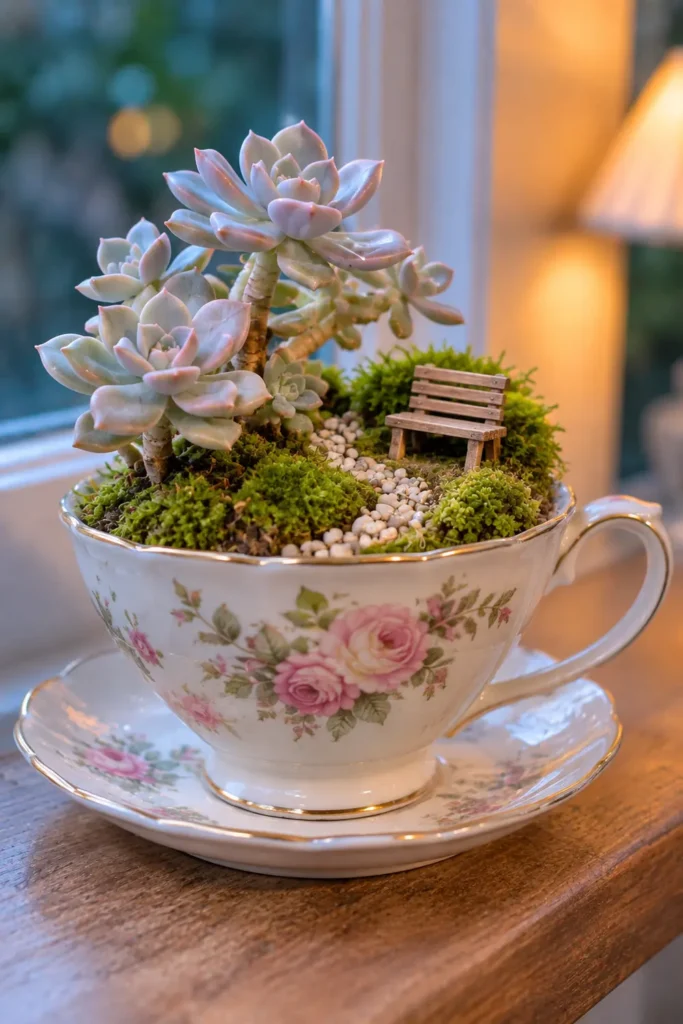
Tiny scenes work best when one plant plays the tree. In a white teacup, a ghost plant with its pale gray-pink rosettes becomes the shade tree, and a patch of green moss at its feet becomes the lawn. A pebble path winding to a miniature wooden bench makes the cup read as a whole scene from across the room.
Keep the props to two or three. That leaves the plants as the stars and stops the cup from looking like a toy shelf.
Care Tip: use dry sheet moss as a topper rather than living moss, since living moss wants far more water than a succulent does. Tiny props are a choking hazard for young children, so keep this one on a high shelf if toddlers are around. No bench? A flat stone and a few shells tell the same story.
6. Cup-and-Saucer Gift Glued Together and Ready to Hand Over
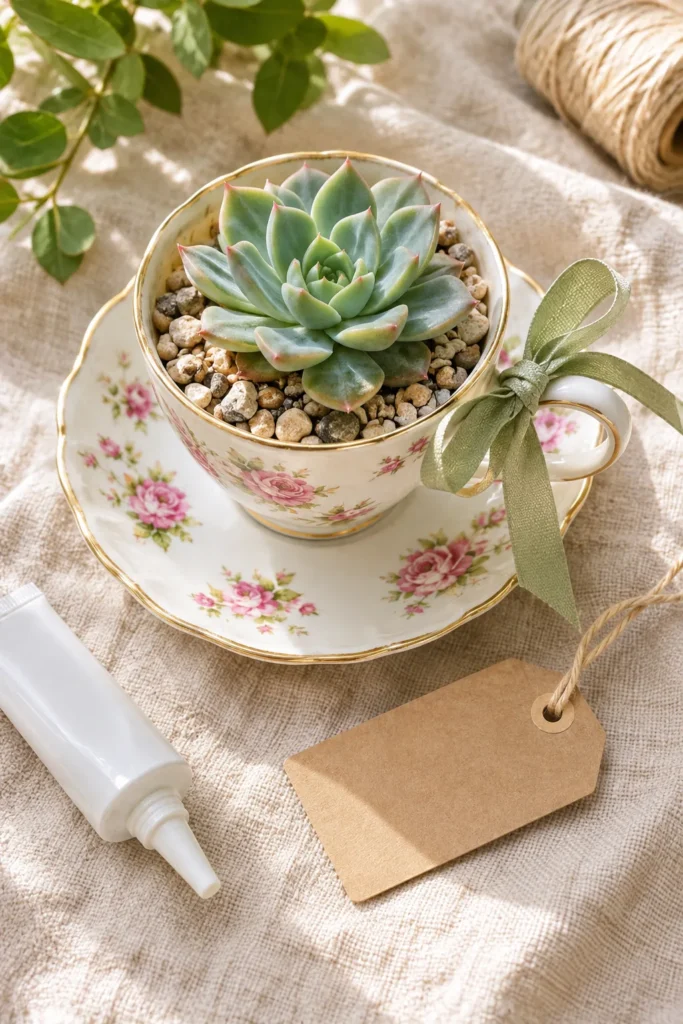
Anyone who has carried a teacup plant to a party knows the cup slides off the saucer on the first turn. A dab of strong ceramic adhesive between the two fixes that, so the gift arrives as one piece. Let the glue cure fully before any soil goes in.
Plant one small echeveria in gritty cactus mix, finish with a layer of pebbles, and tie a sage ribbon around the handle. Add a blank kraft tag so the giver can write the care note by hand. If you grow your own plants, gifting your own plant cuttings makes the present even more personal.
Get the look: a cup and saucer, strong ceramic adhesive, cactus soil, a small echeveria, a sage ribbon, a blank kraft tag.
Want the pair to come apart later? A small dab of removable putty holds them for the trip home without a permanent bond.
7. Matte Espresso Cups on a Japandi Shelf
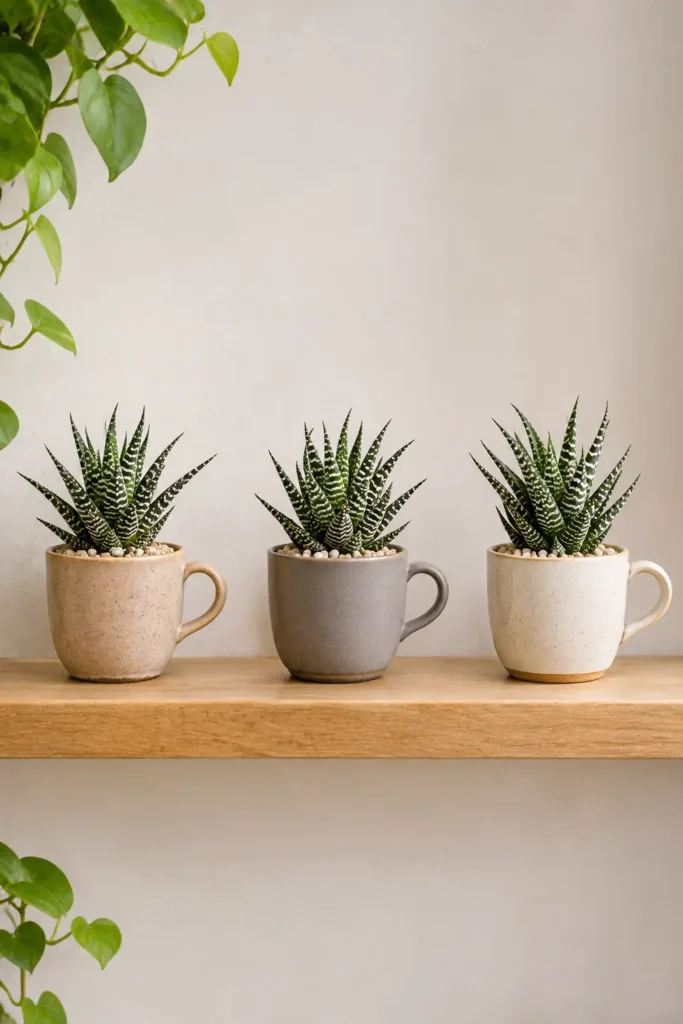
Not every teacup planter has to wear roses. Three matte stoneware espresso cups in oatmeal, soft gray, and cream look calm on a light oak shelf, which is the whole point of Japandi, a style that blends Japanese and Scandinavian restraint.
Put one zebra haworthia in each cup. Its dark green leaves carry pale stripes, so the plain cups let the plant supply the pattern. Leave a hand’s width of empty shelf between the cups so each plant has some air around it. Crowd them and the calm look turns into clutter.
Display Tip: matte glaze shows water rings, so water slowly and wipe any splash right away. Zebra haworthia usually tolerates less direct sun than many succulents, which suits a shelf set back from the window. Want more green? A small jade plant swaps in easily.
8. Nursery Pot Tucked Inside a Sealed Teacup
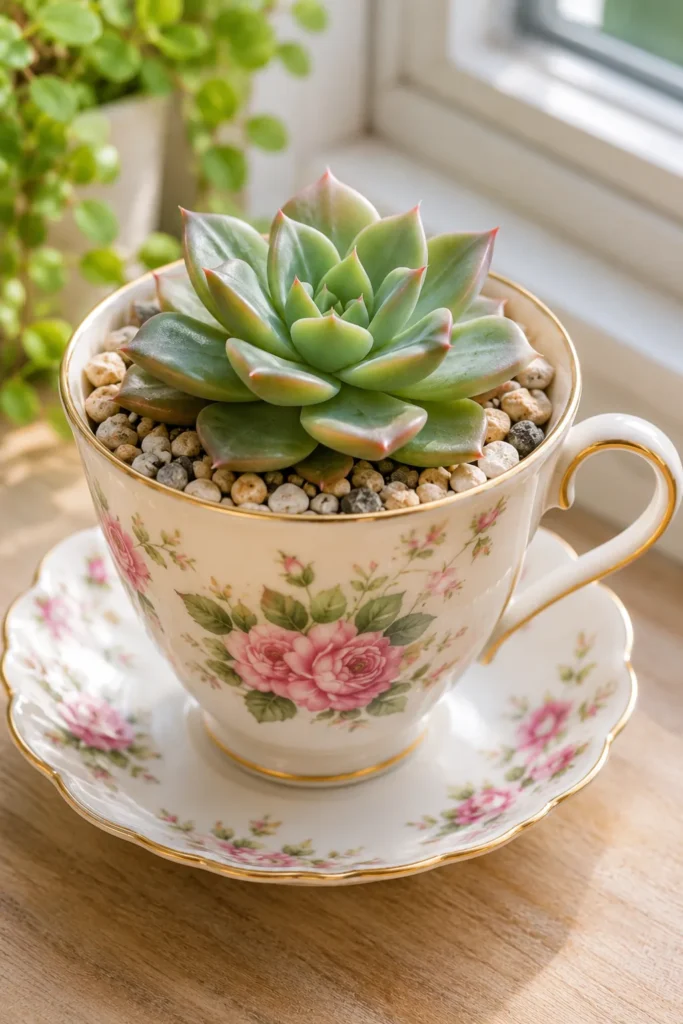
Some teacups are too precious to drill, and that is fine. Keep the succulent in its slightly smaller plastic nursery pot, which already has holes, and lower the whole pot into the cup. This is called double potting. The nursery pot handles the drainage and the teacup handles the looks.
Choose a pot that sits just below the rim, then spoon pebbles around its edge so the plastic disappears from view. When the soil dries out, lift the pot out, water it at the sink, let it drain completely, and slide it back in. Pebbles layered in a sealed cup help less than people expect, so the nursery pot does the real work.
No nursery pot on hand? A small foil cup poked with a few holes does the same job. Check the bottom of the teacup once a week, because a puddle there means the plant needs lifting out more often.
9. Hanging Teacup Planters on a Wooden Wall Board
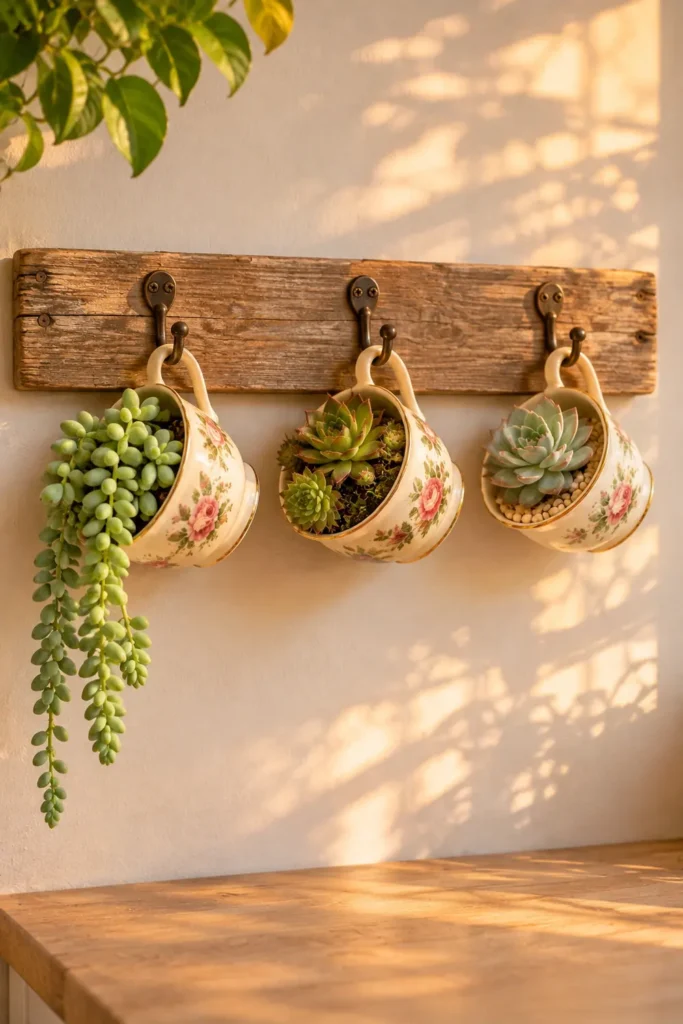
No counter space left? Go up the wall. Screw three small cup hooks into a weathered wooden board and hang a teacup from each handle. Fill them with light, trailing plants, such as burro’s tail in one cup and a hens and chicks rosette in the next. The board turns a bare kitchen wall into a garden strip that takes up no counter at all.
Plant each cup in a small nursery pot that lifts out, so you can water at the sink and nothing drips down the wall. Wet soil is heavy, and an old, thin handle can snap, so pick cups with sturdy handles and keep the plants small. Hang the board from a hook rated well above its planted weight. For bigger versions, see these succulent wall ideas.
Renting? Lean the board against the wall on a shelf instead of hanging it.
10. Tiered Cup-and-Saucer Tower With Trailing Succulents
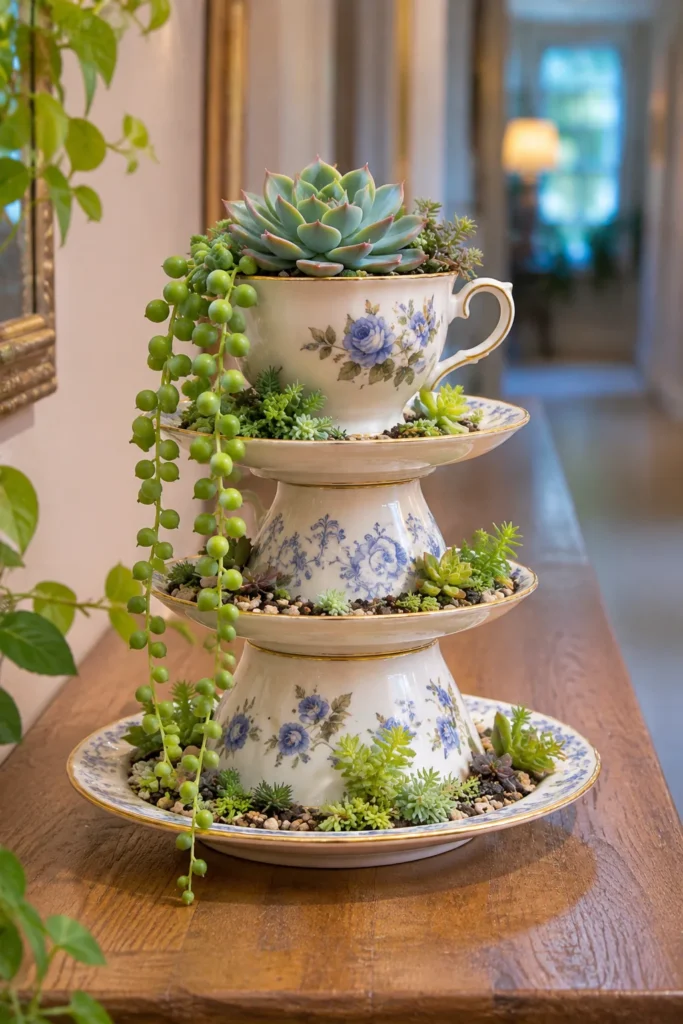
Height is the cheapest upgrade in a small room, and a stack of china gives you plenty of it. Glue a saucer onto an upside-down cup to make a pedestal, repeat with a smaller pair, and finish with a planted cup on top. Use the largest saucer at the bottom, because a wide base keeps the tower from tipping.
Plant the top cup with a small echeveria and fill the shallow saucers with a thin layer of gritty soil and tiny sedum. Let a string of pearls spill over the edge so the trailing stems link the tiers. Check a reliable pet safety list before you put that plant where a cat can reach it.
Display Tip: let the adhesive cure fully, then park the tower on a narrow hallway console where nobody will bump it. No spare saucers? Small side plates work just as well.
12. Succulent Cutting Cluster Packed Into a Teacup
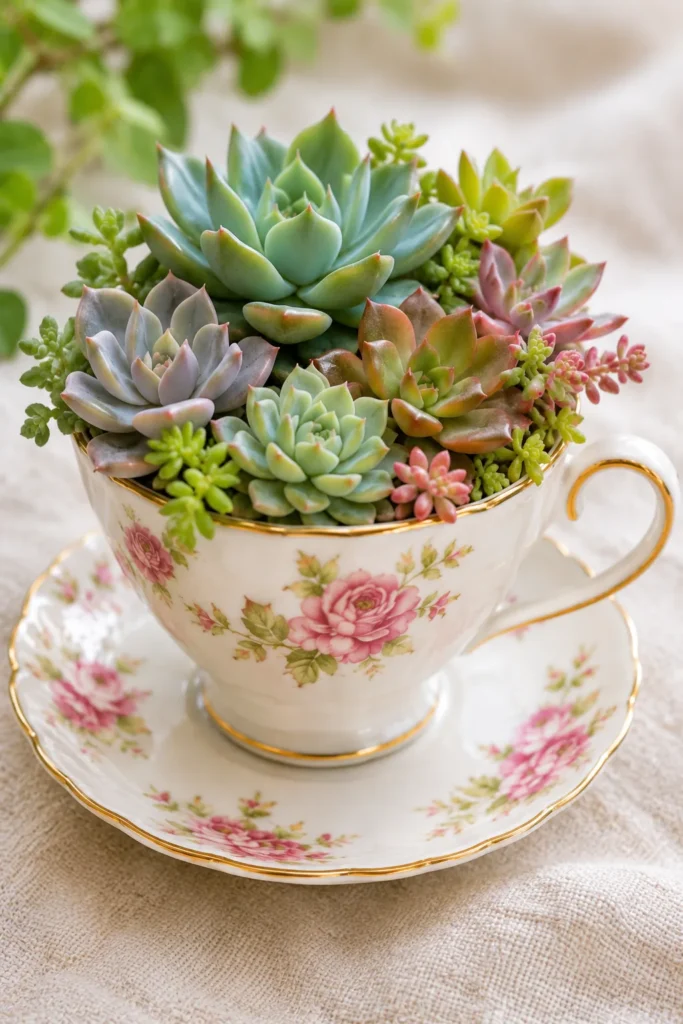
Cuttings are free if you already own a succulent. Press a ball of floral clay into the bottom of a teacup, then push the stems of small cuttings into it like a bouquet. Work from taller rosettes in the center to the tiniest sedum tips at the rim, and mix colors and textures so the cluster looks full. For more arrangements in this style, see these succulent bouquet ideas.
Grower’s Note: let cut ends dry for a few days before pushing them in, since a dry end is less likely to rot. As the cuttings grow, move them into the garden or a larger pot with soil, because a teacup holds very little for roots to use.
13. Leaf Pups in a Teacup Row, Then a Bigger Pot
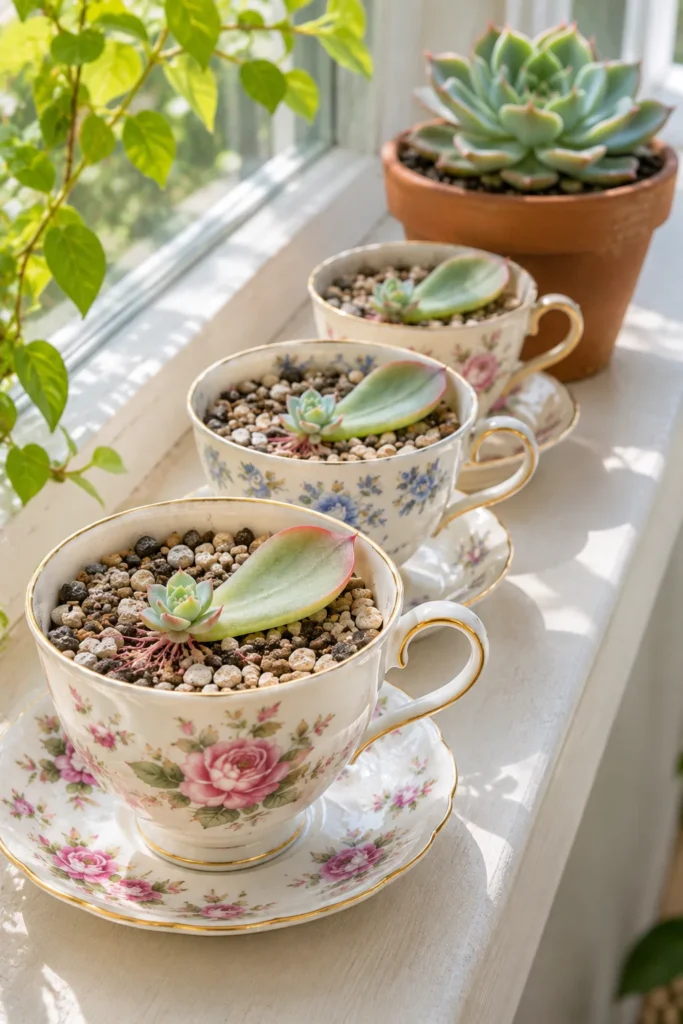
Every teacup planter eventually outgrows its cup. Plan for it by starting new plants in a row of shallow teacups on a bright windowsill. Fill each with gritty cactus mix, add a thin top layer of fine grit, and lay a healthy echeveria leaf flat on the surface without burying it. Within a few weeks, tiny pink roots and a miniature rosette should appear at the base of the leaf. If you want to try this at scale, these succulent propagation ideas are a good next read.
Care Tip: push a finger into the soil and water only when it feels dry past the first knuckle. When the new rosette fills its cup, move it to a pot one size up with fresh succulent soil, and start another leaf in the empty teacup. One plant becomes a whole windowsill.
How to Plant Succulents in Teacups Step by Step
Every idea above follows the same short recipe, so keep it handy before you plant any cup. Run through it in order, and your plant has a fair chance of lasting for a good while.
The easy formula
Teacup Succulent Planter FAQs
Which succulents fit in a teacup?
Small, slow-growing types fit best, such as hens and chicks, echeveria, zebra haworthia, burro’s tail, and young jade plant cuttings. Choose plants smaller than the cup mouth so they have room to grow for a season. Ideas 1 and 2 show how to match plant shape to cup.
How often should I water a succulent in a teacup?
Water only when the soil is dry past the first knuckle, then give a small amount. A teacup holds very little soil, so check often instead of following a fixed schedule. Cups without a hole need the lightest touch. Ideas 8 and 14 cover the lift-out method and a simple finger test.
Do succulents in teacups need drainage holes?
A drainage hole is the safest setup, because succulent roots rot when they sit in wet soil. If you cannot drill, set a nursery pot with holes inside the cup and lift it out to water. Ideas 4 and 8 show both methods. For the full rundown, see whether indoor plants need drainage holes.
What are the easiest teacup succulent planter ideas for beginners?
Start with a single rosette in a cup and saucer, or double pot a succulent inside a sealed cup. Neither needs much skill. Ideas 1, 2, and 8 are the easiest starting points, and idea 8 needs no drilling.
Conclusion
The best teacup succulent planter ideas start with a cup you already own and a plant small enough to fit it. Pick one setup, settle the drainage, and give it the brightest window in the house. Then add a second cup and a third, because odd numbers look best and the thrift store always has more. Cuttings from your first plant will fill the next one for free. Save this post to your Pinterest board for the next time a teacup turns up at the back of the cupboard.